Epoxy resin is an amazing material, which brings to life all our desires for DIY costume jewelry or decorative objects. It can be personalized with pigments, dried flower inclusions or small elements.
What is epoxy resin?
Epoxy resin is a self-curing liquid polymer made up of two components, which are mixed together to produce a hard, solid, glossy finish. Component A is a resin base, component B is a hardener. The hardener heats the resin so that it hardens. This is called catalysis.
Full catalysis of the resin takes about two weeks, but after 24 to 72 hours, it is already hard, smooth to the touch and ready to be demolded. During these 15 days, it's important to store your creations properly. Exposing them to sunlight, for example, can cause the material to yellow.
Epoxy resin is an easy material to work with, provided you follow certain protocols. To help you, here are 5 mistakes to avoid when starting out, and tips to apply for best results:
Mistake 1: Working without protection (00:01:32)
Catalysis is an exothermic phenomenon, a chemical reaction that generates heat and toxic fumes that are harmful to health. That's why it's imperative to wear a suitable, effectivemask, and to work in a well-ventilated room.
It's also essential to wear appropriate clothing, with long sleeves, and nitrile gloves (avoid latex gloves, which are ineffective against epoxy resin). Skin contact can cause itching and skin allergies. It's also advisable to tie back your hair, and to wear a pair of splash-proof goggles to avoid the risk of splashes, as the resin can be irritating to the eyes.
To avoid polluting the air, store resins in an airtight plastic box. Put your creations under a cloche to protect them from dust and isolate toxic fumes.
If you have children, keep them away. They can be sensitive to chemical fumes, so it's important to take appropriate precautions. Similarly, if you're pregnant, it's not advisable to work with resin to avoid potential risks to you and your baby.
If you have pets, isolate them while you make your DIY creation. And what's more, this will avoid the presence of hair in the resin.
Of course, don't drink, eat or smoke to avoid inhaling toxic fumes.

Mistake No. 2: Neglecting your work environment, work surface and tools (00:03:04)
1- Temperature, humidity and storage can influence resin:
- Temperature
The speed of catalysis depends on room temperature. The warmer it is, the faster the catalysis; the colder it is, the slower the catalysis. The ideal temperature for working with epoxy resin is between 20 and 25°C. - Humidity
Resin hates water. Humidity also affects resin clarity and transparency. If the room you're working in is too humid, opaque areas may appear on your creations. - Storage
Temperature is another important factor in keeping resin in optimum condition. We recommend keeping it in a room between 15 and 30°C, away from heat, light and humidity. Resin should be used within 6 months to 1 year of opening.
2 - Climatic conditions must also be taken into account:
- If the weather is damp, a white veil may form on the surface of your creations.
- Working outdoors in direct sunlight is not ideal either. The sun's rays can prematurely yellow the resin. What's more, dust, pollen and insects are likely to find their way into your creations.
3 - The work surface must be well prepared:
- Protect the work surface with a silicone mat, cling film or greaseproof paper. Not only will the resin not adhere to these materials, but cleaning will be much easier.
- The work surface must be clean, dry and straight.
4 - Tools must not be neglected:
- Molds must be clean and dry. Catch any dust, dirt or hair in your molds with tape or clay. If they're too dirty, clean them with a soap solution. As a last resort, you can use acetone, but this type of cleaning can damage the molds over time and take away their shine.
Store molds flat in a dust-free box to prevent them from warping. They will lose their shine with repeated use. - The resin must be stored correctly: clean the necks before closing the bottles with the correct stopper. If you have mixed up the caps of the components, your resin is lost.
- Siliconejars are preferable, as they are more practical and easier to clean. However, you can reuse plastic pots once you've removed the cured resin.
Tools can be cleaned with acetone.
5 - Last but not least, waste materials should not be disposed of just anywhere:they should not be thrown away with the household garbage. It should be taken to a specialized collection center for hazardous waste.
Mistake n°3: Choosing the wrong resin for the right project (00:06:43)
If you want to make decorative objects or jewelry out of epoxy resin, a river table or glaze a photo, you won't need the same resin. There are different types of epoxy resin:
- Casting resin, or molding resin, for casts from 4 mm to 10 cm. It's transparent, low-viscosity and flows easily to capture the finest details. Nevertheless, it takes longer to work and harden. It is suitable for making jewelry, creating figurines and casting decorative objects.
- Glazing or topping resin for surface finishes. It is more viscous and ideal for covering flat surfaces. It is used in thin layers and can imitate a layer of glass up to 4 mm thick. It has a gel-like consistency that prevents spillage. It can be used to create attractive curves. Once catalyzed, it is hard and glossy. Adheres to all substrates like polymer clay.
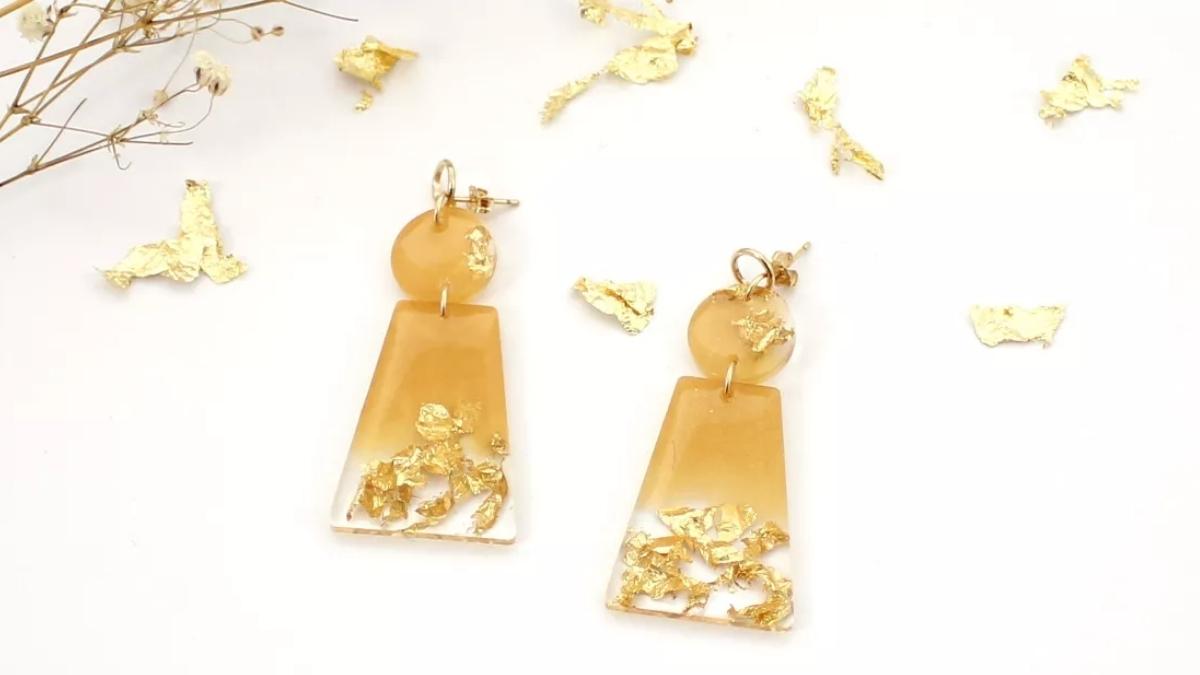
It's ideal for creating paper or fabric jewelry, or polymer clay creations like these dangling earrings.
Cleopatra's Crystal'Diamond inclusion resin is versatile. It can be used for surface finishes as well as for casting in molds with or without inclusions. Its texture is highly liquid and self-flowing. Transparent as water, it has a brilliant effect like crystal. It's perfect for creating jewelry with molds or trays.
Cleopatra Flex epoxy resin imitates a flexible glass layer up to 2 mm thick. Once catalyzed, the resin is glossy and remains flexible. It's ideal for protecting canvases, restoring gloss and color to paintings, creating jewelry from paper or covering album covers.
As they have very distinct properties, they should never be mixed together.

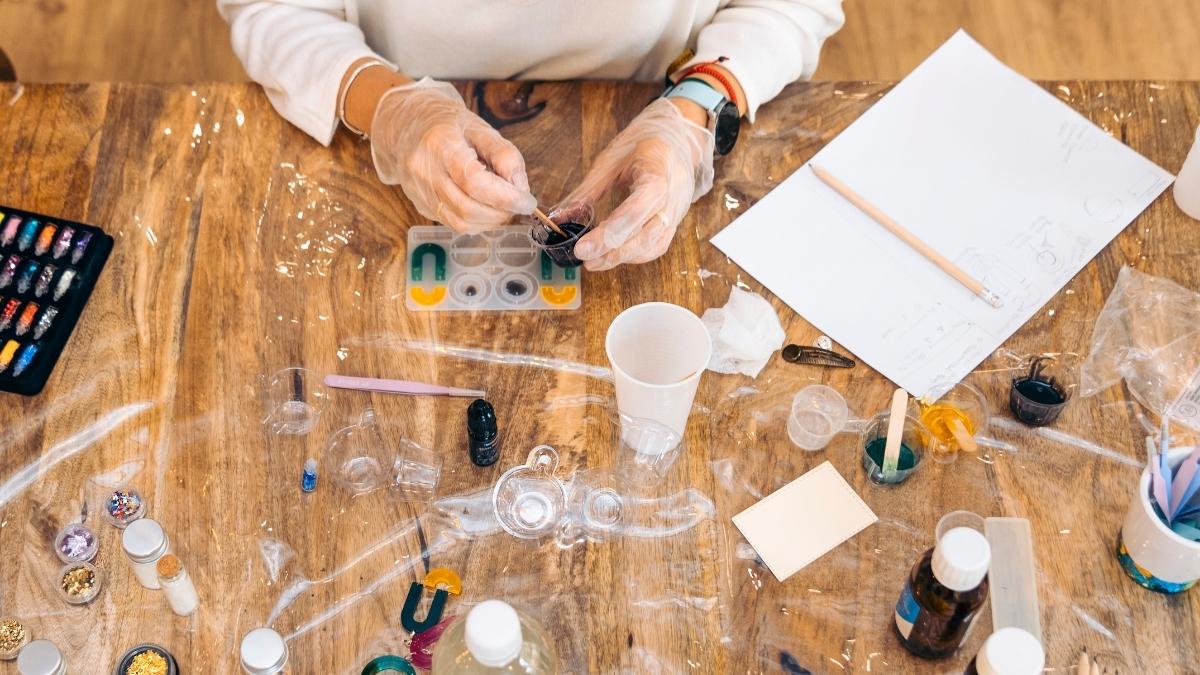
Mistake 4: Sloppy mixing and resin preparation (00:09:10)
This is the most common mistake made by beginners. The mixing ratio indicated by the manufacturer must be scrupulously respected. We repeat: under no circumstances should it be approximated. If the proportions are not exact, the polymerization process will not take place correctly. With too much resin or too much catalyst, your creation will never harden. The resin may become sticky, soft, opaque or crack.
For a homogeneous, transparent mixture, mix gently, remembering to scrape the bottom and edges of the pot. If you don't mix well, soft or sticky areas will remain.
The choice of colorants: always add pigments suited to epoxy resin. Since resin does not like water, water-based colorants should be avoided.
What's more, too much colorant will prevent the resin from hardening.
To avoid cracking and crazing in the resin, it's important not to pour too thickly. It's best to proceed in successive layers.
And to avoid wastage, prepare only the quantity you need. There are useful tools available, such as simulators which calculate the quantity of resin to prepare based on the dimensions of the surface to be resinated or the molds.

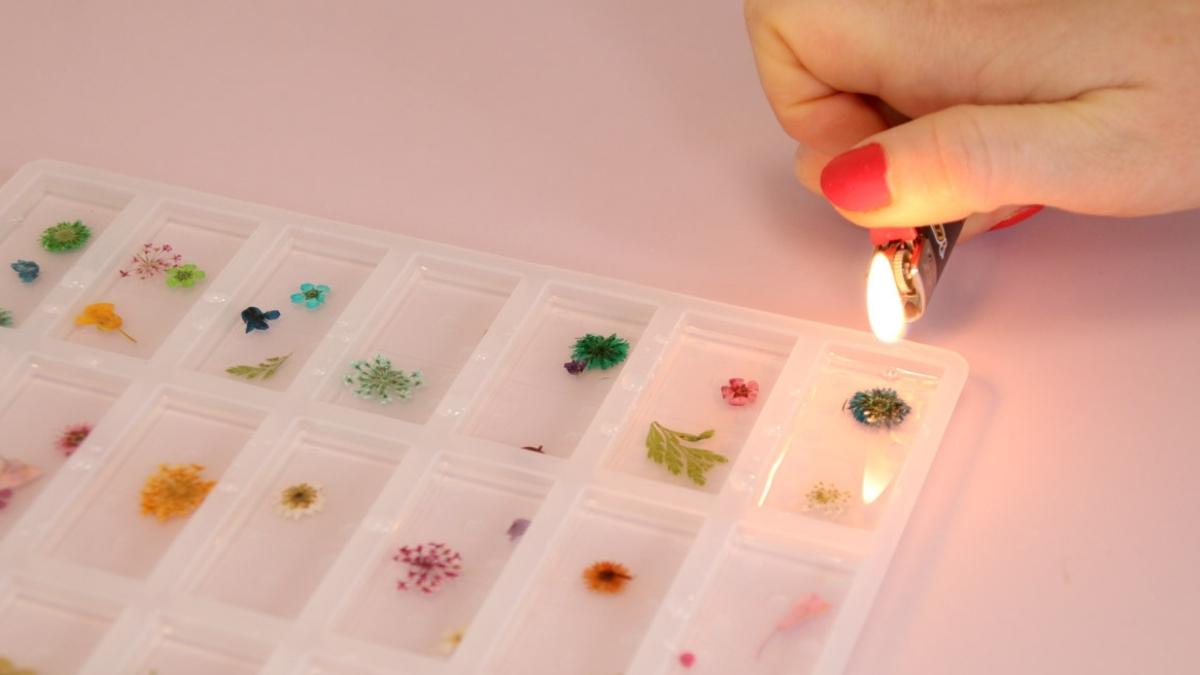
Mistake n°5: Not using the right techniques to eliminate bubbles (00:10:52)
Mixing is the stage during which the most air bubbles are created. Here are a few tips for eliminating air bubbles in your DIY creations:
1 - Stir slowly and patiently with a flat spatula (a round stick won't work). Stirring too vigorously will cause bubbles to form.
2 - Once mixed, leave the resin to rest for a few minutes, until it debubbles on its own.
3 - The more viscous the resin, the more bubbles will form. If this is the case, soak your beaker in a bain-marie for a few minutes. The heat will make the resin more liquid and release air bubbles more easily. Beware: this technique accelerates the exothermic phenomenon and causes the resin to catalyze more quickly.
4 - Pour the resin slowly and gently. If you pour the resin too quickly, you're bound to incorporate bubbles.
5 - Use gentle heat with a hairdryer (be careful not to let it blow too hot), heat gun or lighter. The heat of a blowtorch is too aggressive for silicone molds. It risks accelerating the exothermic phenomenon and melting the molds. Demolding will be very difficult and impossible without damaging the molds.
6 - Use a vacuum pump to eliminate trapped air.
7 - If you're making inclusion resin, coat your small elements or dried flowers with resin before including them in the mixture.
8 - If you're using porous materials, such as wood, don't pour the resin directly onto them. Apply a layer of resin with a brush, as if it were a varnish. Once hardened, the resin can be poured on.
Bonus tip: Wait before sanding your resin (00:13:03)
Always wait for your creation to harden before sanding the resin. A minimum of 48 hours of catalysis is required.
Some creative ideas in resin
Now that you know all about epoxy resin, it's time to get creative! Here are four ideas for epoxy resin jewelry you can reproduce at home. And for more inspiration, visit our "Tutorials" section to discover many free DIY resin jewelry tutorials: