Average Grades
bonsoir ! je me lance dans la réalisation de boucles d'oreilles en pâte polymère quelle résine utiliser pour donner une brillance finale ?
1 Answer
Show answers

Epoxy resin is ideal for designers wishing to create a wide variety of jewels, from transparent pendants to colorful pieces with effects or inclusions. To succeed, follow the correct dosages, mix carefully and choose projects suited to your skill level. Start with basic materials and follow good safety practices to guarantee quality work.
Epoxy resin appeals to DIY beginners and experienced designers alike. Why? Because it can be used to make a wide variety of jewelry: transparent pendants, colored pieces, marbled effects, inclusions... but the first casts can be intimidating. Proportions, air bubbles, setting time, finishing: you quickly get the impression that there are "too many rules".
Here's a rundown of the basics you need to know to get started with epoxy resin.
Epoxy resin is a two-part system (resin + hardener) that polymerizes after mixing. Success depends above all on 4 points:
To understand when to choose epoxy or UV resin, read our dedicated article!
To get you started with epoxy resin jewelry, here's what you'll need to get started:
To help you choose the right molds (shape, depth, flexibility), please refer to our technical data sheet.
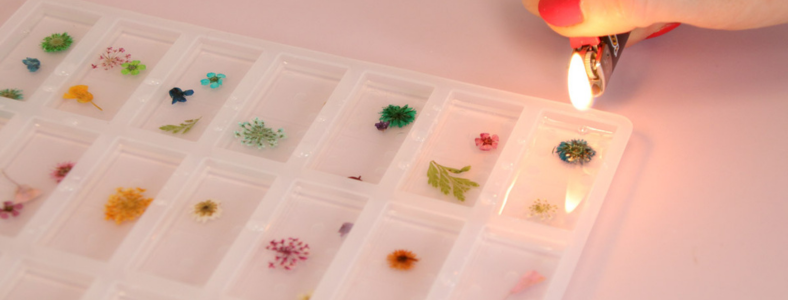
Even for a small pendant, epoxy must be handled with care:
Step 1: Prepare mold and area
Clean the mold if necessary, and lay it flat. Prepare everything before mixing: once you've started mixing resin, you'll have no time to waste.
Step 2: Measure precisely
Follow the ratio indicated by the manufacturer (weight or volume). Accuracy is the No. 1 cause of sticky parts.
Step 3: Mix methodically
Mix slowly but thoroughly, scraping down the sides and bottom. Aim for homogeneity, without incorporating too much air.
Step 4: Let stand (a useful option)
Depending on the resin and your gesture, a short pause may help some bubbles to rise before pouring.
Step 5: Pour, controlling bubbles
Pour gently into the mold. For air bubbles: it's better to prevent (slow mixing, gentle pouring) rather than "over-correct".
Step 6: Protect during setting
Cover against dust. Avoid moving the mold.
Step 7: Demolding and finishing
Unmold when the piece is fully set (according to the time indicated).
For a beautiful finish, you can then sand your pieces.
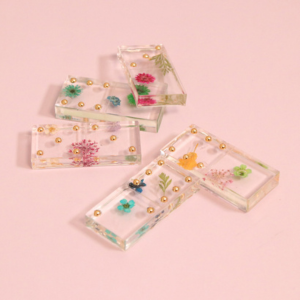
When your first "transparent" pieces come out clean, you can gradually enrich them:
Progress Tip: change one parameter at a time (new color OR new inclusion OR new shape). This is the easiest way to understand what has had an impact on the result.


Often, if epoxy resin is sticky or soft, this is due to a dosing problem or insufficient mixing.
Bubbles in the resin are generally caused by mixing too vigorously or pouring too quickly.


Credits
Perles & Co, Internet & E-Commerce company [28/01/2026] Any reproduction, representation, adaptation, in any form whatsoever, even partial, is prohibited, except for reproduction for private use not intended for collective use, representation in the family circle (art. L 122-5 CPI) and online publishing on condition that the source is mentioned and a link is included to the corresponding page of our site www.perlesandco.com.

