Average Grades
Free shipping on orders over 50€ up to 500g
French Online shop for beads and accessories for the creation of DIY jewellery and other creative hobbiesLog-in
0
Shopping cart
Shopping cart

When it comes to bead weaving, a few initial mistakes are enough to discourage you: wrong choice of beads, unsuitable thread, irregular tension or an overly complex project. For a good start, choose Miyuki Delica 11/0 beads and Fireline thread, and begin with a simple bracelet. Following a step-by-step tutorial and preparing your finish before you start makes all the difference.
Have you just discovered bead weaving and can’t wait to make your first peyote-stitch bracelet or your first brick-stitch brooch? That’s a great start! But before you dive in headfirst, there are a few common mistakes that can quickly ruin the experience. The good news: they’re all avoidable. We’ll walk you through everything.
This is the number one mistake. When it comes to beading, not all beads are created equal. Irregular or poorly sized beads result in an uneven finish, with gaps in the weave or rows that go askew.
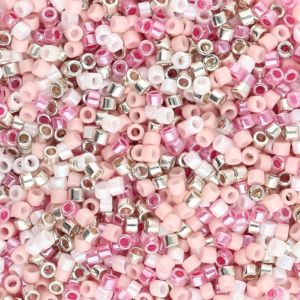
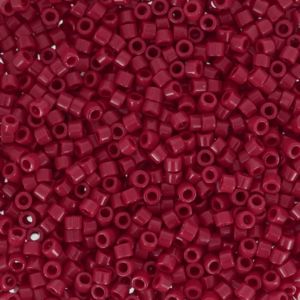
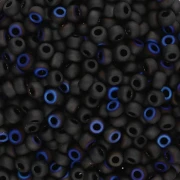
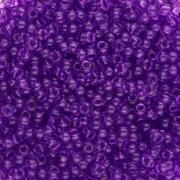
To get started, go with Miyuki Delica 11/0 beads. Their cylindrical shape, large hole, and standardized height are designed for needle weaving (peyote, brick stitch) and loom weaving. The result is flat, smooth, and even—exactly what you need to learn.
👉 Check out all our tutorials featuring Miyuki beads for weaving.

The thread is the backbone of your creation. A thread that’s too thick won’t pass through a 11/0 Delica bead twice. A thread that’s too thin will break along the way.
Initial enthusiasm is valuable, but it can work against you. A 3-cm-wide peyote-stitch bracelet is beautiful… but not for a first project.
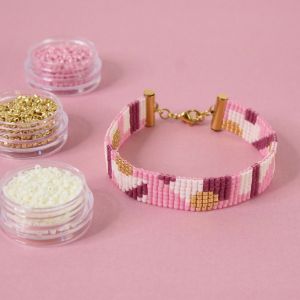
Start with a simple peyote-stitch bracelet using 4 to 6 columns, with just a few colors. You’ll learn the basic techniques, see results quickly, and gain confidence. That’s what real progress is all about.
Thread tension is one of the keys to successful weaving—and one of the hardest things to master at first.
Pulling the weave too tight isn’t the biggest problem. The only issue is that it makes it harder to tuck the thread in at the end.
Not maintaining even tension or not pulling the thread tight enough, on the other hand, can cause problems: a peyote stitch pattern with uneven tension won’t lie straight. In the case of brick stitch, it will result in a loose, floppy weave.
The secret? Work steadily, without forcing it, and check your tension every 2–3 rows. With practice, your hand will naturally find the right rhythm.
Many beginners jump straight into the first row without securing the starting thread. The result: the first few beads slip off at the slightest movement.
Get into the habit of adding a bead stop at the start of your project. Simply thread a separate bead and wrap the thread around it once to secure everything in place. It’s easy to remove at the end and will save you a lot of frustration.
Leaving only 5 cm of thread at the start of your project is a common mistake. When it comes time to weave in the ends and neatly finish your creation, you won’t have enough thread left to work with.
Always allow at least 15 to 20 cm of thread at the start of weaving. This gives you enough to weave the thread through several rows. This applies regardless of the weaving technique.
Did you know? You almost never tie knots in bead weaving. Instead, you secure the thread within the weave by passing it through several rows of beads. There are, of course, exceptions, but not for peyote or brick stitch.
If the weave isn’t too loose, five diagonal passes through the weave are sufficient. It’s invisible from the outside if you’ve threaded the thread through the beads right next to where it comes out. If the thread is visible, it means you didn’t thread it in the right spot.
And that’s coming from Tiffanie, one of our weaving experts!
Following a well-researched beginner’s tutorial—with videos or step-by-step diagrams—to the letter, using the specified materials, is undoubtedly one of the keys to success for your first projects. It helps you learn without skipping any steps.
Many patterns are available online without accompanying tutorials because they’re intended for people who already know the technique, so choosing your first projects carefully is important—even if you fall in love with a pattern that doesn’t have instructions.
A flexible needle is best for needle beading because it prevents the needle from breaking and keeps you from getting hurt. For beading with Miyuki 11/0 beads, a size 12 beading needle is recommended. Do not use sewing needles, as they will be too thick.
However, for weaving on a loom, you’ll need a straight needle so you can thread through the beads in a row in a single pass.
Note that not all beading needles are suitable for bead weaving. There are beading needles for embroidery, flexible beading needles for threading beads but not for weaving, and split-eye or wide-eye needles that aren’t really suitable for weaving either.
Starting your weaving without reading the entire pattern is like driving without looking at a map. You risk discovering halfway through that a color is missing, that the reading direction changes, that the finishing requires a technique you haven’t mastered yet, or that you need a finishing agent you don’t have in stock or that’s no longer available.
💡You need to think about the clasp and how to finish the bracelet when you order the beads.
Before each project: read the entire diagram, count the columns, and make a list of the colors you’ll need. Ten minutes of preparation can save you a lot of frustration.
👉 Need inspiration? Check out our free bead weaving tutorials, organized by skill level and technique.
A crooked weave, a row you have to undo, a thread that breaks… it happens to everyone, even the most experienced. Your first project is never perfect, and that’s OK.
Every mistake is a learning opportunity: your tension was too tight, your thread wasn’t the right type, your needle was too stiff. Next time, you’ll make the necessary adjustments. And before long, you’ll see yourself improving.
Advice from Tiffanie, our expert:“If the instructions seem confusing and everything’s getting jumbled up in your head, it’s better to set the weaving aside and come back to it later—or even the next day. Sometimes you get stuck trying to figure something out, and you get frustrated, but a good night’s sleep and coming back to it with a clear head often help you focus better… and succeed more easily.”
What’s next?
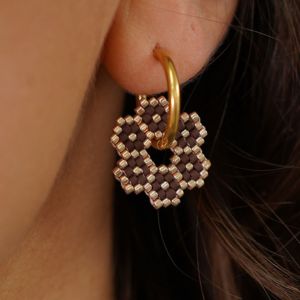
Once you’ve avoided these mistakes, everything flows more smoothly. You can explore Miyuki Delica beads in all their sizes and colors, try out new techniques, and create increasingly elaborate pieces.
Bead weaving is a craft that rewards patience. And those first successful pieces of jewelry are truly worth all the effort.


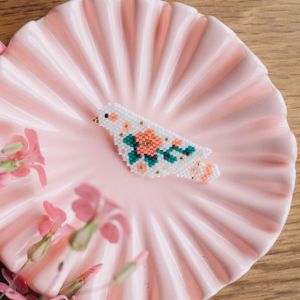
Flat peyote is the ideal technique for beginners. It's intuitive, well-documented and allows you to quickly create bracelets, rings or bag ornaments. Once you've mastered the basics, brick stitch and herringbone become more accessible.
Miyuki Delica 11/0 beads are the benchmark for needle weaving. Their cylindrical shape and regularity guarantee a flat, even fabric. For the loom, round Miyuki Seed beads 11/0 work equally well.
Yes, that's right. There are many free online tutorials and diagrams to help you learn on your own. The key is to start with simple projects and progress step by step, following the instructions given in the tutorials.


Credits
Perles & Co, Internet & E-Commerce company [25/06/2026] Any reproduction, representation, adaptation, in any form whatsoever, even partial, is prohibited, except for reproduction for private use not intended for collective use, representation in the family circle (art. L 122-5 CPI) and online publishing on condition that the source is mentioned and a link is included to the corresponding page of our site www.perlesandco.com.
