Average Grades
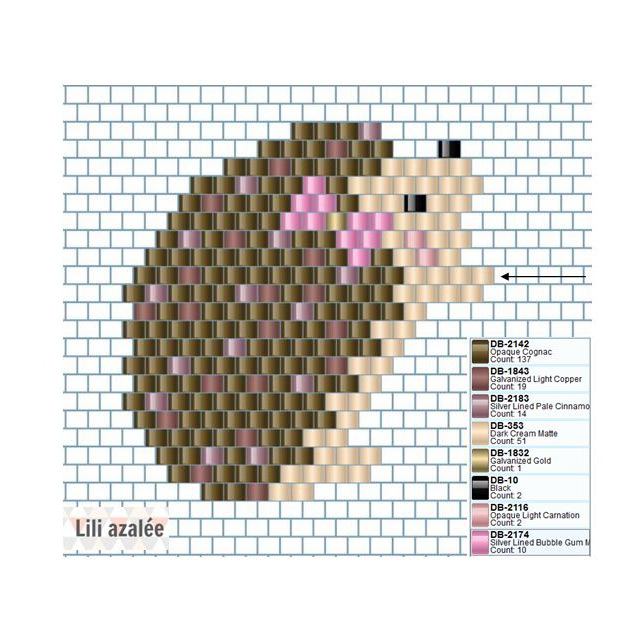
Start weaving with the row indicated by the arrow. Cast on this row using the ladder stitch.

/im-Hedgehog-pattern-brooch-in-brickwork-beadwork-Miyuki.jpg "Hedgehog pattern brooch in brickwork beadwork Miyuki")
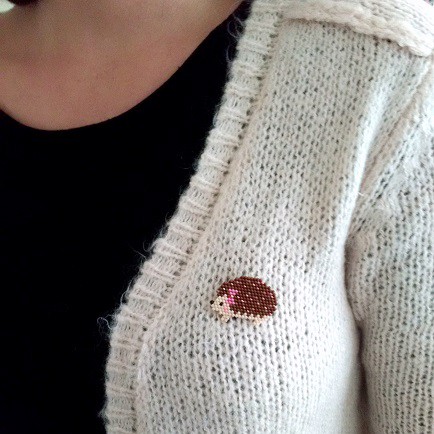
The first chill of fall has arrived... It’s the perfect time for bead weaving! Aurélie from the LiliAzalée blog shares two Miyuki bead weaving patterns: two little hedgehogs, Eglantine the big sister and Sidonie the little sister. Two perfect patterns for customizing your favorite sweaters!
For beginners, check out our tutorial “How to Make a Brick Stitch Designwith Increases and Decreases.”
A big thank you to Aurélie for sharing these patterns.
We love seeing what you create using the tutorials on Perles & Co. So, feel free to send us photos of your creations on our Facebook page.
Start weaving with the row indicated by the arrow. Cast on this row using the ladder stitch.
Next, crochet the top of the hedgehog using the brick stitch.
Thread your yarn through the beads again to weave the bottom of the hedgehog.
Apply glue to the back of your finished weaving to reinforce it, and attach the brooch backing. (Use the 18-mm brooch backing for the large model and the 15-mm brooch backing for the small one.)
And there you go—your brooches are finished! So, do you like them, Eglantine and Sidonie?





You have a question about this tutorial? Ask it to our team and the people who have already tested it. The Perles & Co community is here to help you!
Credits
Perles & Co, Internet & E-Commerce company [11/01/2017] Any reproduction, representation, adaptation, in any form whatsoever, even partial, is prohibited, except for reproduction for private use not intended for collective use, representation in the family circle (art. L 122-5 CPI) and online publishing on condition that the source is mentioned and a link is included to the corresponding page of our site www.perlesandco.com.

