Average Grades
Free shipping on orders over 50€ up to 500g
French Online shop for beads and accessories for the creation of DIY jewellery and other creative hobbiesLog-in
0
Shopping cart
Shopping cart
This beginner's jewelry course guides you through accessible lessons to create your own jewelry, starting with Tila bead earrings. You'll learn how to use three essential pliers and choose the right wire, while reusing materials from previous lessons to progress with ease.
Welcome to episode 2 of our fall season beginner jewelry course. Here you will learn the things you need to know to make jewelry yourself. These lessons for beginners are composed of explanations on one or more jewelry techniques, a jewelry idea to make and a list of affordable materials to start creating. The difficulty of the projects and techniques will increase little by little while remaining simple to realize. The goal is also to offer you DIY projects that have a logical sequence and for which you will be able to reuse the remaining material and tools from the previous lessons.
The first lesson was dedicated to the realization of a bracelet with a sliding knot. For this second lesson, we will reuse the flat rectangular beads used in the first lesson to make earrings. We will look at two ways to shape the wire to create Tila bead earrings.
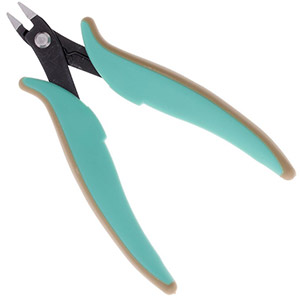
To do this, you will need a set of 3 beginner jewelry pliers: the round tip pliers, the flat tip pliers, and a cutting pliers. These three basic pliers are the minimum to have when you want to make jewelry other than elastic bracelets or bracelets with sliding clasps.
As said before, 3 pliers are essential to create jewelry. You can find pliers kits including these 3 pliers, but you can also buy them separately to have more qualitative pliers.


In the equipment list at the bottom of the page, you will have the choice between a beginner kit with these 3 pliers of acceptable quality to start with or the 3 other more qualitative pliers sold separately. Of course, with practice and testing of pliers, you will discover your favorite pliers.
Many metal wires exist: Copper, brass, 925 silver, Gold Filled or Stainless Steel. For our project, it is essential to have a flexible wire, because we need to pass through both holes of the beads with the same piece of wire. We are going to make a pigtail loop to hang our beads on the ear stud. So the wire doesn't need to be stiff because it will be wrapped around the base of the loop. This way, the loop will not open by itself. In this case, we can take golden copper wire, soft 925 silver or soft gold filled. Avoid starting with hard or stainless steel wire. These wires are very difficult to form for novices. Also, they don't take well to being twisted, then straightened, then twisted again. This breaks them.
The wire must pass easily in the hole of the beads. So we need a wire with a diameter of less than 0.80 mm. That's why we chose the same copper wire as the one used in the summer season's beginner jewelry course. Feel free to check out these episodes if you haven't already. If you participated in this first season, you won't need to buy the wire again because you should have some left.
Here are the two episodes from the previous season where this thread was used. Click on the images to access the lesson:


The technique presented in the video can also be used for other types of jewelry. If you string the beads longer, you can form a circle with the wire and the Tila beads. This way you can make earrings that look like creoles. You will still need to attach an ear stud or ear hook to this circle. You can also use this technique to make a bracelet. Be careful, it will be flexible.
We are often asked what wire to use to make our own creoles and ear hooks. Although many people are interested, it is not so easy to make real Creoles or hooks like the ones you buy ready-made. The wire used here is too soft to make creoles to wear alone. Our hardest yarns will not be very malleable and may still warp from being worn. In truth, it takes professional jeweler's equipment to get a well shaped and rigid creole. It requires annealing the hard metal with a flashlight, shaping it, then cleaning and polishing it, or even re-applying a gold plating. For your information, you can find several videos on the creation of pro jewelry on our site : Jewelry techniques.
Also, when you cut the wire with metal pliers, the wire is then sharp and may hurt the ears. It is then necessary to round the end of the wire with a bead reamer and a rounding tip. This will remove the gold layer on the end of the wire. Of course, you can still create creoles and ear hooks with wire and few materials but keep in mind that you will need to know professional jewelry techniques and professional materials to achieve a professional result. The hardness of the wire will not magically transform your creole into a commercially available, industrially made creole.


Credits
Perles & Co, Internet & E-Commerce company [28/10/2022] Any reproduction, representation, adaptation, in any form whatsoever, even partial, is prohibited, except for reproduction for private use not intended for collective use, representation in the family circle (art. L 122-5 CPI) and online publishing on condition that the source is mentioned and a link is included to the corresponding page of our site www.perlesandco.com.
