How to tie an elastic bracelet knot?
If you're a beginner and want to start creating DIY costume jewelry, you've come to the right place! We've put together a series of videos to give you the keys to learning how to make jewelry. With each lesson, we'll share a new technique with you. Ready to go?
It's possible to make a bracelet without clasps or jewelry clips! Elastic bracelets are the simplest and most economical way to start making jewelry. That's why lesson 1 of our beginner's jewelry training course starts with this technique.
You may be thinking that you don't need a tutorial to learn how to make this kind of bracelet, that all you have to do is string beads on wire and tie a knot... Think again! Elastic jewelry looks extremely simple to make, but there are several things you need to know and plan for before you get started. Otherwise, your bracelet won't last very long!

1 - Which elastic bracelet wire?
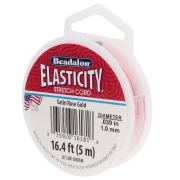
First of all, there are several types of elastic wire with different diameters. We invite you to take a look at our elastic-wire comparison chart for more details on the subject. The elastic yarns we're interested in for our bracelet are Nylon/Silicone/Elasthane and Multistrand.
- Multi-strand yarn is made up of several individual strands, which are more fragile than Nylon/Silicone/Elastane yarns. However, if one strand breaks, the others will not break immediately. This yarn prevents the beads of your creation from falling to the ground in a fraction of a second. You'll have time to remake it before it breaks.
Multi-strand wire is suitable for lightweight creations with beads that have no roughness inside the hole that could grip the wire and break it. - Nylon and silicone wires are stronger, but will break all at once.
Nylon and silicone wire are more suitable for large beads and gemstone beads. Beware, however, that gemstone and ceramic beads are very heavy and put a lot of strain on elastic wires, so there's a greater chance of breakage.
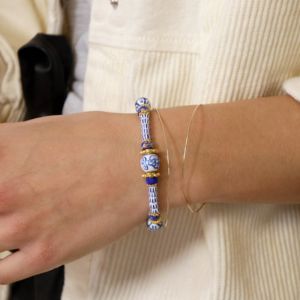
For our video, we used a colored 0.50 mm nylon thread.
The second important point is to choose the thread according to the size of the hole in the beads. Check the hole size of all your beads every time. This information is given on each product's web page. The wire must pass easily through the beads.
What's more, we're going to make a rather large and unsightly knot at the end. To hide the knot, plan to buy a bead with a hole larger than the wire, so that the knot can be slipped through. This bead should be threaded first.
Other finishing methods exist when the knot is not possible (thread too big or knot impossible to hide). But these other finishing systems should be considered as a plan B, as they risk weakening the thread. This is particularly true of the Crimp beads system, but for this method, you'll need jewelry pliers. So we won't go into that here.
2 - Stringing beads on elastic thread
Don't cut the wire from the spool, so that you can string the beads without the risk of them slipping off the wire.
Pre-stretch the thread. That is, pull on it to loosen it. All elastic threads relax after a while. By forcing it to relax before stringing the beads, you prevent this from happening once the bracelet is finished.
This also allows you to test the strength of the wire you've purchased, to make sure it's flawless and won't break at the worst possible moment.
String the large-hole bead first.
Slide on your beads and measure the length of the bracelet with a ruler as you go. Your bracelet should be at least 2 cm longer than your wrist. So, if your wrist circumference is 15 cm, make a bracelet at least 17 cm long.
How to measure your wrist for a bracelet? Here's a data sheet explaining different ways to measure your wrist.
3 - How to close an elastic bracelet without fastening?
Cut the thread, leaving a few centimeters of thread on each side of the beads, so you can tie the knot easily.
The knot used is called the surgeon's knot. It's actually a simple, basic knot, but you have to wrap the thread around each other twice instead of just once. Tie the knot a second time, or even a third time if you notice the thread slipping and unravelling. Tighten the knot firmly, from the outside by pulling on the thread ends, but also from the inside by pulling on the sides of the thread holding the beads.
Cut off any protruding wire ends, leaving 1 to 2 mm after the knot. Apply jewelry glue to the knot, then slide the knot inside the large-hole bead. To do this, stretch your bracelet a little, and with your index finger and thumb, push the bead over the knot.
Wait a few hours for the glue to dry before wearing.
4 - 7 elastic bracelet ideas to go further
Want to try out other elastic bracelet designs while you wait for your next lesson? Here are several elastic bracelet tutorials. If you want to reuse your elastic thread, check that the beads in the other models are compatible.