Free shipping on orders over 50€ up to 500g
French Online shop for beads and accessories for the creation of DIY jewellery and other creative hobbies

Log-in

How to make a simple noose?

Made by : Perles & Co
Published on the :16/09/2025
In summary

To make a noose, use waxed cotton, Linhasita thread, leather cord or micro-macramé thread. You'll need to make a loop, wrap the thread around it twice, iron through the loops, then tighten. Then adjust the opening. Repeat on the other side of the bracelet, then adjust the knots before cutting the wires and gluing or burning the end.

Want to get started with micro-macramé? Then this data sheet is for you! We'll show you step-by-step how to make an easy bracelet noose. Learn how to make a slipknot in just a few minutes!
Simple, practical and attractive, this knot makes it easy to adjust the size of a bracelet or necklace.
Use this sliding knot to tie a Brazilian braceletor a macramé bracelet, or add Miyuki beads, charms or a spacer! The possibilities are endless, and it's up to you to create trendyDIY costume jewelry!

What is a slipknot?

A slip knot is a type of knot used in jewelry to create an adjustable closure. It allows the wires to slide over each other toadjust the size of the bracelet on the wrist. It is particularly useful in jewelry without metal clasps.

Why use a noose for a bracelet?

  • Adjustable: fits all wrists
  • Easy to make, even for beginners
  • Discreet and aesthetic
  • No need for a clasp
  • Ideal for Brazilian bracelets, macramé and DIY creations

Which wire should I use to make a bracelet with a sliding knot?

We advise you to use thread on which a knot will hold and not slip, such as :

  • Waxed cotton
  • Linhasita thread (perfect for micro-macramé)
  • Leather cord
  • Micro-macramé thread

Tip: test the thread before making your jewelry to check that the knot holds and slides properly.

How do I finish a slipknot?

Finishing depends on the type of wire used:

  • Synthetic thread: melt the ends with a thread burner or lighter to prevent fraying.
  • Natural fiber yarn (cotton, linen, hemp): cut off excess yarn and glue ends with vinyl glue.


You can also make sliding knots with leather thread, soutache or rat-tail cord.

Tips for a successful sliding closure

  • Don't overtighten from the outset: the knot must be able to slide!
  • Burn or glue the ends once the knot is snug.
  • Check that the knot slides easily without too much friction.
  • Avoid wires that are too stiff or very thick.

How to make a noose for a necklace or bracelet?

Follow the step-by-step photos or the video to learn how to make a slipknot.

Tutorial steps

Step 1
How to make a simple noose? : Step 1

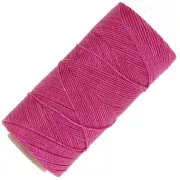
Wrap the dark pink cord around the light pink cord twice.

Step 2
How to make a simple noose? : Step 2

Pass the dark pink cord through both turns and tighten the knot by pulling on both ends.

Step 3
How to make a simple noose? : Step 3

With the first node completed, let's move on to the second.

Step 4
How to make a simple noose? : Step 4

Wrap the light-pink cord around the dark-pink cord twice. Tighten the knot by pulling on both ends of the cord. You can adjust the length by pulling on the ends.

Result
Schema  How to make a simple noose?

What length of thread should I use for a slipknot?

Ideally, measure your wrist (for a bracelet) or your neck (for a necklace) and add a margin of about twenty centimeters to make the noose.

Share with my friends
To go further
Which wires burn and melt?
Howto
Which wires burn and melt?
Howto
Which wires burn and melt?
Howto
Which wires burn and melt?
Howto
Which wires burn and melt?
Howto
Which wires burn and melt?
Howto
Which wires burn and melt?
Howto
Which wires burn and melt?
Howto
Which wires burn and melt?
Howto
Which wires burn and melt?
Howto
Which material to use ?
Cotton waxed cord
Cotton waxed cord
Linhasita wax thread bobbin 1mm
Linhasita 0.5 mm
Linhasita 0.5 mm
Linhasita 0,75 mm
Linhasita 0,75 mm
Linhasita 0.35 mm
Linhasita 0.35 mm
Linhasita waxed thread 1.4 mm
Linhasita waxed thread 1.5 mm
Your questions (8)
You have a question about this sheet? Ask our team and the people who have already tested it. The Perles & Co community is here to help!
By Annie (17/07/2025 15:55:51)
Comment faire un noeud coulissant sur bracelet kumihimo a 8 fils
Translate the question
Please log in to use this feature
Our Lucie expert answers you (21/07/2025 14:19:27)
Bonjour, pour réaliser le nœud coulissant, il ne faut pas utiliser les 8 fils séparément, mais considérer les deux extrémités tressées comme deux cordons simples autour desquels on va faire le nœud. En espérant que ce soit plus clair. Merci
Translate the answer
By Anais (14/09/2024 17:01:44)
Bonjour pour un noeud coulant quelle fil dois-je prendre ? En sachant que je cherche de l’argenté, et en grande quantité le fil j’ai utilisé ne fonctionne pas très dur à le faire coulisser réf FIO-243 merci
Translate the question
Please log in to use this feature
Our Tiffanie J. expert answers you (16/09/2024 09:17:03)
Bonjour, les fils Linhasita restent les plus adaptés, car ils sont plus résistants. Peut-être avez-vous trop serré le noeud ? Les fils métallisés sont généralement assez fragiles donc je n'ai pas d'autres fils à vous conseiller.Peut-être qu'un fil Linhasita plus fin vous conviendra mieux ? https://www.perlesandco.com/bobine-de-fil-cire-linhasita-pour-micro-macrame-0.5-mm-argente-prata-x335m-p-434561.html 
Translate the answer
By Romain (19/02/2024 23:31:46)
Le fil nylon power en Nylon torsadé convient il pour faire des bracelets simple à noeud coulissant qui tiennent dans le temps? Merci
Translate the question
Please log in to use this feature
Our Tiffanie J. expert answers you (20/02/2024 12:17:30)
Bonjour oui vous pouvez utiliser ce fil.
Translate the answer
By Gwennaelle (04/11/2023 03:25:59)
bonjour, pourriez vous me dire quel fil est plus résistant ou plus adapter entre le nylon tresser ou le polyester ciré pour des bracelet en perle avec noeud coulissant ?
Translate the question
Please log in to use this feature
Our Tiffanie J. expert answers you (06/11/2023 12:24:47)
Bonjour, pourriez-vous me donner les références car la matière ne me suffira pas à vous dire quel est le fil le plus adapter. Bonne journée.
Translate the answer
By Sylvie (08/03/2023 16:11:34)
Bonjour combien mesure le fil au départ s'il vous plaît
Translate the question
Please log in to use this feature
Answer from customer Lucie L. (09/03/2023 11:48:43)
Bonjour Sylvie, la longueur de fil à prendre dépend de la mesure souhaitée. Pour être à l'aise, prenez environ une vingtaine de cm supplémentaire pour la réalisation de votre noeud.
Translate the answer
Your reviews (4)
Notices subject to control
4.5/5
Average Grades
Please log in to use this feature
By Anne-Marie (posted on : 31/07/2011 )
Super pour une fermeture de bracelet tout en simplicité. A essayer: enfiler 4 perles de semi-précieuses à séparer par un simple noeud et finir les bouts de ficelle avec une belle petite perle en argent nouée.
Translate the notice
By cecile (posted on : 02/02/2017 )
Bonjour,

Y a t\'il un tuto pour terminer un tissage de bracelet en noeud coulissant?
Merci pour votre réponse.
Cécile
Translate the notice
Our Perles & Co expert answers you (03/02/2017 12:22:21)
Bonjour,

Nous ne disposons pas actuellement de tutoriel répondant à votre demande, nous en prenons note et vous proposerons ce tutoriel dès que possible. En attendant voici des indications écrites pour vous aider, cependant elles requièrent un assez bon niveau, si vous êtes débutante je vous conseille de faire un tissage classique terminé par des embouts de tissage et une chaînette d\'extension :

Généralement, lorsque l\'on termine un tissage sur métier à tisser et que l\'on souhaite finir par un nœud coulissant, il faut utiliser un fil d\'au minimum 0,5 mm sur l\'extérieur du tissage et il faut terminer le tissage en pointe/flèche avec une diminution. Voici une vidéo pour vous aider avec la diminution : https://www.perlesandco.com/Realiser_son_bracelet_en_perles_Miyuki_Delicas_au_metier_a_tisser-f-371-40.html?praPath=40
Le fil d\'extérieur épais doit suivre tout le tissage jusqu\'au bout de la pointe.

Il vous faudra ensuite coincer les fils pour finir le tissage et vous vous servirez du fil extérieur pour faire le nœud coulissant. Si votre tissage est épais je vous conseille plutôt un nœud macramé : https://www.perlesandco.com/Apprendre_a_faire_un_noeud_macrame-f-350-32.html?praPath=32
Comme dans ce tutoriel : https://www.perlesandco.com/Bracelets_Macrame_Fils_nylon_tresse_et_Intercalaires-s-2095-4.html

Cordialement,
Translate the answer
By Béné (posted on : 09/08/2022 )
Bonjour, dans votre phrase "Nous vous conseillons d'utiliser du fil sur lequel un noeud tient et ne glisse pas comme du coton ciré, du fil Linhasita, du fil pour micro macramé ou encore des cordons en cuir. Attention cependant à la finition qui n'est pas la même d'un fil à l'autre"
je ne comprends pas si vous conseiller ou vous ne conseillez pas d'utiliser du coton ciré, du fil Linhasita, du fil pour micro macramé ou encore des cordons en cuir."
Merci & belle journée
Translate the notice
Our Tiffanie J. expert answers you (02/09/2022 11:35:38)
Bonjour, oui vous pouvez utiliser ces fils pour les noeuds.
Translate the answer
By Dominique (posted on : 28/05/2019 )
Bonjour, rnQuelle longueur de fil ou cordon préconisez vous ? Merci !
Translate the notice
Our Perles & Co expert answers you (29/05/2019 10:37:14)
Bonjour,
Le mieux est de prendre beaucoup de fil et de tester la longueur sur votre main avant de faire les nœuds des extrémités et de recouper le fil. Bonne journée !
Translate the answer

Credits

Perles & Co, Internet & E-Commerce company [16/09/2025] Any reproduction, representation, adaptation, in any form whatsoever, even partial, is prohibited, except for reproduction for private use not intended for collective use, representation in the family circle (art. L 122-5 CPI) and online publishing on condition that the source is mentioned and a link is included to the corresponding page of our site www.perlesandco.com.