Average Grades
Bonjour, quel est le moule à utiliser pour faire ce bracelet ?
1 Answer
Show answers

How to use Moiko silkscreen to make a bracelet?
Tropical leaves are in! Just the thing, Moiko has prepared an easy tutorial on how to use silkscreens to make a polymer clay bracelet. Take a look at our entire collection of silkscreens screens to adapt the model to your own tastes.
If you're just starting out in polymer clay modeling, we invite you to take a look at our many modeling technical sheets, in particular to discover the essential tools for beginners in polymer clay.
Step 1:
Condition the clay for the bracelet base. Spread it out on the thickest part of the pasta machine and cut it so that it's about 4 centimetres wide and 25 centimetres long.
Step 2:
Prepare your bracelet mold and wrap it with the clay. Be sure to join the ends carefully, so that the joint doesn't break when you take the polymer out of the oven. Separate your clay from the backing while it's still hot.
Step 3:
Bake at 120°C for 30 minutes.

Step 4:
Prepare a sheet of blue clay in the medium notch machine, 25 cm long by 4 cm wide.

Step 5:
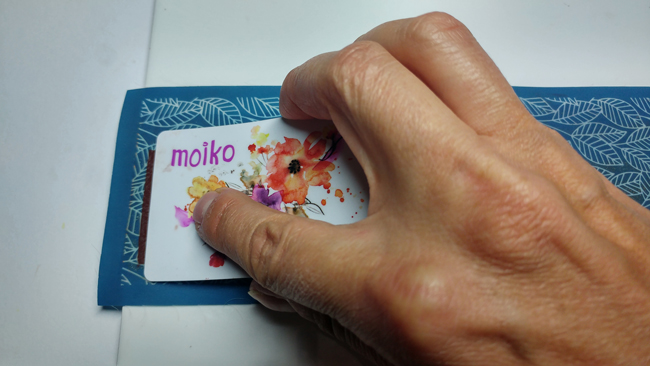
Place the silkscreen on your plate. Add acrylic paint to one edge of your plate, then with a card, spread it over the entire plate. Remove the silkscreen and soak it immediately in water, rinsing thoroughly.
You can cut small leaves from the blue plate once the paint has dried.

Step 6:
Work with other polymer clay colors using the same technique and pattern. In this project, there are six different autumnal shades and one covered with gold leaf. Remember to work all these plates with the same thickness, i.e. medium notch. Set the colored pieces aside and wait for the acrylic paint to dry.

Step 7:
Check that the acrylic paint is completely dry on all printed surfaces. If so, you can now start cutting single leaves from the blue base of the bracelet and replacing them with the leaves cut from the colored bases.

Step 8:
Once you've decided that you've replaced enough leaves, cover the base with greaseproof paper and even out the surface either with a card or a roller. Pay particular attention to the areas where the leaves have been replaced.

Step 9:
Cover our bracelet base with a thin layer of liquid polymer. Cover with the worked blue plate. Use a sharp blade to remove any excess material. Repeat these steps to cover the inner side of the bracelet with the color of your choice, and bake the bracelet at 120°C for 30 minutes.


And that's it! Your bracelet is finished!
We love seeing your creations, so feel free to send us photos on our Facebook page or tag us on Instagram with #Perlesandco!


You have a question about this tutorial? Ask it to our team and the people who have already tested it. The Perles & Co community is here to help you!
Credits
Perles & Co, Internet & E-Commerce company [03/05/2018] Any reproduction, representation, adaptation, in any form whatsoever, even partial, is prohibited, except for reproduction for private use not intended for collective use, representation in the family circle (art. L 122-5 CPI) and online publishing on condition that the source is mentioned and a link is included to the corresponding page of our site www.perlesandco.com.

