How to make a Bargello pattern on polymer with an extruder?
The Bargello is a weaving pattern, it is also called the Hungarian point, it is characterized by a design that develops and shifts in waves with broken lines. The traditional threads are replaced to adapt this technique to the polymer clay by Fimo soft clay threads made from an extruder to obtain regularity. Several discs can be adapted to create this Bargello effect, circles with more or less fine diameters or other shapes like the triangle tip are quite usable to have a beautiful effect in relief.
Step 1
Take 4 pasta colors in pastel shades in camaieu, your dough must be very flexible. Take a small amount of each, about a quarter of a 57g loaf. Insert one of the colors of polymer clay into the extruder in the form of a cylinder, placing the nozzle with 19 holes. Turn your crank to extrude the dough and bring out the colored filaments. Pass each color through the extruder.
2nd step
Take white dough, pass it in the machine to a notch fine enough dough to obtain a plate. Cut the plate into two parts and set aside one.
Place a first filament straight on the plate using your blade. Continue to arrange all the filaments side by side in a straight line, changing the colors. Roll the assembly without crushing the assembly.
Stage 3
Slowly cut thin slices of the order of a millimeter and then place them on the second thin white plate. Each pose of wire must be offset by one millimeter by referring to the colors, so the pattern draws in waves. Your arrow motif should be 2.5 cm wide and about 8 cm long. Make this pattern a second time with these measurements.
Step 4
Cut the 2 strips of Bargello pattern, put them face to face in an opposite direction, having cut their ends before so that a diamond pattern appears from their meeting.
Step 5
Take the extruder by changing the tip, take the one that has a single hole of 3 mm. Extrude one of the colors, place 2 wires on each side of the bargello band, pass the roller over the assembly to weld your parts without removing the relief from the pattern.
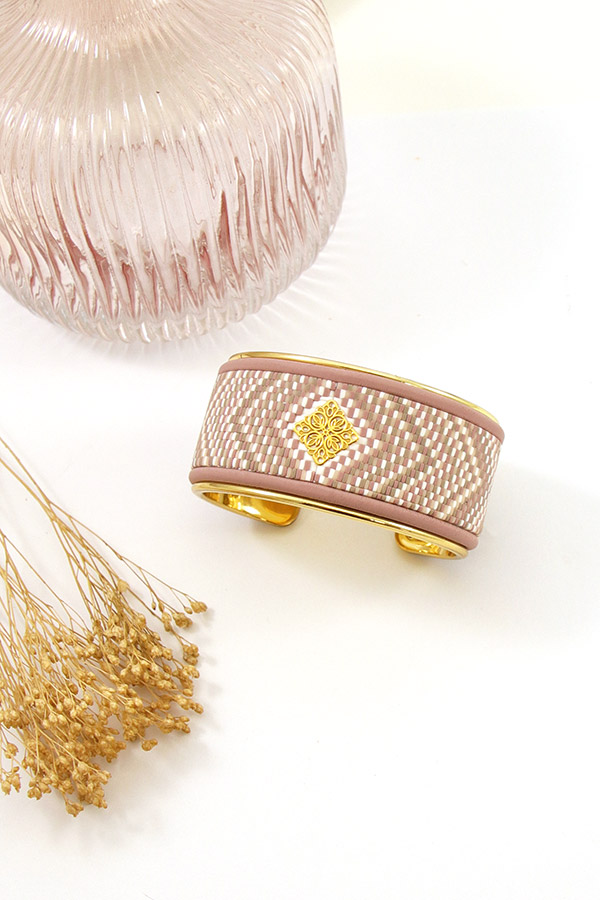
Step 6
Place the strip of dough on the bracelet, cut the ends to the necessary length, be careful not to mark the metal. Arrange the golden rectangle in the middle of the pattern by pressing which will camouflage the pasta connection. Start cooking with the metal bracelet at 120 degrees for 30 minutes.
Step 7
Once the bracelet out of the oven wait for it to cool to loosen the polymer clay from the metal, add dots of glue on the bracelet before replacing the polymer, put a drop of glue to fix the golden stamp.