How to make a pair of orchid earrings?
Inive of a few colors and flowery patterns?
Today we offer you a tutorial to make a nice pair of pendant earrings orchids in polymer clay. Special thanks to Boudchou jewelry creations for sharing his technique. Don't hesitate to take a look at his Facebook page and his Instagram page
Not a fan of colors? You can of course find all of our polymer clay colors on our site. For beginners who want to make this tutorial, you will need a dough machine .
Come on, we leave you with the technique. You will find all the necessary material at the bottom of this tutorial.
Steps
Step 1 : For the petals, you must first create its template. Do not hesitate to do it on cardboard type paper. Then cut out.
Take a piece of FIMO Violet dough and flatten it to notch 5 of the MAP.
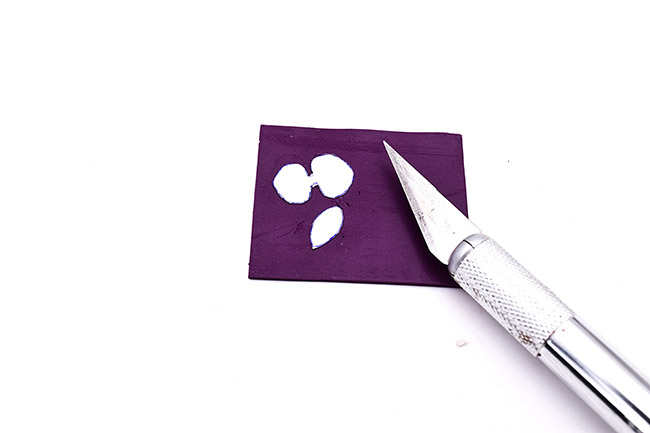
Place your templates on the dough, and cut with a scalpel.
Once the petals are cut, flatten the edges slightly with your finger, then in the palm of your hand, use the modeling tool and press the "ball" on the edges to have something finer.

Step 2 : Take a small piece of FIMO Violet dough, form a ball and press it on your work surface (this will be the base that will hold the petals ?)
With a toothpick (or a small ball modeling tool) place one petal after another.
With a brush, place gold powder on the tips (be aware that this stage of gold powder is optional, according to your tastes ?)
Proceed in the same way for the large petals, and put the gold powder.


Step 3 : Now take a little white FIMO dough and flatten out on notch 6 of the MAP. With a scalpel directly make the shape of the heart of the orchid (you can also use card stock and proceed as the first step).
Flatten with the modeling tool to have finer contours. Then, put gold powder with the brush (this step is of course optional, you can also use dry pastels ?).
Place your flower heart gently, pressing enough to adhere to the petals. Put it up the way you want to give something realistic.
Take a very small piece of FIMO White dough and form a small ball, which you will place in the center of your flower.
Cook according to the manufacturer's directions.


Mounting
Step 4 : Take a little paste of FIMO Violet and form a ball. Place it on the bottom of the support.
Very gently, press your orchid on it (beforehand you can place liquid fimo) to maintain the whole.
Do not hesitate to make your dough prettier on the back
Cook again according to the manufacturer's instructions and let everything cool.


Step 5 : Once the assembly has cooled, apply glue to the back so that everything is taken together. Don't worry, the glue is transparent when drying.
Then once the glue is dry you just have to put the ear hook on the support.

So, are you convinced by these very realistic orchid earrings?

Do not hesitate to share the result of your creations by posting a photo on our social networks: our Facebook page and our Instagram page


