Average Grades
Free shipping on orders over 50€ up to 500g
French Online shop for beads and accessories for the creation of DIY jewellery and other creative hobbiesLog-in
0
Shopping cart
Shopping cart
Install Perles & Co on your home screen: tap the Share button in Safari, then "Add to Home Screen".
Install Perles & Co on your home screen for quick access and real-time updates.
Enable notifications to track your orders and never miss our highlights.

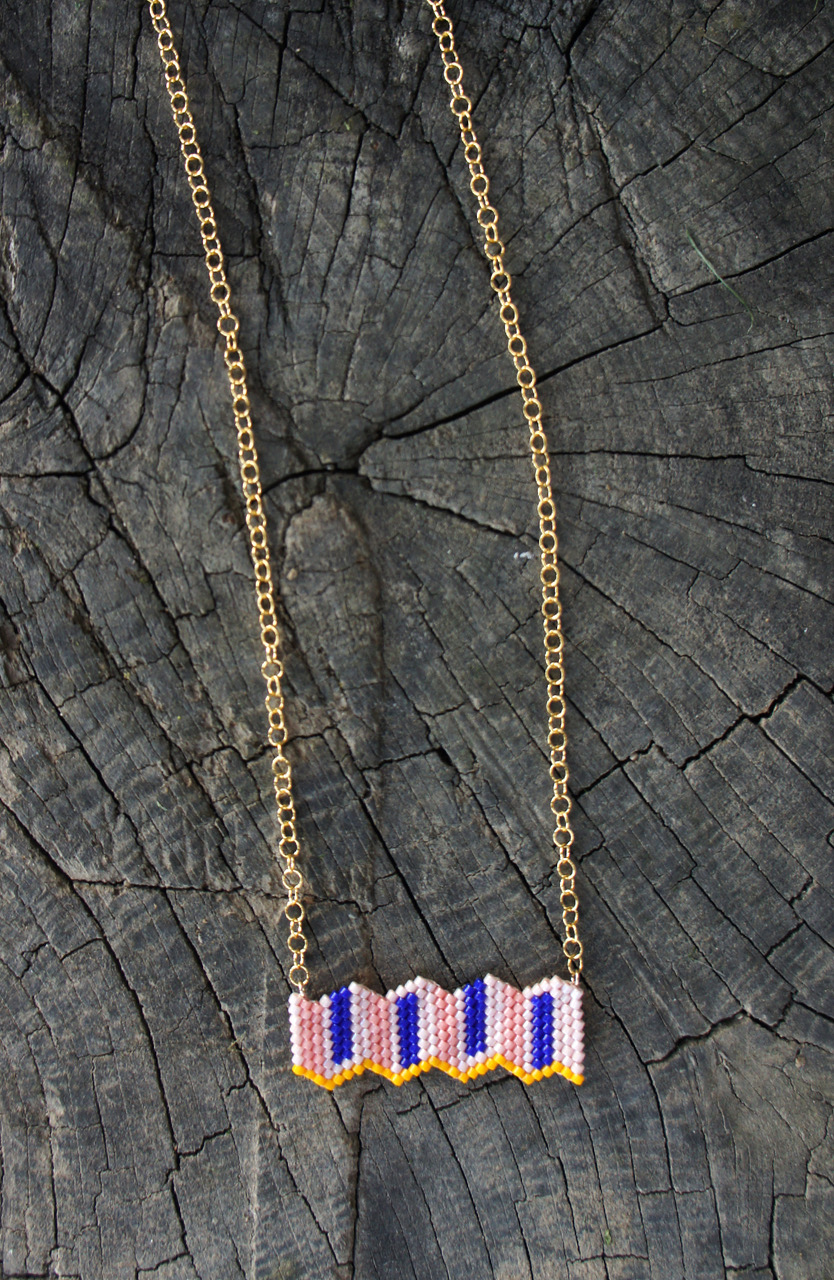
How to make a necklace with a graphic Zigzag pattern in Brick Stitch weaving?
Whether in winter or summer, geometric patterns are always all the rage! To innovate your costume jewelry designs, we've unearthed a unique and atypical geometric pattern: the Zigzag motif! In this tutorial, you'll learn how tomake a Brick Stitch long necklace with a ZigZag pattern. With its light, electric colors, it's the perfect match for your summer outfits!
Endlessly adaptable, all you have to do is choose the colors of your Miyuki Delicas beads to suit your tastes and desires!
Many thanks to Charlotte for this step-by-step tutorial!
If you're new to Brick Stitch weaving, don't hesitate to take a look at our technical sheets for learning bead weaving. We assure you that once you've consulted them, nothing will hold any secrets for you! You'll have no more worries about starting your Brick Stitch weaving, and you'll become a Brick Stitch weaving pro with a raise and a discount!
For more geometric patterns and inspiration, visit our bead weaving tutorials category!

STEP 1: Weaving
We used the "Brick Stitch" technique to create this weave.
Tips and advice from designer Charlotte :

How to start your Brick Stitch weaving by making your first line?
Thread the first two beads. Next, thread the thread through the first bead to create a loop, then thread the third bead through the previous bead. Repeat for each bead in the first line. Taadaam! You've just completed the first line. Congratulations to bead-weaving beginners on this first step! Don't give up, here we go again! ~
How to make an invisible reduction in Brick Stitch weaving?
First, thread two beads, then pass your needle under the thread connecting the second and third beads on the line below. Then pass your thread back through the two beads in the opposite direction. Your thread is now in the first bead, so pass your needle through the second bead from bottom to top. For the third bead, pass your needle under the thread connecting the third and fourth beads, then pass it back through the bead in the opposite direction. Repeat until the end of the line.

How to make a simple Brick Stitch increase?
Start by threading two beads, then pass your needle under the thread connecting the first and second beads on the line below. For the third bead, pass your needle under the thread connecting the second and third beads, then pass it back through the bead in the opposite direction. Repeat until the end of the line.
How to make a multiple increase in Brick Stitch weaving?
This technique is the same as for the first line. With each bead you add, pass the thread back through the previous bead and then through the one you've just added. Repeat until you reach the end of the line.
How do I make a multiple reduction in Brick Stitch weaving?
Simply pass the thread through the beads you've just woven, then depending on where the thread exits, make a simple increase or an invisible reduction.
To finish the weave, iron the thread inside the beads to create a knot to lock the thread, then cut it flush with the weave.
Charlotte's tip: To make the task easier and your weaving more solid, tighten the thread after each action!
STEP 2: Assembly
Once you've made your weave, you need to assemble it to the warp using the rings and two clamps. Use the cutting pliers to cut the warp to the desired length. Here, designer Charlotte has cut the warp to 70 cm to create the sautoir.
To hold the rings open, use wire to fasten the ring in the middle of the two beads at each end. Refer to the image below. Then pass the thread twice through the beads to create a knot and secure the ring. You can now insert the chain and close the ring.
Repeat this action at each end of the first weave, as well as the top two ends for the second weave.

Charlotte's tip: Pass the thread through the ring twice to solidify the necklace. Don't try to thread the beads too many times, as this could cause them to break: make no more than two knots.
Charlotte's tip: When you slide your ring into the bead, make sure the opening faces outwards to prevent the ring from coming loose from the weave when you manipulate it to put the chain on.

TADAM! Your long necklace is finished! Isn't it gorgeous and original?
We'd love to see your creation (alone or worn) and, who knows, share it on our social networks. So send us your photos on Facebook or tag us on Instagram with #perlesandco!


You have a question about this tutorial? Ask it to our team and the people who have already tested it. The Perles & Co community is here to help you!
Credits
Perles & Co, Internet & E-Commerce company [29/05/2017] Any reproduction, representation, adaptation, in any form whatsoever, even partial, is prohibited, except for reproduction for private use not intended for collective use, representation in the family circle (art. L 122-5 CPI) and online publishing on condition that the source is mentioned and a link is included to the corresponding page of our site www.perlesandco.com.
