Average Grades
Free shipping on orders over 50€ up to 500g
French Online shop for beads and accessories for the creation of DIY jewellery and other creative hobbiesLog-in
0
Shopping cart
Shopping cart

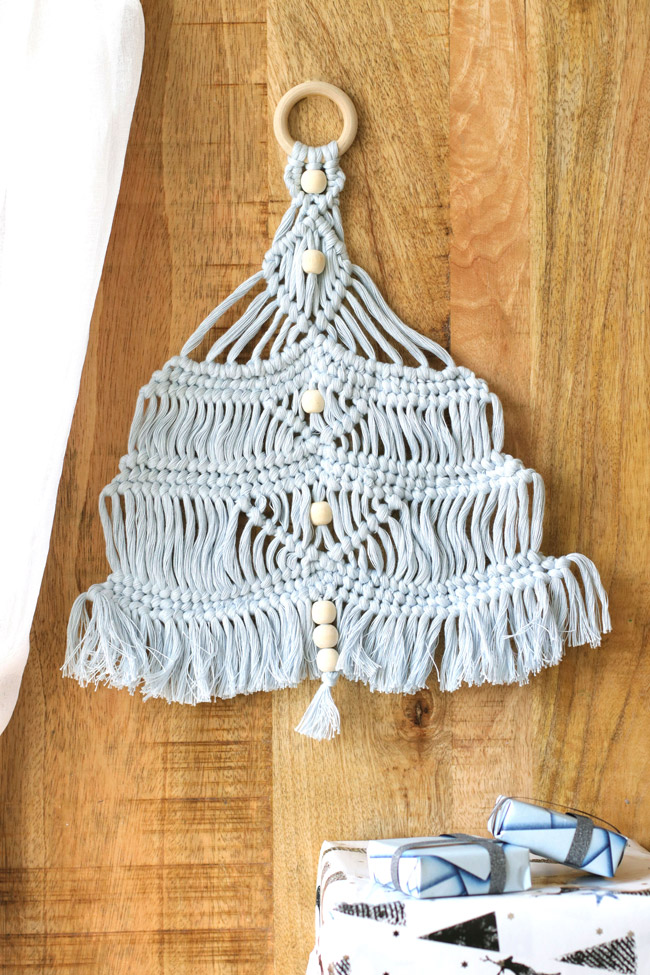
How to make a macramé Christmas tree?
Tired of natural Christmas trees that lose their needles, or unattractive synthetic trees that take up space? Here's a macramé DIY idea that will let you hang your tree on the wall! You'll be able to create your own macramé tree in dozens of different colors, thanks to our selection of 3 mm Cotton Suprême 3XL macramé cord. These are the same spools used to create those famous decorative macramé feathers, for which we've also included a tutorial!
Don't fancy a Christmas tree on the wall? You can also repeat the same tutorial with thinner thread, such as Linhasita 0.75 mm micro-macramé thread, to create a key ring. And off you go! A little idea for a guest gift as a souvenir of this year's Christmas party!
Step 1:
Cut three 3m-long pieces of wire and fold them in half. Tie it to the ring with a lark's knot. To do this, pass the loop over then under the ring and thread both ends of the wire through.
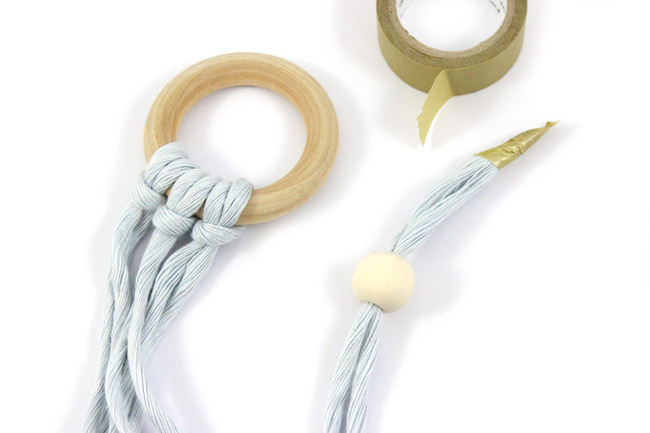
Step 2:
Pass a wooden bead over the two center wires. To do this, wrap a piece of masking tape around the ends of the wire, then roll the wire through the bead. Then remove the masking tape.
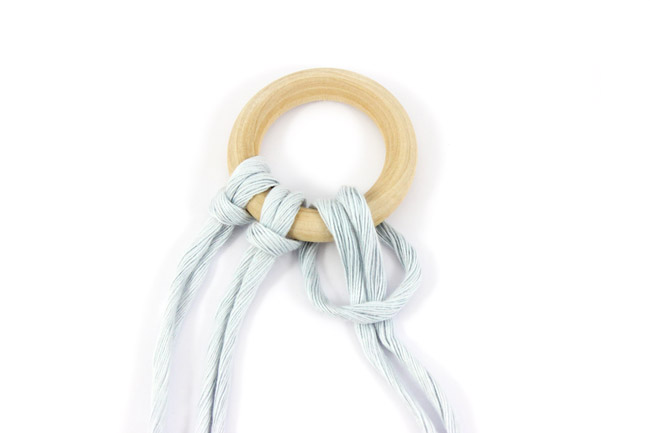
Step 3:
Tie six half-key knots identical to the photo on each side of the bead. Tie the outer wire to the inner wire. Reverse the direction of the knot for the other side.
Step 4:
Tie a half-key knot using the wire to the left of the center wire. To do this, go over the center thread and then under it, coming out over the left-hand thread.
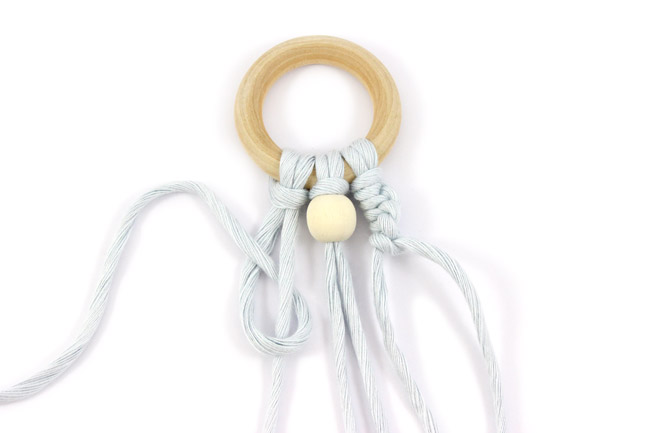
Step 5:
Tie another half-key knot in the opposite direction. This amounts to a frivolity knot. Do the same on both sides and join the wires in the center with another frivolity knot. The vertical part of the knot should be in front of you. Turn the wires if necessary.
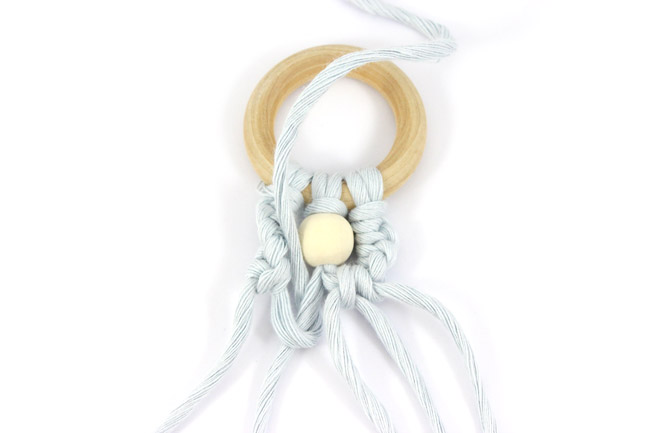
Step 6:
Cut a 2m80 piece of wire, fold it in half and tie it to the center wire with a lark's knot in the opposite direction to the one at the beginning. Next, tie an inside-out frivolity knot by knotting the top thread to the center thread. Try to form an oblique rod, the aim of this step being to form the top of a rhombus. Tie another 2m80 piece of wire with a lark's knot, then tie the second top wire onto the center wire. Do the same on the other side. We've now doubled the number of wires to work with.
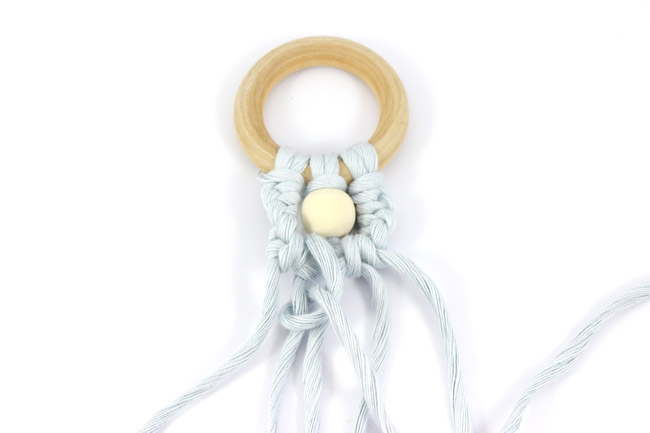
Step 7:
Thread a bead onto the two center wires, then start knotting the lower part of the diamond. To do this, tie two half-key knots with each thread, on the leftmost thread until you reach the center. Be careful, the second half-key is reversed and goes under the wire instead of over it.

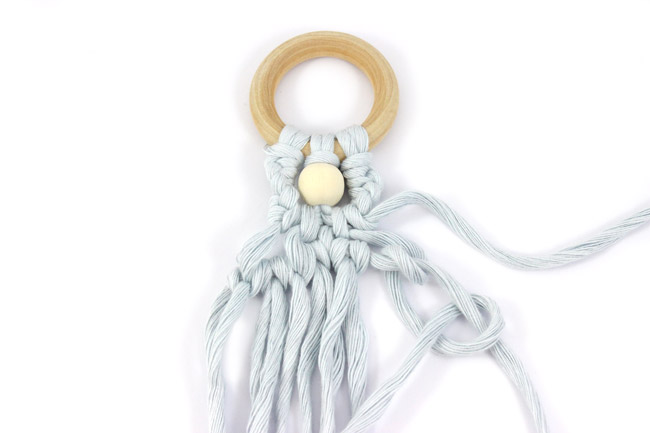
Step 8:
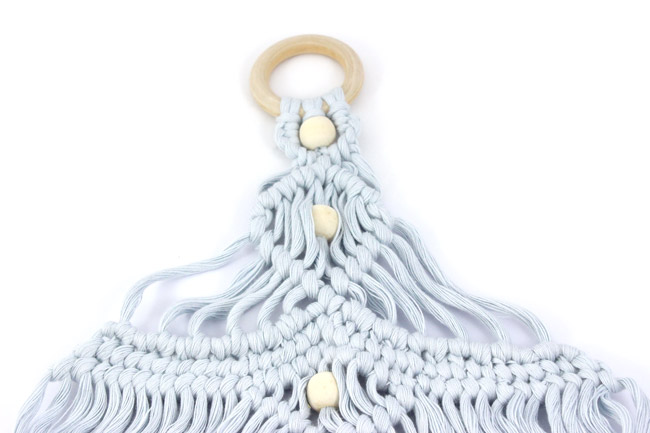
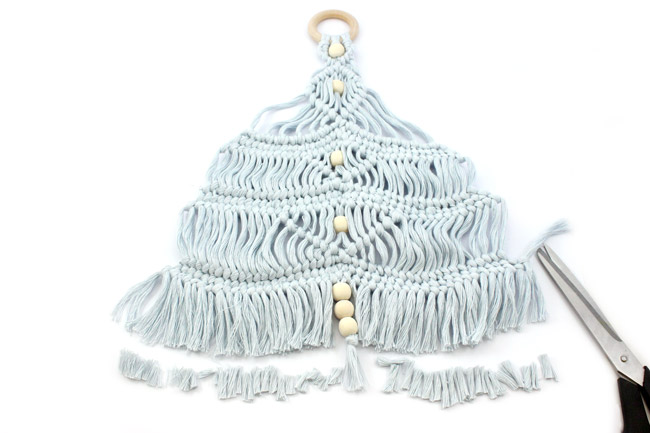
The rest is just a repetition of the previous knots. Create a curved wand using frivolity knots and adding a wire with a lark's knot in between. Then make two baguettes with double half-key knots, the second of which is reversed. Make a new lozenge by repeating step 7. Again, make three baguettes with double half-key knots only, then a wider rhombus and again three baguettes with double half-key knots. In the center, string three beads and tie a knot to hold them in place. Even out the length of the wires by cutting them.


You have a question about this tutorial? Ask it to our team and the people who have already tested it. The Perles & Co community is here to help you!
Credits
Perles & Co, Internet & E-Commerce company [12/12/2019] Any reproduction, representation, adaptation, in any form whatsoever, even partial, is prohibited, except for reproduction for private use not intended for collective use, representation in the family circle (art. L 122-5 CPI) and online publishing on condition that the source is mentioned and a link is included to the corresponding page of our site www.perlesandco.com.
