Average Grades
Free shipping on orders over 50€ up to 500g
French Online shop for beads and accessories for the creation of DIY jewellery and other creative hobbiesLog-in
0
Shopping cart
Shopping cart
Install Perles & Co on your home screen: tap the Share button in Safari, then "Add to Home Screen".
Install Perles & Co on your home screen for quick access and real-time updates.
Enable notifications to track your orders and never miss our highlights.

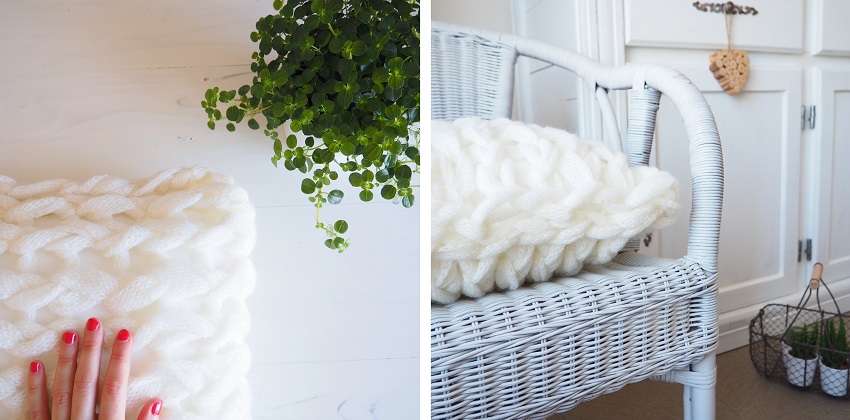
Have you heard of arm knitting? It's the art of knitting with your arms!
DMC offers a lightweight, soft-touch tubular yarn called Handy that makes it easy to knit without needles.
Aline, from the blog Aline aux pays des mailles, suggests we make a cushion with this new wool, and the result is so nice that we're tempted to redecorate our living room or bedroom by making several cushions in every color!
Many thanks to Aline for teaching us the arm knitting technique.

How to knit without needles?
Here are the technical tips to learn how to knit without needles and master the arm knitting technique.
A - Knit with your hands (continental method).

The first step is to leave a piece of wool, called A yarn, long enough to knit your stitches. For this project, you'll need about 2 meters of wool (50 cm of which will be used for sewing the right side).
B- Knit a row of stockinette

With the stitches on your right arm:
With stitches on left arm :
C- Fold down stitches
Knit two stitches right sides together.
D- Assembly

The stitching on the sides of the cover is done 1 stitch from the edge, also known as the selvedge stitch, and is easily recognizable as it forms a small V. At this stage, the knitted fabric should be placed purl to purl, with the right side facing you.

E- Designer's tip
At the end of the knitting process, once the stitches have been brought down, it's a good idea to leave enough thread to sew the bottom and left side of the cushion. The right-hand side will be sewn with the assembly thread (A).
To hide and secure the sewing threads, simply cut the wool as close as possible to the knitting and secure the thread with a few stitches, by hand, on the reverse side of the knitting.
When changing balls, it's a good idea to sew the two ends of the old and new balls together, so that there's no thread to tuck in.

Making the cushion cover
STEP 1
Assemble 12 stitches.
STEP 2
Knit 21 rows of jersey right sides together, then fold over all the stitches. The result is a rectangle measuring 80 x 40 cm.
STEP 3
Place your cushion inside your knitted fabric, fold it inside out and close the cover by sewing on three sides.
Your cushion is finished. Thanks to this cozy wool, you can easily add a touch of softness and a cocooning atmosphere to your home, ideal for the transition to autumn/winter.

We love to see what you can do with the tutorials on Perles & Co. So, don't hesitate to send us photos of your creations on our Facebook page .


/im-DIY-Tutorial-Knitting-a-basket-for-cat-or-rabbit-with-hands.jpg "DIY Tutorial Knitting a basket for cat or rabbit with hands")


You have a question about this tutorial? Ask it to our team and the people who have already tested it. The Perles & Co community is here to help you!
Credits
Perles & Co, Internet & E-Commerce company [03/11/2016] Any reproduction, representation, adaptation, in any form whatsoever, even partial, is prohibited, except for reproduction for private use not intended for collective use, representation in the family circle (art. L 122-5 CPI) and online publishing on condition that the source is mentioned and a link is included to the corresponding page of our site www.perlesandco.com.
