Average Grades

Pass through the left-hand hole of the end cap, then through the left-hand hole of a Tila bead. Repeat these steps to insert 2 beads into the end cap.

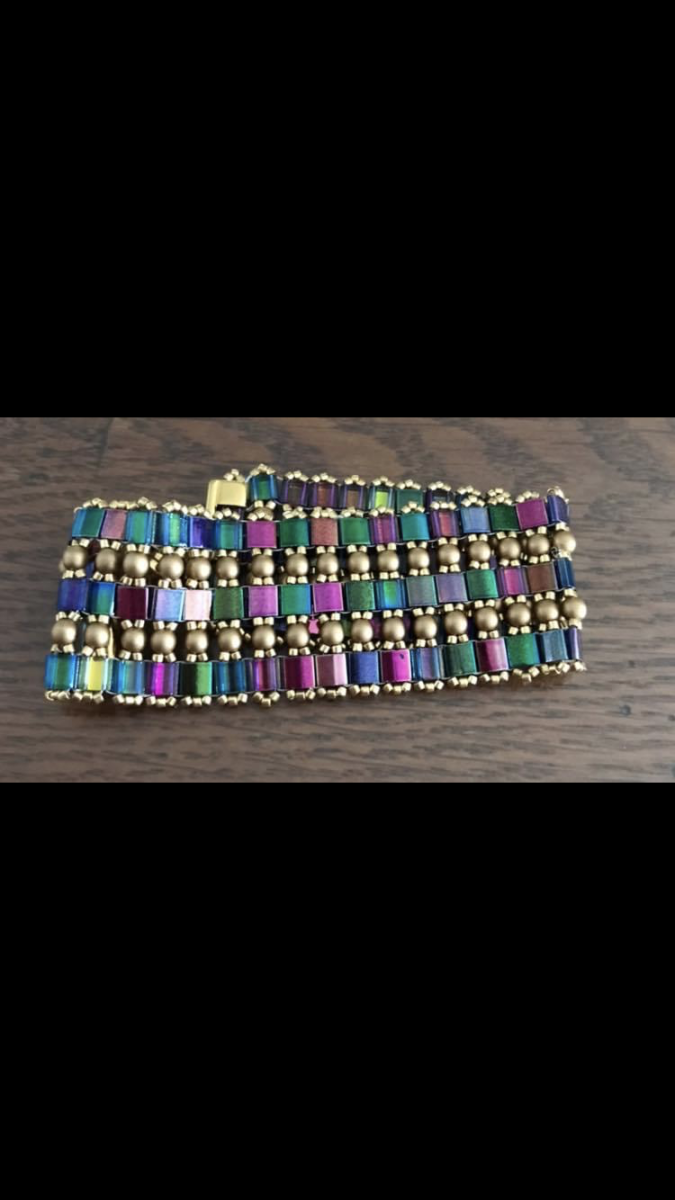
You gave a warm welcome to Sev Rine's first tutorial, the glittering 3D triangle pendant in Miyuki 11/0 beads and PureCrystal bicones. So here's a second tutorial to delight fans of Tila Beads. A pretty multi-row cuff bracelet combining Tila beads, round Czech glass beads and Seed beads. And it's THE winning combo!
To create other color versions of this bracelet, take a look at our Miyuki Seed beads 15/0, Miyuki Tila beads and Czech glass 4mm round beads.
You can also decide to add or remove rows in width, or adapt the color of the primers by finding all our Cymbal beads weaving tips on our site.
All you need is a needle and thread, and you're ready to go! Sev Rine shares her secrets for making this bracelet.
Once you've finished your creation, don't hesitate to share it with us on social networks. We'd love to see your color variations: our Facebook page and our Instagram page.
Pass through the left-hand hole of the end cap, then through the left-hand hole of a Tila bead. Repeat these steps to insert 2 beads into the end cap.

String 3 seed beads 15/0 (R15) and pass through the right hole of the connector.

Thread 1 Tila, then pass through the right-hand hole in the connector

Then pass through the hole of the inserted 1st Tila and the center connector.

Repeat step 2: thread 1 Tila through the right-hand hole of the central connector, the second Tila of the first row and the last connector.

Repeat step 2 until the second row is completed.

Thread 3 R15s, then pull your thread up to the top of the weave through the left-hand holes of the Tila and connectors to secure the weave.

Then go back through the 3 R15s and down the right-hand holes this time. Pass through the bottom left-hand Tila

Thread 1 R15, 1 4 mm round bead (PR4), 1 R15 then thread through the left hole of the Tila.

Thread 1 R15, 1 PR4, 1 R15 then wind the wire into the left-hand hole

Thread 3 R15s (photo 2) then descend through the holes on the right, threading 1 R15 before and after each PR4.

Thread 3 R15s, wind the wire through the left-hand hole in the Tila and then through the right-hand hole.

Thread 1 Tila again and pass through the Tila hole next to it.

Thread 1 R15, 1 PR4, 1 R15, 1 Tila, then take the thread down through the right-hand hole of the Tila next to it, then up through the left-hand hole of the Tila (photo 3). Repeat to thread the last Tila. Thread 3 R15s, then repeat step 6.

Repeat these steps until you obtain the desired weave length (here, approx. 18 cm with 30 rows of Tila). To place the connector at the end of the weave, pull up through the left connector hole, thread the Tila beads through the left hole. Thread 3 R15s through the right-hand holes of the Tila beads and connector. Pass through the left-hand holes again to secure. Secure your wire.


You have a question about this tutorial? Ask it to our team and the people who have already tested it. The Perles & Co community is here to help you!
Credits
Perles & Co, Internet & E-Commerce company [18/09/2020] Any reproduction, representation, adaptation, in any form whatsoever, even partial, is prohibited, except for reproduction for private use not intended for collective use, representation in the family circle (art. L 122-5 CPI) and online publishing on condition that the source is mentioned and a link is included to the corresponding page of our site www.perlesandco.com.