Average Grades
Free shipping on orders over 50€ up to 500g
French Online shop for beads and accessories for the creation of DIY jewellery and other creative hobbiesLog-in
0
Shopping cart
Shopping cart
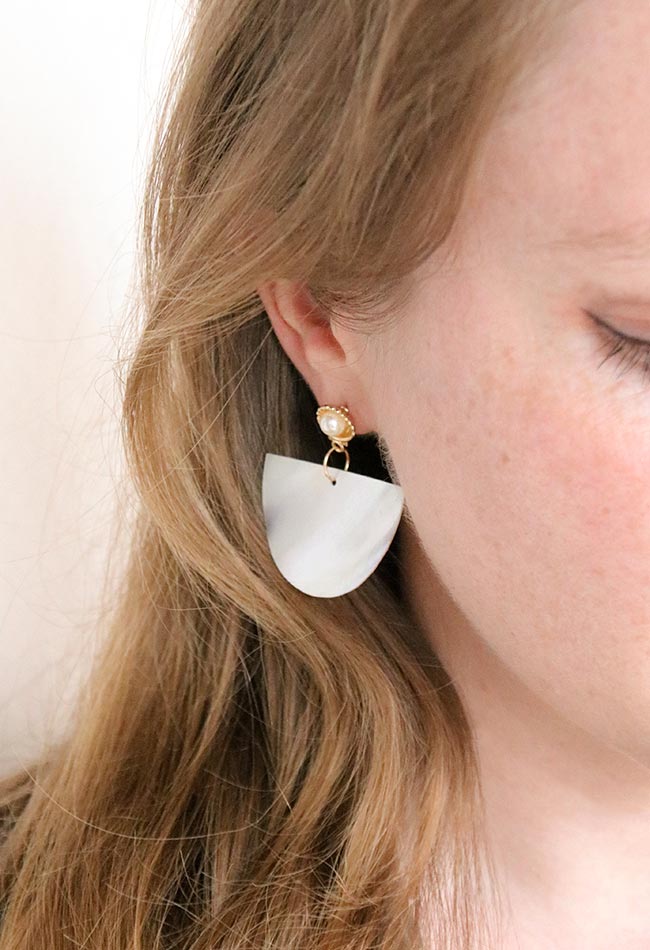
How to make your own half moon mother-of-pearl earrings?
Mother-of-pearl and seashells are essentials for summer. Available in macramé bracelets with cowries , in shell pendants with gilding on the edges or even shells stuck on bars , these creations breathe the iodized air and the beach. Something to feel on vacation even if it is not the case. In any case, that's what we want!
Whether you are on vacation or not, this super fast DIY gem will delight you! In addition, you have the choice between using ready-made open rings for even more convenience or else making them yourself thanks to the special ring-making pliers for costume jewelry which you will find in the list of materials below. of page. This clip is ultra easy to use and you can create rings from 2 to 9 mm in no time with hard copper wire, hard gold filled wire, hard 925 silver. Also take a good cutting pliers.
Step 1 :
Start by measuring the size of the ring you will need. Here we have made 4mm rings so that the mother-of-pearl half-moon has enough ease to swing.

2nd step :
Take your wire and place it end in the pliers. Do not tighten the wire too hard so as not to mark it. With your thumb, press the wire against the pliers and turn it slightly, keeping your thumb pressed against the pliers. When you have turned the wire 180 °, release the pliers and bring it back against the base of the wire which is not yet formed. Again rotate the wire 180 ° then a little more so that the ends have the correct curvature of the ring.


Step 3:
Cut the thread. The two ends of the ring must be at most against each other.

Step 4:
Open the ends with two pliers by rotating them. Thread the ear stud and half mother-of-pearl disc. Pay attention to the direction of threading.

Step 5:
5. Close the ends of the ring by rotating them and making a small round trip to put the edges against each other.

Step 6:
Put a touch of jewelry glue or UV LED resin (with the UV LED lamp ) to keep the ends closed and thus prevent the elements from sliding out of the ring.

Your earrings are ready and you are ready for summer!
Do not hesitate to show your creations on our Facebook page, in the Super club group of Perles & Co customers or on Instagram by quoting us with @perlesandco or with #perlesandco.


You have a question about this tutorial? Ask it to our team and the people who have already tested it. The Perles & Co community is here to help you!
Credits
Perles & Co, Internet & E-Commerce company [05/06/2020] Any reproduction, representation, adaptation, in any form whatsoever, even partial, is prohibited, except for reproduction for private use not intended for collective use, representation in the family circle (art. L 122-5 CPI) and online publishing on condition that the source is mentioned and a link is included to the corresponding page of our site www.perlesandco.com.
