Average Grades

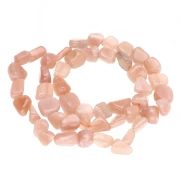
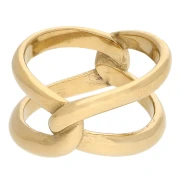
Here's what you'll need to make your ring.


Easily create a personalized adjustable heart ring using a stainless steel backing and gemstone beads. This step-by-step tutorial guides you to create an elegant, sturdy piece that can be customized with a variety of available bead colors. Ideal for beginners, the simple assembly will enable you to achieve a neat and unique result. Fall for this trend!
In this new DIY jewelry tutorial, learn how to easily make a personalized adjustable heart-shaped ring decorated with gemstone beads and pearl beads. Using a heart-shaped 304L stainless steel adjustable ring base, you’ll learn step-by-step how to attach the beads using tarnish-resistant copper wire, which is ideal for ensuring a secure fit and a long-lasting finish. Very trendy, this type of ring can also be adapted to other base shapes, such as round or oval rings. The tutorial’s shopping cart also offers several ring bases to customize, so you can vary the styles to suit your preferences.
The adjustable 304L stainless steel ring base is particularly popular in jewelry making for its resistance to oxidation, durability, and comfort. Easy to maintain, stainless steel is well-suited for everyday use. When paired with gemstone beads, it allows you to create a ring that is both elegant and sturdy: the natural stones add an authentic and colorful touch, while the pearlescent beads soften the overall look for a luminous and harmonious finish.
One of the great advantages of this tutorial is its high degree of customization. You’re free to choose the color of the 3 mm gemstone beads to create a unique ring that matches your style or your other jewelry. Whether you prefer soft, natural tones or more contrasting colors, all the beads you need are available in our gemstone selection.
The assembly technique, which involves wrapping and twisting the wire, is simple and perfectly suited for beginners in jewelry making. For a neat finish, we recommend using flat-nose pliers to securely tighten the wire around the ring, as well as wire cutters for clean edges.
Once your heart-shaped ring is finished, feel free to share your creation on social media by tagging our Facebook page or Instagram account. We love seeing your creations and how you put our DIY jewelry tutorials to use! And if you’re looking for even more ideas for DIY stainless steel rings, check out all our other tutorials.
Here's what you'll need to make your ring.

Start by cutting 35cm of copper wire.

Wrap the wire around one end of the ring. Repeat the operation 3 times, making sure to tighten the turns of wire together.

Thread the first bead, then pass the wire through the center of the ring and tighten the wire around the bead and ring.

Repeat the same operation all the way around the heart ring, alternating the beads and making sure the wire is tight around the ring. Don't hesitate to use a pair of flat pliers to tighten and twist the wire.

I chose to follow this sequence: an Indian Agate bead, a pearly bead, an Indian Agate bead and a stainless steel bead.

All that's missing here is one last bead.

Once the last bead has been threaded, all you have to do is make several turns of wire around the ring to finish it off.

I made 3 turns of wire in the remaining space on my ring. Now all you have to do is cut off the excess wire with a pair of wire cutters, and make sure you fold the wire ends over with the flat pliers, so they don't catch on your skin or clothes.

Your new favorite ring is now ready to wear!


You have a question about this tutorial? Ask it to our team and the people who have already tested it. The Perles & Co community is here to help you!
Credits
Perles & Co, Internet & E-Commerce company [04/02/2026] Any reproduction, representation, adaptation, in any form whatsoever, even partial, is prohibited, except for reproduction for private use not intended for collective use, representation in the family circle (art. L 122-5 CPI) and online publishing on condition that the source is mentioned and a link is included to the corresponding page of our site www.perlesandco.com.