Average Grades

Here, I'll explain how to make the clasped version. For the version without clasp, go to step 7.
Cut a length of wire and pass one end through the wire protection.

Mother's Day is fast approaching, and it's the perfect opportunity to spoil your mom, grandma or one of the women in your life! This year, opt for an original gift that will symbolize your unique relationship: a pretty pair of mother-daughter bracelets to wear together. The effect is guaranteed!
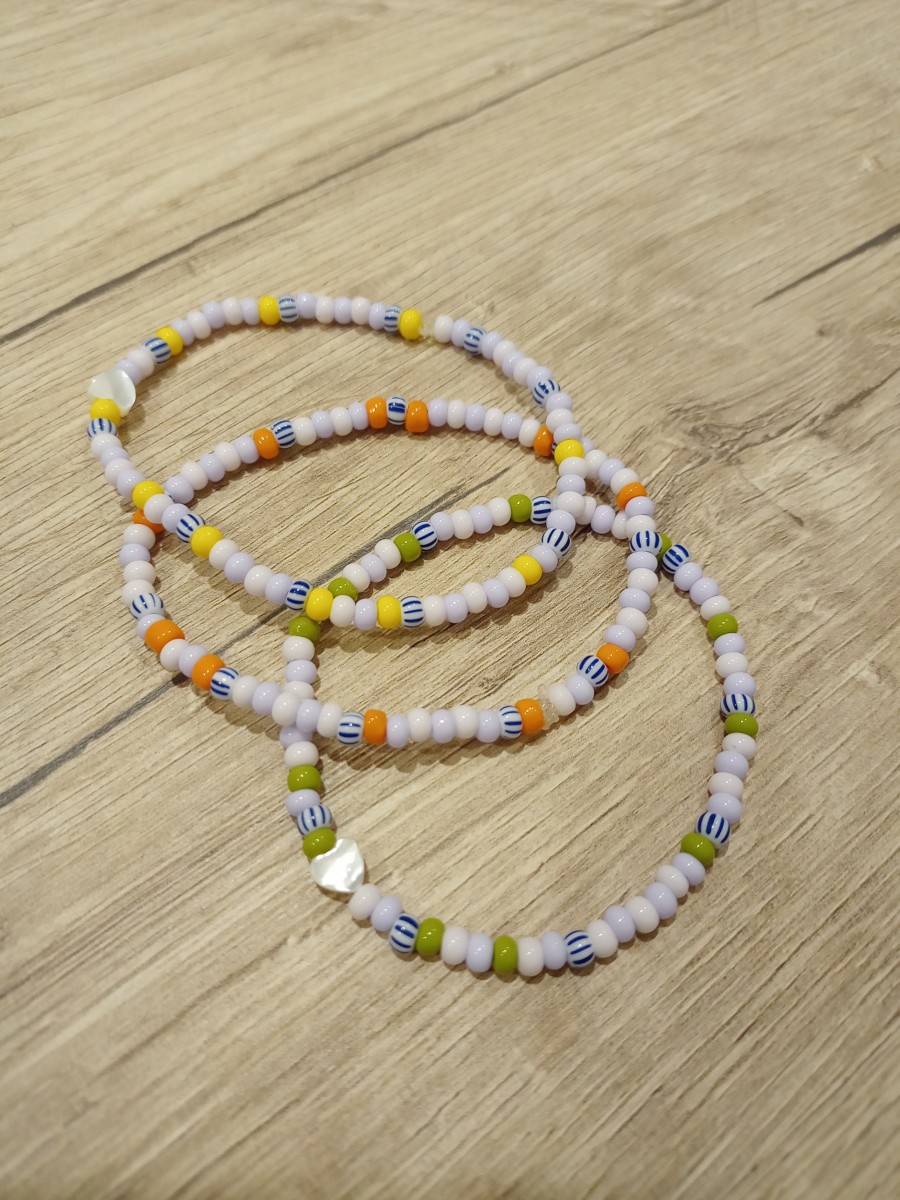
Discover in this tutorial how to create mother-daughter bracelets, two virtually identical pieces of jewelry to be worn together. To make them, you'll need mother-of-pearl heart and letter beads for a shiny, luminous effect, as well as 6/0 seed beads in different colors: lilac, orange, khaki, light pink, yellow and blue-white. You won't encounter any particular difficulties in this tutorial, as it's a simple beading operation. It's a creation accessible to beginners, and doesn't take long to complete. You'll also need a pair of wire cutters to cut the desired length of wire according to the size of the wrists for the two bracelets, as well as flat-nose pliers to secure your crush beads. If you're new to jewelry-making, we offer a complete beginner's tool kit. Everything you need to get started!
These bracelets can, of course, be customized by changing the color of the 6/0 seed beads and their finishes to suit your tastes: why not choose beads with a lustrous finish for a shiny effect? You can also replace the letter pearls with number pearls corresponding to your respective dates of birth, and replace the heart pearl to suit your tastes! The choice is endless!
If you reproduce this tutorial, we invite you to share your creation with us on social networks, mentioning Perles & Co on your post. We love to see the beautiful creations you make!
Here, I'll explain how to make the clasped version. For the version without clasp, go to step 7.
Cut a length of wire and pass one end through the wire protection.

Add a pearl mask to the pearl to be crushed.

Thread the beads randomly, so that they go around your wrist. You can add a different bead to the center of the bracelet.

To close the bracelet, repeat the first steps. You'll need to add a squeeze bead, then a wire guard, and then pass the wire guard back through the squeeze bead.
Depending on your clasp, you can either pass the clasp through the wire guard before passing back through the squeeze bead, or use a ring.

Finally, add a pearl cover.

For the version without clasp, use elastic thread.
Cut the length to fit the wrist.
Thread the beads randomly and finish the bracelet by tying several knots.


You have a question about this tutorial? Ask it to our team and the people who have already tested it. The Perles & Co community is here to help you!
Credits
Perles & Co, Internet & E-Commerce company [30/04/2024] Any reproduction, representation, adaptation, in any form whatsoever, even partial, is prohibited, except for reproduction for private use not intended for collective use, representation in the family circle (art. L 122-5 CPI) and online publishing on condition that the source is mentioned and a link is included to the corresponding page of our site www.perlesandco.com.