Average Grades
Free shipping on orders over 50€ up to 500g
French Online shop for beads and accessories for the creation of DIY jewellery and other creative hobbiesLog-in
0
Shopping cart
Shopping cart

How to make a flamingo pink knitting pattern?
How to use an automatic knit?
If you want a decoration with the patterns "trend" of the moment, in this tutorial, Catherine blog Lili plays mum tinker , offers you to learn how to make a pink flamingo with an automatic knitting . An easy decoration to make and ideal in a child's room.
What is a knit?
It's a machine that will make it easy for you to knit a yarn without knowing how to knit! It is composed of a central tube in which there are 4 hooks on which you will hang a thread of wool. Outside, there is a crank. When you turn it, a knitted cord is created before your eyes.
With the help of an automatic knitting, you can create jewels, wall decorations but also customize a sweater or cushion. To you to create according to your desires!
Find another step by step to realize knit cactus ... ideal to associate with the pink flamingo!

STEP 1
On a sheet of paper draw a pink flamingo. It will serve you as a template.
To define the necessary length, place a piece of wool all around the body and a second for the legs of the pink flamingo.

2ND STEP
Make two knitted cords using the automatic knitting of the two lengths of yarn cut previously while making sure to leave a few extra centimeters for the margin.

For more information on using automatic knitting, watch this video that will guide you through the use of this machine.
STEP 3
Cut the thread and close the knitting.
STEP 4
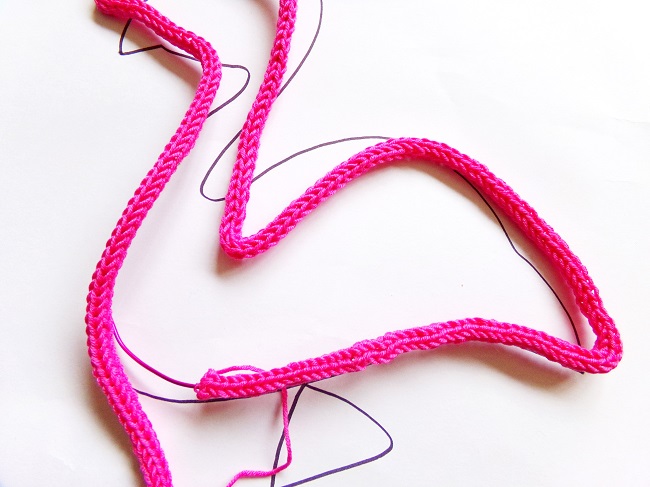
With the aluminum wire, make the outline of the body of the pink flamingo using your previously drawn drawing. Repeat the instructions for the legs (in one thread).
Be sure to leave an extra 1 cm at each end so you can close it later.

STEP 5
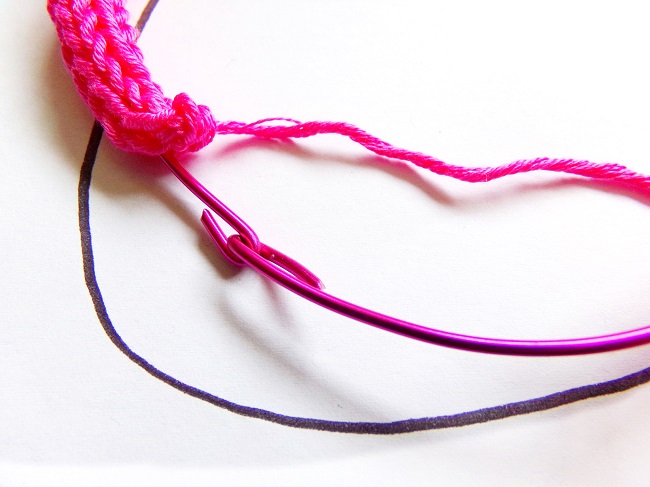
Thread the knit on the wire for the body and legs.

Then, close the ends of the iron wires and tie the ends of the knitted cord around. If there is too much knitting, remove a little bit then stop the stitches.
Twist the legs in the middle of the body of the flemish.


Your pink flamingo made with knitwear and wire is finished. To hang on a wall, you can use a bug ... Easy to do, easy to hang!
We like to see what you do with the tutorials on Perles & Co. So, do not hesitate to send us photos of your creations on our Facebook page or to tag us on Instagram#perlesandco .


You have a question about this tutorial? Ask it to our team and the people who have already tested it. The Perles & Co community is here to help you!
Credits
Perles & Co, Internet & E-Commerce company [05/05/2017] Any reproduction, representation, adaptation, in any form whatsoever, even partial, is prohibited, except for reproduction for private use not intended for collective use, representation in the family circle (art. L 122-5 CPI) and online publishing on condition that the source is mentioned and a link is included to the corresponding page of our site www.perlesandco.com.
