Free shipping on orders over 50€ up to 500g
French Online shop for beads and accessories for the creation of DIY jewellery and other creative hobbies

Log-in

DIY turquoise ceramic heishi bead necklace

Made by :Tiffanie Perles Co
Published on the :18/08/2021
Time :20 minutes
Level :Easy
Prices :27,37€
DIY turquoise ceramic heishi bead necklace

How to make an elastic heishi necklace?

Nothing could be easier than a piece of jewelry made of elastic thread! No need for a clasp. This is a perfect tutorial for beginners who want to make jewelry for the first time. Plus, it's a creative activity that will work for adults and children as young as 8 years old. You can organize a creative summer workshop that will satisfy everyone.

However, there are a few rules that must be followed to prevent your necklace from breaking quickly. First of all, you should know that even if the elastic thread is very practical, it is also a thread that does not have a very long life, regardless of the brand or type of elastic thread. You will be able to keep it for an average of 2 to 5 years depending on the use you make of it and the way you store the jewel.

The plastics used for these wires deteriorate with heat, UV, contact with chemicals and alcohol present in cosmetics, sea salt, chlorine, limestone, etc. If you want to keep your necklace as long as possible, don't bathe with it, don't store it in direct sunlight, but rather in a jewellery box in the shade (but all this is also valid for jewellery in general). Otherwise, just assume that you will need to replace the wire regularly, every 2 years for example.

You will also need to pre-stretch the wire before you make the final knot. Most of these wires will relax a bit after a few days. The best thing is to force them to stretch beforehand so that you don't have this concern once the collar is finished.

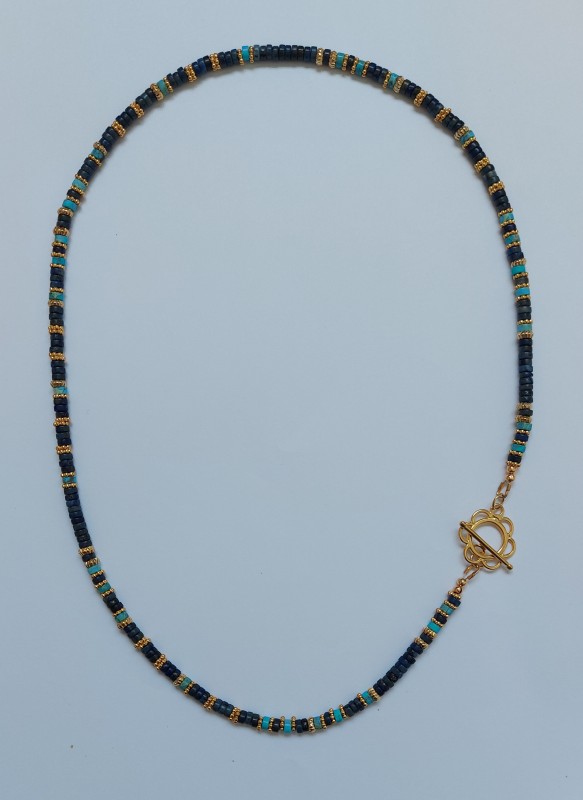
In this tutorial, we used ceramic heishi beads. We also have polymeric heishi beads which are more colorful, lighter and available in different sizes. It all depends on your jewelry preferences. Colorful or handmade?

Tutorial steps

Step 1
DIY turquoise ceramic heishi bead necklace : Step 1

Cut 1.2 m of wire and fold it in half. In this necklace, we're going to double the elastic thread, as the beads are a bit heavy, but a bigger thread would be harder to tie at the end. Fold it in half, tie a knot on the side of the loop to prevent the beads from slipping out of the wire, then string the same beads as in the photo. The turquoise beads are framed by single washers and the duck blue beads are interspersed with double washers.

Depending on your neck or head size, you will need to adjust the length of the thread and the number of beads. This version is for a small head size (54 cm).

Step 2
DIY turquoise ceramic heishi bead necklace : Step 2

Untie the knot at the end and cut the loop so that you have two pieces of wire on each side of the pearl necklace. Make a triple surgeon's knot with the 4 pieces of wire, knotting them as if the two pieces of wire on each side were one wire. If you don't know what a surgeon's knot is, we invite you to go and see our technical sheet in the link. It is made like a simple knot, but instead of winding the wires once, you wind them twice.

Also tighten the collar from the inside by pulling it slightly. Cut the wires 1 mm from the knot, then put jewellery glue on them. Put the gold bead on the knot before the glue dries, so that the knot is hidden. Wait 24 hours before wearing it.

Step 3
DIY turquoise ceramic heishi bead necklace : Step 3

If you have jewelry clips, you can add a pendant in the center with an open ring. If you don't have any, you can thread a pendant that already has a ring in the right direction beforehand as explained before.

Result
Schema  DIY turquoise ceramic heishi bead necklace
Tiffanie Perles Co
 Tiffanie Perles Co - Les tutos de Tiffanie
Bonjour, moi c'est Tiffanie. J'étais créatrice et designer produit chez Perles & Co. J'adore tester de nouveaux DIY et vous faire profiter de mes expériences. Vous pouvez toujours consulter les tutoriels que je vous avais concocté sur le site !
Associated keywords
Share with my friends
Which material to use ?
Please note that the quantities of the suggested equivalents are not necessarily exact. You can adjust them in your basket.
Supplies
Round jumprings open 5x0.8 mm Gilded with fine 24K x25
0,90€
Suggested reference for this article:
5x0.8mm Round open rings - Gold Tone x25
0,90€
0.5 mm Stretch Magic Elastic Cord - Transparent x25m
9,65€
19x17mm Zamac sunflower pendant - Fine Gold Plated x1
1,50€
5x4mm Heishi style ceramic tube beads - Turquoise Green mat x20
1,70€
5x4mm Heishi style ceramic tube beads - Pigeon Blue mat x20
6,82€
5mm worked Round beads - Fine Gold Plated x5
4,80€
6x3mm Flower beads - Fine Gold Plated x10
2,00€
Subtotal : 27,37€
Tools
Jewel Glue Hasulith 30ml
OUTIL-007
Qty : 1
5593 in stock
2,40€
Scissors 25cm x1
SEW-336
Qty : 1
13 in stock
6,40€
Kit of 3 pliers in Perles & Co pocket Pink x1
19,00€
Subtotal : 27,80€
Equivalent product
5x4mm Heishi style ceramic tube beads - White mat x20
1,70€
5x4mm Heishi style ceramic tube beads - Light Brown mat x20
1,70€
5x4mm Heishi style ceramic tube beads - Black mat x20
1,00€
5x4mm Heishi style ceramic tube beads - Terracotta mat x20
1,70€
Roman Coin Pendant 22x19 mm - Gold plated x1
7,90€
Your questions (3)

You have a question about this tutorial? Ask it to our team and the people who have already tested it. The Perles & Co community is here to help you!

By Pascale (14/07/2024 08:53:49)
Bonjour, pourquoi sur un fil a elastique et non sur un fil de pèche ou cable ? merci
Translate the question
Please log in to use this feature
Our Tiffanie J. expert answers you (15/07/2024 09:08:48)
Bonjour, pour offrir un tutoriel aux personnes qui veulent faire un collier en fil élastique :) . L'avantage du fil élastique, c'est qu'il n'y a pas besoin de fermoir donc le prix est moins élevé. C'est aussi plus facile et ça rassure les débutants dans la création de bijoux. Vous pouvez tout à fait le refaire avec du fil câblé et un fermoir. Les perles sont un petit peu lourdes pour du fil de pêche, si vous prenez du fil pêche il faudra prendre un gros diamètre. Du 0,30 mm minium je pense.
Translate the answer
By daphne (17/06/2022 08:56:26)
pour faire le modèle en bleu combien de sachets de chaque couleurs faut il??merci
Translate the question
Please log in to use this feature
Answer from customer Tiffanie J. (17/06/2022 09:06:56)
Bonjour, la quantité indiquée dans la liste de matériel est normalement suffisante (4 sachet de bleu canard et 1 sachet de turquoise). Si vous avez un cou plus large que le modèle ou que vous souhaitez faire un collier beaucoup plus grand, vous pouvez prendre un sachet de bleu canard en plus.
Translate the answer
By Anonyme (13/06/2022 14:20:39)
pourquoi la colle?
Translate the question
Please log in to use this feature
Answer from customer Tiffanie J. (13/06/2022 14:55:29)
Bonjour, la colle va servir à sécuriser le noeud un peu plus et à bloquer la perle sur le noeud.
Translate the answer
Your reviews (1)
Notices subject to control
5/5
Average Grades
Please log in to use this feature
By annael (posted on : 27/10/2021 )
Super modèle, j'aime trop les couleurs, n'ayant pas le matériel sous la main j'ai improvisé et remplacer les céramique par des heishi gemme 4mm, du coup il a fallut que je duplique les séquences de perles, j'ai remplacé le pendentif par un fermoir et voilà
Merci pour ce tuto =D
Translate the notice
Answer from customer Tiffanie Perles&Co (28/10/2021 09:05:32)
Il est encore plus joli comme ça, bravo ! :D
Translate the answer

Credits

Perles & Co, Internet & E-Commerce company [18/08/2021] Any reproduction, representation, adaptation, in any form whatsoever, even partial, is prohibited, except for reproduction for private use not intended for collective use, representation in the family circle (art. L 122-5 CPI) and online publishing on condition that the source is mentioned and a link is included to the corresponding page of our site www.perlesandco.com.