Free shipping on orders over 50€ up to 500g
French Online shop for beads and accessories for the creation of DIY jewellery and other creative hobbiesLog-in
0
Shopping cart
Shopping cart

How to make a pair of dangling earrings?
As you know, every time Puca releases a new color of bead, our partner shares new tutorials to complete your jewelry collection.
This time, Puca' s new cabochons allow you to create a pretty pair of cream and gold pendant earrings, perfect for wearing with any summer outfit.
To personalize your pair of earrings, you can of course vary the colors by choosing from our full range of 18mm glass cabochons by Puca® and Piros glass beads by Puca®.
To learn more about glass bead jewelry, take a look at our other Puca® tutorials.
You'll find all the materials you need for this tutorial at the bottom of the page (please note that for stock reasons, some references may be replaced by similar ones).
Are you ready? We'll tell you how
The steps :
Step 1: Place 45 Miyuki Délicas 11/0 ( DB11) and close.

Step 2: Make 5 rows using the peyote technique with DB11s.
Step 3: Make 2 rows of Miyuki Seed beads 15/0 (R15)
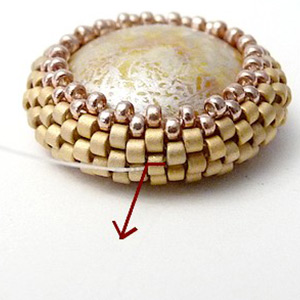
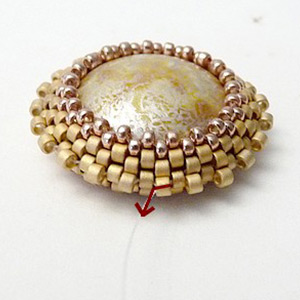
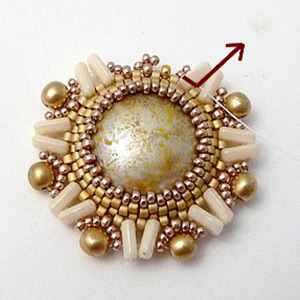
Step 4: Turn your work over and place your cabochon, then place your thread as shown in the photo.

Step 5: Make 2 rows with R15 and place here
Step 6: Place 1 DB11
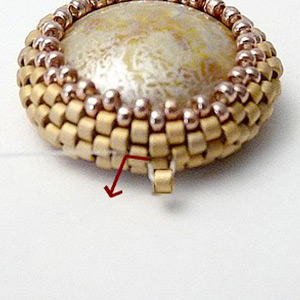
Step 7: Make the whole row and place here
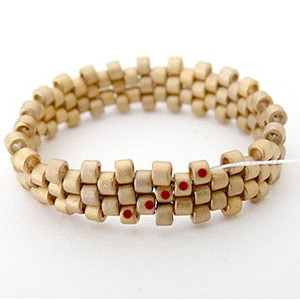
Step 8: Place 1 Piros between the DB11s
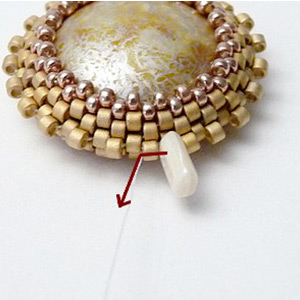
Step 9: Place 1 other Piros
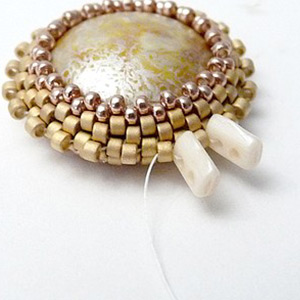
Step 10: Place 1 R11

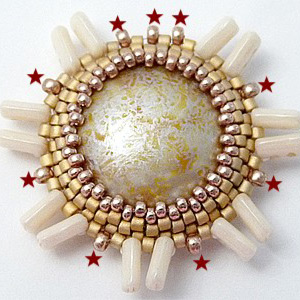
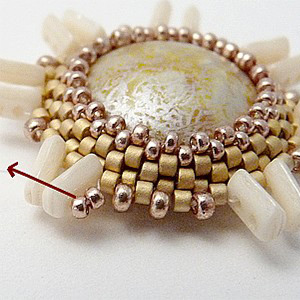
Step 11: Carry out the entire row, alternating steps 8 to 10. Be careful, on the top of the assembly 3 R11 follow each other.
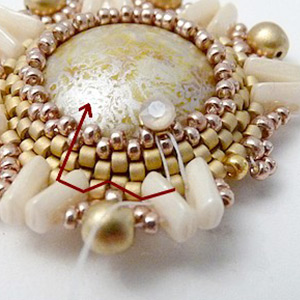
Step 12: Place here in the Piros

Step 13: Place 2 R15 in the Piros top hole.
Step 14: Place 3 R15 in the R11

Step 15: Place 3 R15 in the 2 Piros

Step 16: Continue with steps 13 to 15, then place in the middle R11.
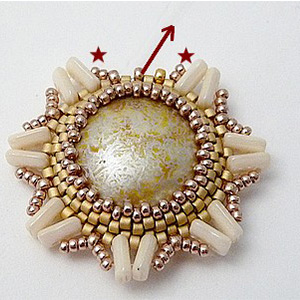
Step 17: Place 3 R11 in a loop

Step 18: Place yourself here in the first R15
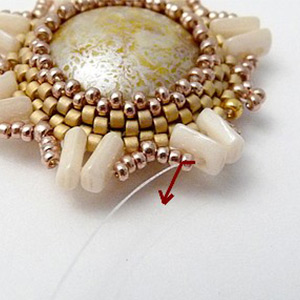
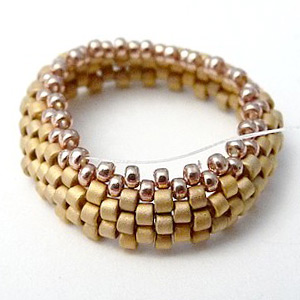
Step 19: Place 1 round bead in the first R15.
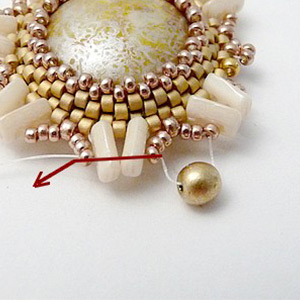
Step 20: You get this. Place yourself in the Piros as shown in the photo.
Step 21: Place 1 Mesh between the Prios and move to the next Piros and continue for the whole row.
Step 22: Place yourself here in DB11, go to the top of the mesh and place yourself as shown in the photo. Do the whole row like this

Step 23: You've got it! Fence your wire, then place your chain, linking it to the Piros and your support with rings.
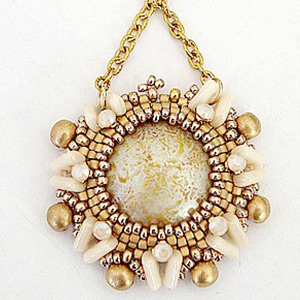
That's it! Your pretty pair of earrings is now finished. Do you approve?
We love to see the results of your creations, so don't hesitate to share them with us on our social networks: our Facebook page and our Instagram page.


You have a question about this tutorial? Ask it to our team and the people who have already tested it. The Perles & Co community is here to help you!
Credits
Perles & Co, Internet & E-Commerce company [31/07/2020] Any reproduction, representation, adaptation, in any form whatsoever, even partial, is prohibited, except for reproduction for private use not intended for collective use, representation in the family circle (art. L 122-5 CPI) and online publishing on condition that the source is mentioned and a link is included to the corresponding page of our site www.perlesandco.com.
