Free shipping on orders over 50€ up to 500g
French Online shop for beads and accessories for the creation of DIY jewellery and other creative hobbies

Log-in

Stay informed in real time

Install Perles & Co on your home screen: tap the Share button in Safari, then "Add to Home Screen".

Stay informed in real time

Install Perles & Co on your home screen for quick access and real-time updates.

Stay informed in real time

Enable notifications to track your orders and never miss our highlights.

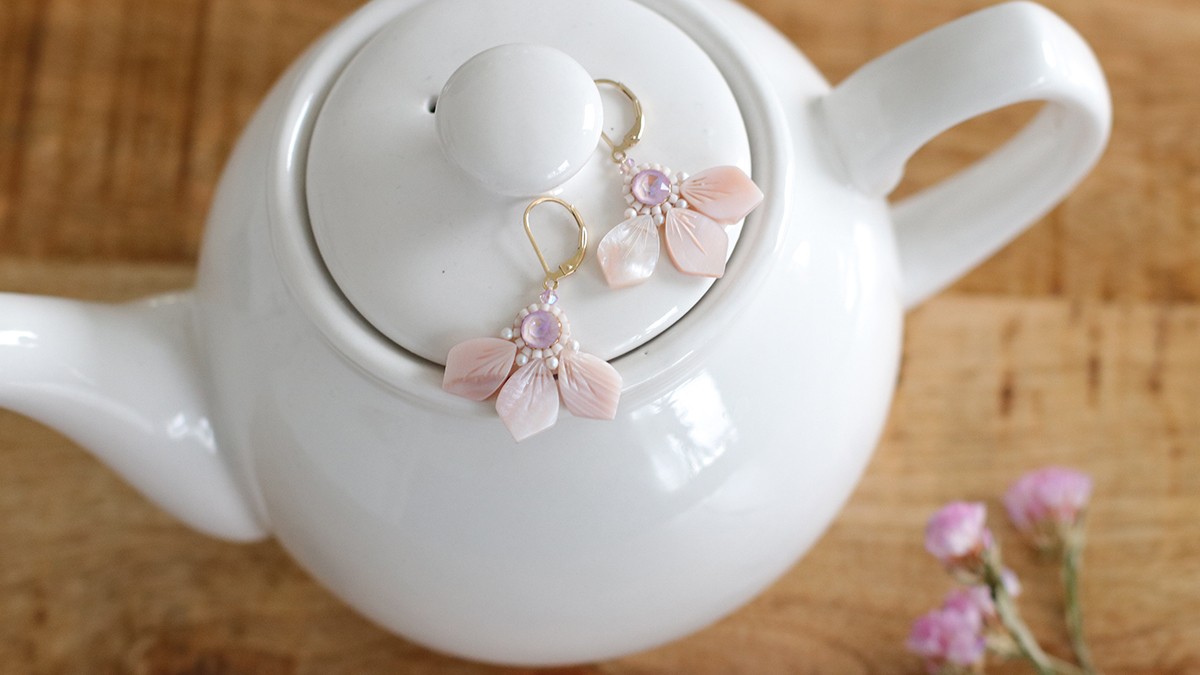
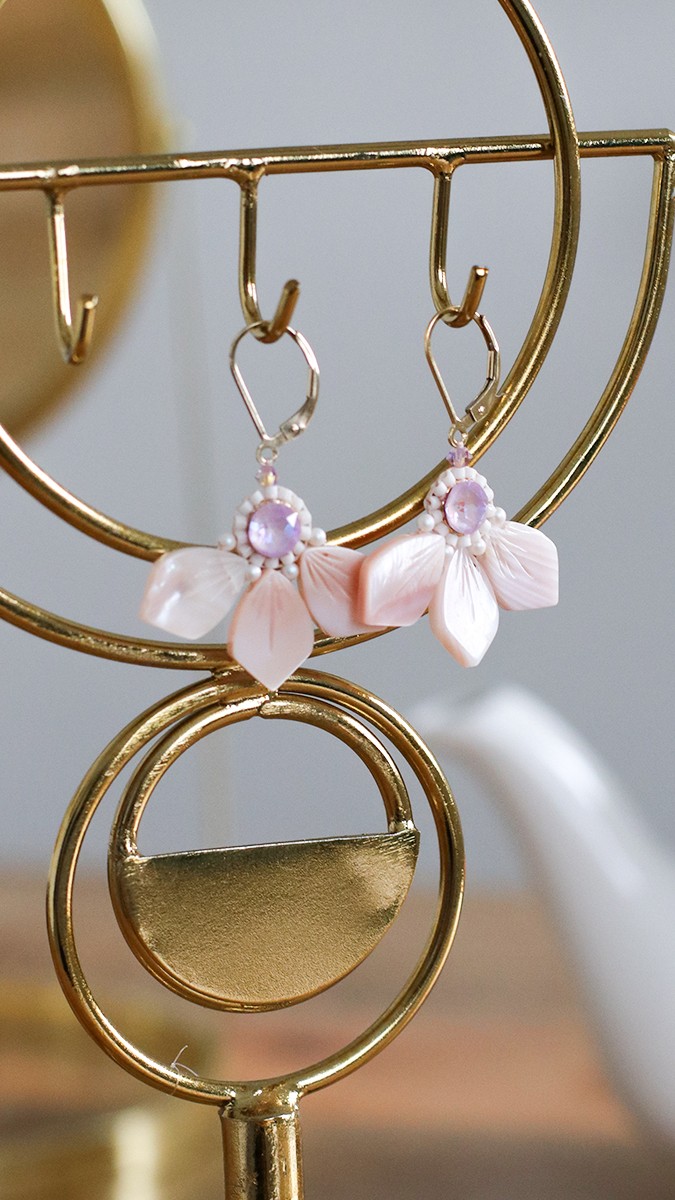
DIY Flower Earrings Made with Mother-of-Pearl, Miyuki Beads, and PureCrystal

Made by :Tiffanie Perles Co
Published on the :14/03/2019
Time :45 minutes
Level :Easy
Prices :46,18€
DIY Flower Earrings Made with Mother-of-Pearl, Miyuki Beads, and PureCrystal

How do you make flower-shaped beads for earrings?

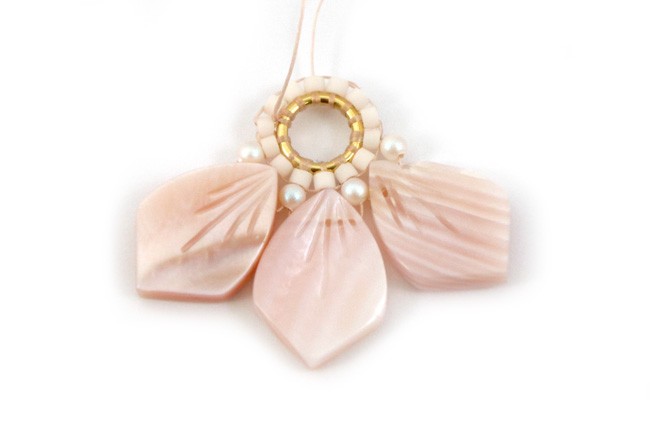
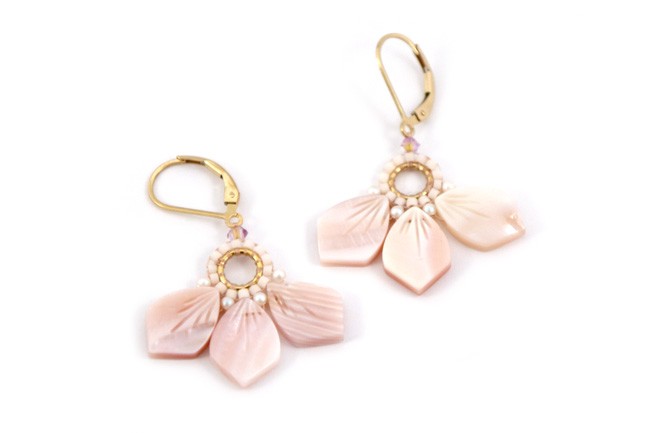
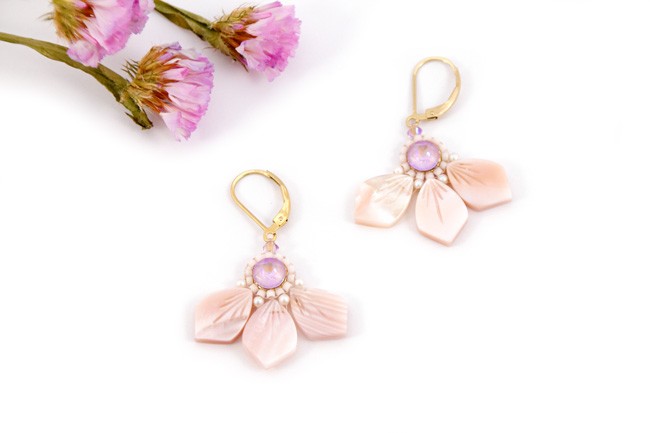
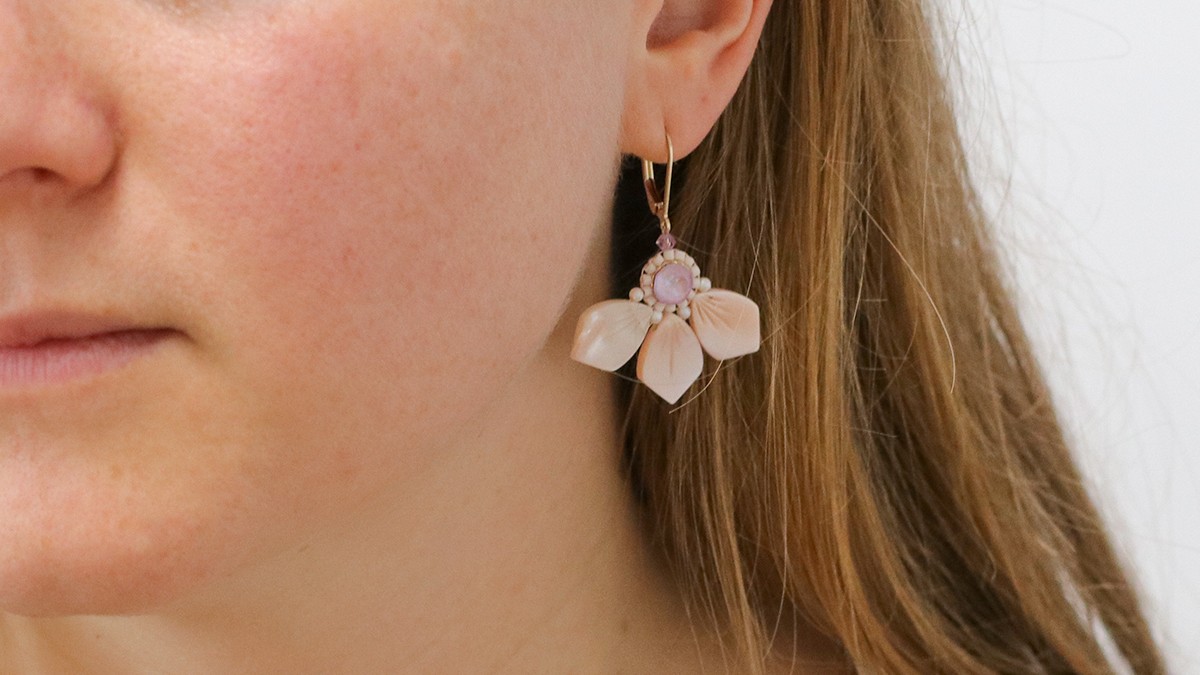
Learn how to weave beads to create flower-shaped earrings. The free earring pattern featured in this tutorial consists of mother-of-pearl petals, 11/0 Miyuki Delica beads, and pearlescent beads, bicones, and cabochons made of PureCrystal.

The earring hooks are 14-karat Gold Filled leverbacks. The rings are also Gold Filled. Gold Filled is a 14-karat gold finish applied to a brass base. The gold content accounts for 1/20 of the product’s total weight—about 50 to 100 times more than in a gold-plated product. Gold Filled is therefore even more durable over time than gold-plated jewelry! You’re also very unlikely to have an allergic reaction to it, since the gold layer is thicker than on gold-plated jewelry.

In this jewelry-making tutorial, you’ll learn how to weave Miyuki beads around a ring and then add PureCrystal pearl beads and mother-of-pearl flower petals to your weaving.

Feel free to share your creations on our Facebook page, in the “Perles & Co Super Customer Club” group, or on Instagram @perlesandco.

Tutorial steps

Step 1
DIY Flower Earrings Made with Mother-of-Pearl, Miyuki Beads, and PureCrystal : Step 1

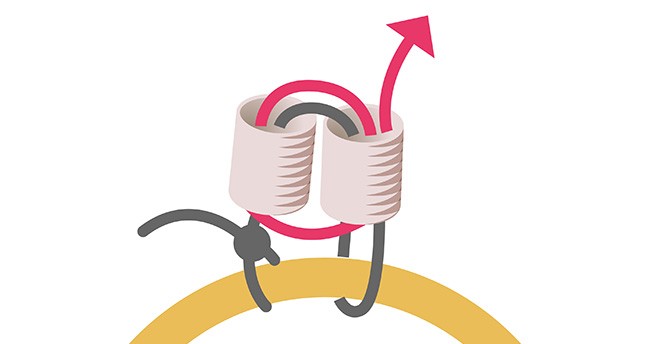
Cut 1 m of Miyuki or Ko weaving thread. Thread it onto a needle and tie the end to the ring with a double knot. Leave a 10 cm tail so you can hide the thread inside the beads later. Thread 2 Miyuki 11/0 Bisque White delica beads and place them against the ring. Pass the needle around the ring and back through the second bead.
Step 2
DIY Flower Earrings Made with Mother-of-Pearl, Miyuki Beads, and PureCrystal : Step 2

Go back to the first bead, then back to the second one to secure your weaving and bring the beads closer together.

Step 3
DIY Flower Earrings Made with Mother-of-Pearl, Miyuki Beads, and PureCrystal : Step 3

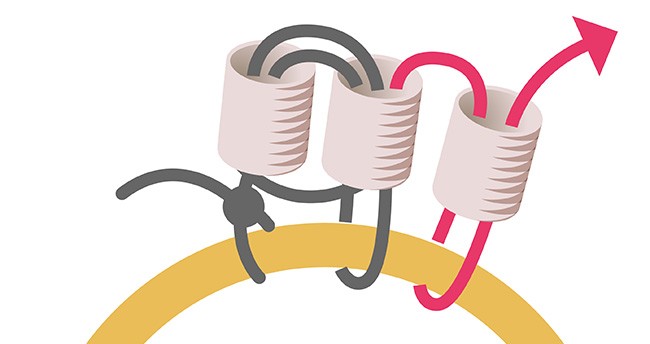
Thread a third Bisque White bead, place it against the ring and the second bead, pass the thread under the ring, and bring it back through the third bead to secure it to the ring. Continue this way all the way around. When you reach the last bead, secure it to the first bead in the circle by threading the string through the first bead and then back through the last one.

Step 4
DIY Flower Earrings Made with Mother-of-Pearl, Miyuki Beads, and PureCrystal : Step 4

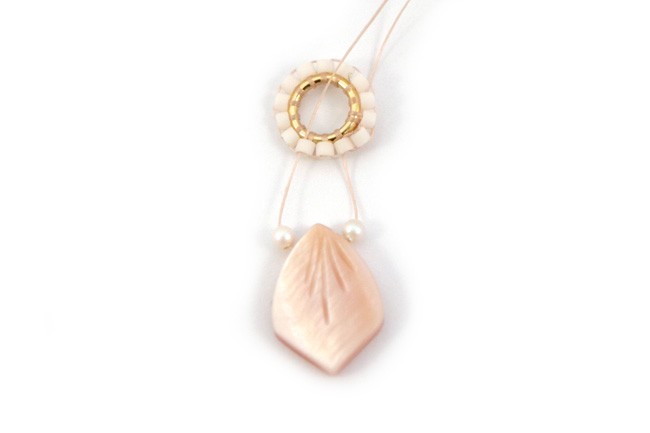
Thread a 2 mm PureCrystal bead, a pink mother-of-pearl petal, another PureCrystal bead, and then insert the needle into the third Miyuki bead, starting from where the thread is coming out. Pass the thread under the ring and back through the Delica bead and the pearlescent bead.

Step 5
DIY Flower Earrings Made with Mother-of-Pearl, Miyuki Beads, and PureCrystal : Step 5

Thread a petal and a pearlescent bead, then insert the needle again 3 beads further along. Repeat step 4 twice to attach 2 more petals. Do not go back through the last pearlescent bead.


Step 6
DIY Flower Earrings Made with Mother-of-Pearl, Miyuki Beads, and PureCrystal : Step 6

Your thread is coming out of a Miyuki bead toward the outside. Thread the needle through the next Miyuki bead, then the one next to that, until you reach the center of the weave. Thread a 3 mm PureCrystal Amethyst bicone onto the needle and pass the needle through the loop of the earwire. Go back through the bicone, the Miyuki bead, pass under the loop, and go back through the Miyuki bead, the bicone, the earwire, and again through the bicone and the Miyuki bead.

Step 7

Tie a knot using the threads you’ve already woven, then thread a few Miyuki beads before cutting the thread. Note: For aesthetic reasons, the thread should extend toward the inside of the ring. Do the same with the end of the thread from the beginning. Try to tie the knots on the same side as where the thread is secured.

Step 8
DIY Flower Earrings Made with Mother-of-Pearl, Miyuki Beads, and PureCrystal : Step 8

Apply jewelry glue around the edge of the ring—preferably on the side where the wires are cut and where you tied the knots—and then glue on the 6 mm PureCrystal cabochons.

Result
Schema  DIY Flower Earrings Made with Mother-of-Pearl, Miyuki Beads, and PureCrystal
Tiffanie Perles Co
 Tiffanie Perles Co - Les tutos de Tiffanie
Bonjour, moi c'est Tiffanie. J'étais créatrice et designer produit chez Perles & Co. J'adore tester de nouveaux DIY et vous faire profiter de mes expériences. Vous pouvez toujours consulter les tutoriels que je vous avais concocté sur le site !
Share with my friends
To go further
Which material to use ?
Supplies
Jewel Glue Hasulith 30ml
OUTIL-007
Qty : 1
1593 in stock
2,40€
Miyuki Beading needles x6
OAC-162
Qty : 1
7842 in stock
1,60€
Miyuki Nylon Beading thread B 0.25 mm Blush x50 m
3,00€
Miyuki Delica 11/0 DB1510 - Opaque Bisque White Mat x8g
3,20€
Gold filled Leverback earrings to decorate 16 mm x2
10,10€
PureCrystal 5810 Pearls 2 mm Pearlescent White Pearl x20
1,20€
Gold filled closed jumprings 7x1mm  x4
7,00€
PureCrystal 1088 Round Stone 6 mm Crystal Lavender DeLite x1
0,60€
PureCrystal 5328 Crystal Bicones 3 mm Amethyst Shimmer 2X x50
5,70€
Mother-of-pearl petal, 14x10 mm - Pink x1
11,38€
Subtotal : 46,18€
Your questions (2)

You have a question about this tutorial? Ask it to our team and the people who have already tested it. The Perles & Co community is here to help you!

By Alessandra (09/09/2026 16:32:03)
Dov'e' il tutorial? Forse non lo avete caricato corettamente?
Translate the question
Please log in to use this feature
Our Lucie expert answers you (09/09/2026 19:13:20)
Buongiorno, abbiamo appena tradotto il tutorial. Grazie
Translate the answer
By Marie (11/11/2021 17:31:28)
Bonjour les images du tutoriel ne s'affichent pas...savez-vous pourquoi? Est-il possible d'avoir une version par mail avec les ilages? Merci,Marie
Translate the question
Please log in to use this feature
Answer from customer Tiffanie J. (12/11/2021 11:09:30)
Bonjour, nous avons eu un souci technique sur certains tutoriels. Cela devrait être réparé maintenant.
Translate the answer
Your reviews (0)
Notices subject to control
Please log in to use this feature

Credits

Perles & Co, Internet & E-Commerce company [14/03/2019] Any reproduction, representation, adaptation, in any form whatsoever, even partial, is prohibited, except for reproduction for private use not intended for collective use, representation in the family circle (art. L 122-5 CPI) and online publishing on condition that the source is mentioned and a link is included to the corresponding page of our site www.perlesandco.com.