Free shipping on orders over 50€ up to 500g
French Online shop for beads and accessories for the creation of DIY jewellery and other creative hobbies

Log-in

1 chevron bracelet with Miyuki Half Tila beads

Made by :Mariette B.
Published on the :16/06/2025
Time :2h
Level :Advanced
Prices :5,10€
1 chevron bracelet with Miyuki Half Tila beads

How to make a 1 chevron bracelet with Half Tila?

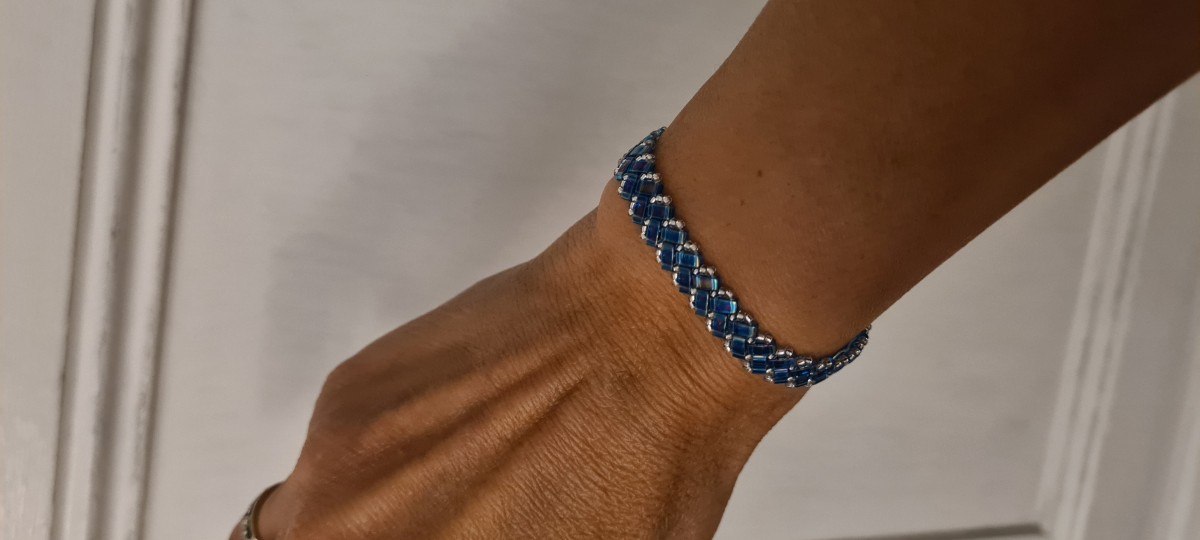
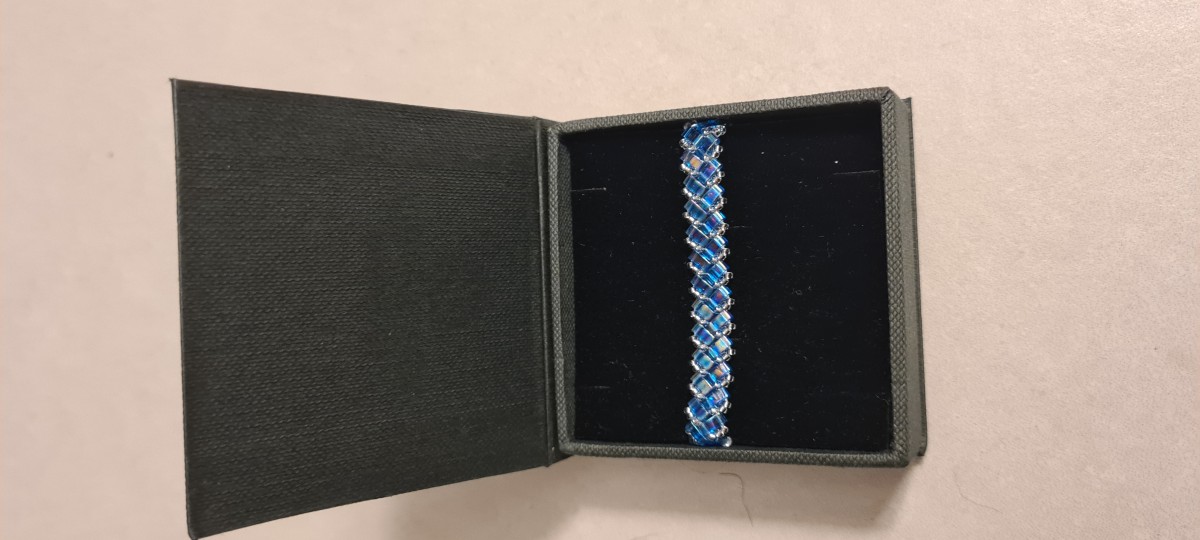
After a first half tila 2 chevrons bracelet tutorial, and a second to learn how to make an odd weave in half tila chevrons, we're ending our series dedicated to chevron tutorials with a tutorial still made by our partner designer Mariette!

This tutorial can be made with classic Fireline 0.12 thread or Elonga 0.30mm elastic thread. If you choose the elastic version, here are Mariette's recommendations:

- you don't need to measure your hand before weaving the bracelet, as it will be elastic. Measure the length to be woven by taking the length directly on your arm at the height where you want to wear it
- use a needle with a large eye
- take enough length to weave the whole bracelet and to make the surgeon's knot at the end
- tighten the elastic thread evenly with each row, otherwise the bracelet may wobble
- practice making the surgeon's knot in advance - don't pull too hard on both strands once the knot is made (risk of breaking the elastic).

If you choose to weave your bracelet with Fireline thread, you can use a size 10 Tulip needle. To close the bracelet, you won't need to make a knot. You can simply zigzag the thread through a dozen or so beads.

The steps of this tutorial are available below, but for greater clarity, feel free to download the pdf to access the illustrated steps.

IF you make this bracelet, don't hesitate to share your creation with us on social networks!

Tutorial steps

Step 1

To begin, thread a bead of a different color from those intended for weaving. This will lock the beads in place when you start.

Thread the bead and iron it once in the same direction.

Step 2

Choose Miyuki Half Tila rectangular beads and Miyuki 15/0 Seed beads.

Step 3

Thread one Seed bead, one Half Tila and then three Seed beads.

Step 4

Pass the needle through the free hole in the last Half Tila thread.

Step 5

Don't pull the wire all the way up against the starter bead. Thread one Seed beads and one
Half Tila.

Step 6

Pass the needle through the first Seed beads in place. Then turn the weave over.

Step 7

Thread two Seed beads.

Step 8

Pass the needle through the free hole in the previous Half Tila.

Step 9

Thread a Seed beads and a Half Tila.

Step 10

Pass the needle through the next Seed beads, the one on its own. Then turn the weave over again.

Step 11

Gently pull on both ends of the thread so that the beads sit securely in place. Thread two Seed beads and pass the needle through the free hole of the last Half Tila in place.

Step 12

Thread a Seed beads and a Half Tila, then pass the needle through the Seed beads alone. Turn the weave over once more.

Step 13

Thread two Seed beads and pass the needle through the free hole of the last Half Tila in place.

Step 14

Thread a Seed beads and a Half Tila, then pass the needle through the Seed beads alone. Turn the weave over.

Step 15

Thread two Seed beads and pass the needle through the free hole in the last Half Tila in place.

Step 16

Thread a Seed beads and a Half Tila, then pass the needle through the Seed beads alone.

Result
Schema  1 chevron bracelet with Miyuki Half Tila beads
Mariette B.
 Mariette B. - Les créations de Mariette
Je suis enseignante et à mes heures perdues, je crée des diagrammes et je cherche de nouvelles techniques que j'aime partager avec Perles & Co et toutes leurs clientes.
Associated keywords
Techniques
Couleurs / Effets
Niveau de réalisation
Pour qui ?
Share with my friends
Which material to use ?
Supplies
Miyuki Seed beads 15/0 0001 - Crystal Silver Lined x8g
1,50€
Subtotal : 5,10€
Tools
Elonga elastic cord 0.30 mm Multi-strand - White x25m
3,50€
Tulip needle with round tip 0,46x51 mm (N°10) x4
4,80€
Fireline Thread - Fused Braid 0.12 mm (6LB) Crystal x50 m
7,50€
Stainless Steel Big Eye beading needle x4
3,80€
Subtotal : 19,60€
Please note that the quantities of the suggested equivalents are not necessarily exact. You can adjust them in your basket.
Equivalent product
Miyuki Seed beads 15/0 0003 - Gold Silver Line
1,50€
Your questions (4)

You have a question about this tutorial? Ask it to our team and the people who have already tested it. The Perles & Co community is here to help you!

By MARIE-JOSE (30/10/2025 09:58:57)
débutante, ce bracelet est super beau mais n'utilisant pas de fil élastique , quelle attache me conseillez vous ? merci d'avance
Translate the question
Please log in to use this feature
Our Laurence expert answers you (30/10/2025 14:09:12)
Bonjour,
Ce tutoriel peut être réalisé avec du fil classique type Fireline 0.12.

Translate the answer
By Claudie (25/08/2025 16:15:21)
Bonjour, je voudrais faire le bracelet chevron avec un filet élastique mais comment faire pour la terminaison de ce bracelet est-ce que je dois réenfiler dans le début je ne sais je ne sais pas comment faire merci pour votre réponse je vous souhaite bon courage
Translate the question
Please log in to use this feature
Our Laurence expert answers you (26/08/2025 09:17:27)
Bonjour,
Les étapes à suivre si vous choisissez un fil élastique sont mentionnées en haut de page du tutoriel :

Ce tutoriel peut être réalisé avec du fil classique type Fireline 0.12 ou du fil élastique Elonga 0.30mm. Si vous choisissez la version élastique, voici les recommandations de Mariette :
- vous n'avez pas besoin de mesurer votre main pour pouvoir ensuite passer le bracelet puisqu'il sera élastique. Mesurez la longueur à tisser en prenant la longueur directement sur votre bras à la hauteur où vous souhaitez le porter
- utilisez une aiguille à grand chas
- prendre une longueur suffisante pour tisser tout le bracelet et pour faire le noeud de chirurgien à la fin
- tendre le fil élastique à chaque rang de manière uniforme sinon le bracelet risque d'onduler
- s'entraîner à faire le noeud de chirurgien à l'avance- ne pas trop tirer sur les deux brins une fois que le noeud est fait (risque de casser l'élastique)
 
Translate the answer
By Zaubette (14/07/2025 16:31:07)
Bonjour,quels
anneaux fermés vous utilisez et je voudrais savoir aussi si vous avez des anneaux fermes avec une chaînette.
Merci bon courage
Claudie ou zaubette.
Translate the question
Please log in to use this feature
Our Lucie expert answers you (16/07/2025 10:08:28)
Bonjour, d ans le tutoriel, c’est du fil élastique qui a été utilisé, il n’y a donc pas d’anneaux fermés.
Vous pouvez retrouver toutes les étapes en téléchargeant le schéma au format PDF.
Translate the answer
By Marion (17/06/2025 16:23:16)
Gibt es die Anleitung auch auf deutsch?
Translate the question
Please log in to use this feature
Our Margaux expert answers you (02/07/2025 14:52:01)
Hallo, ich habe gerade die Textschritte hinzugefügt, damit Sie sie auf Deutsch haben können. Ich hoffe, das hilft Ihnen bei der Durchführung des Tutorials. Vielen Dank.
Translate the answer
Your reviews (0)
Notices subject to control
Please log in to use this feature

Credits

Perles & Co, Internet & E-Commerce company [16/06/2025] Any reproduction, representation, adaptation, in any form whatsoever, even partial, is prohibited, except for reproduction for private use not intended for collective use, representation in the family circle (art. L 122-5 CPI) and online publishing on condition that the source is mentioned and a link is included to the corresponding page of our site www.perlesandco.com.