Average Grades
bonjour je ne comprend pas comment faire le noeud feston, pourriez-vous m'aidez svp?
1 Answer
Show answers

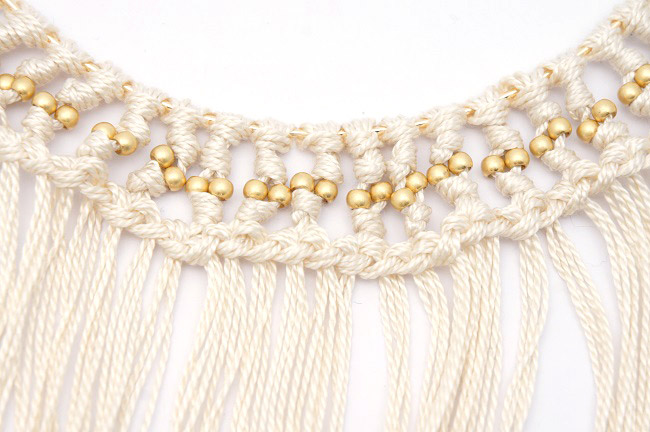
How to make a macramé necklace?
Macramé is a technique based on the use of different types of knots. In this tutorial, we'll teach youstep-by-step how tomake amacramé necklace.
The combination of cream color and golden beads and spacers creates an ethnic-chic necklace, ideal for the summer season. If you'd like to create this necklace in another color, we recommend you choose from our DMC n°5 pearl cotton range (1mm thread).
![]() We love to see your creations, so don't wait any longer and send them to us on our Facebook page or tag us on Instagram with #perlesandco!
We love to see your creations, so don't wait any longer and send them to us on our Facebook page or tag us on Instagram with #perlesandco!
Step 1
Cut 80 pieces of 30cm DMC bead cotton. Gather them four by four. Fold one set of four strands in half and tie a lark's knot around the neck. Do the same for the other strands. You should end up with 20 lark's knots on the neckband.
To learn how to make a lark's knot, see our data sheet.

Step 2
Make a single knot below each lark's knot. Use a stick or your finger to place the knot just below the lark's knot: place the stick in the knot hole, sticking part of the knot over where you want to place it.


Step 3
Separate the wires in half again and thread 4 wires through each bead. Once again, tie a simple knot with all eight wires.

Step 4
Split the eight wires in half so that you have four in each hand. Tie the two sets of wires at the right end of the necklace with a half straight festoon knot. Use the right-hand thread for the knot and don't overtighten. Then take the left-hand set of wires from the right-hand set of wires you used for the half festoon knot. Tie another half right festoon knot with this set, using the 4 wires on the left as a base. Continue doing the same until you reach the end of the collar. Make sure you always pass the wires in the same direction.
Step 5
Start again from the right to make a second series of straight festoon half-knots.

Step 6
Flatten the knots and position them correctly. Generously apply glue to the base of the knots and glue the cord in place. Then trim the cord so that it doesn't protrude from the weave, and apply glue to the ends so that it doesn't unravel.

Step 7
Once the glue is completely dry, add the triangles with open rings.


NB: Please note that the list of products below does not fully correspond to the presentation photo. For stock reasons, some products in this tutorial have been replaced by equivalents.


You have a question about this tutorial? Ask it to our team and the people who have already tested it. The Perles & Co community is here to help you!
Credits
Perles & Co, Internet & E-Commerce company [07/04/2017] Any reproduction, representation, adaptation, in any form whatsoever, even partial, is prohibited, except for reproduction for private use not intended for collective use, representation in the family circle (art. L 122-5 CPI) and online publishing on condition that the source is mentioned and a link is included to the corresponding page of our site www.perlesandco.com.
