
Average Grades
Bonjour, pouvez-vous me donner la longueur du bracelet, hors fermoir en perles? Merci beaucoup et bravo, c'est un très beau modèle.
2 Answers
Show answers
Install Perles & Co on your home screen: tap the Share button in Safari, then "Add to Home Screen".
Install Perles & Co on your home screen for quick access and real-time updates.
Enable notifications to track your orders and never miss our highlights.
How to start an odd Peyote weaving?
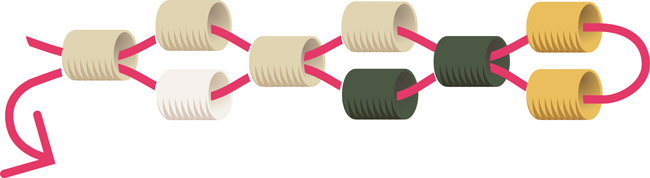
Do you dream of creating a pearl bracelet without a loom? This technique exists! It is called the Peyote weaving. Please note this technique does not use the same grids / weaving patterns as weaving on a loom . On a loom, the beads are aligned in both directions (horizontally and vertically) while in peyote weaving they are aligned only in one direction and staggered in the other. Of course other hand weaving techniques exist but we will talk here about one of the two most common which allows to make pearl bracelets . The other is the Brick Stitch and is mainly used to make earrings, pendants, pins and small decorations.
The bracelet presented in this video tutorial comes from one of our old limited edition weaving kits. Many of you asked us about the grid and how to make the Miyuki pearl clasp for this bracelet. Here is the weaving grid of the dream catcher bracelet. You have the choice between the Khaki version or the Terracotta version. The list of pearls is indicated under each weaving grid and you can add them directly to your basket from the list at the bottom of the page. Below half of the diagrams is sufficient to weave the bracelet but if you want to download and print the free peyote bracelet diagrams in full in PDF format click on the link.

References of the Miyuki Delicas 11/0 pearls used: DB-1832, DB-2275, DB-0351, DB-0120, DB-1900, DB-0380

References of the Miyuki Delicas 11/0 pearls used: DB-1832, DB-2288, DB-0203, DB-2282, DB-1155, DB-2106
Given the complexity of the clasp and the time required to make this entire bracelet, we have divided this tutorial into two parts. Here the bracelet itself and another technical sheet which shows you on video how to make a "T" clasp in pearls . Please note the clasp uses 3 different weaving techniques. If you are a beginner prefer to finish the bracelet with rings, an extension chain and a carabiner.
Photo of the pearl "T" clasp:

Step 1 :
For more weaving comfort, and as the bracelet is symmetrical, we will start by weaving the center of the bracelet. You can obviously decide otherwise, adapt your weaving method to what suits you best. However, in general, we do not start by weaving the point of the bracelet, we do it later because it is much simpler to make a reduction in peyote pearls than an increase. Thread the first two rows of weaving at the same time following a zigzag on the diagram. You must therefore have threaded 21 pearls.

2nd step :
Thread a new golden pearl and pass the needle through the persimmon pearl. Tighten and position the two beads side by side.

Step 3:
Thread a khaki pearl and go through the beige pearl on the diagram. Tighten and position them well side by side. Add a white pearl and pass the thread through the other beige pearl. Tighten.
Step 4:
Continue weaving the third row and exit with the golden pearl at the end of the first row.

Step 5:
Add a golden pearl and go through the golden pearl above. Go back to the new golden bead and start weaving the fourth row.


Step 6:
At the end of the fourth row, you can add a new golden bead to weave the fifth row.

Step 7:
At the end of the row, repeat step 5. This change of row is carried out every other row in the odd weaving, so always on the same side. Continue in this way following the pattern of the weaving. As the weaving grows, it will be easier for you to see where to add beads because the weaving will form "hollows" which you will only need to fill. To start the decrease on the weaving, simply weave the row and iron in the next golden pearl.

Step 8:
Go through the white and red beads on the diagonal diagram.

Step 9:
Go to the red pearl above and stand out in the white pearl to its right.

Step 10:
Go through the golden pearl and add a golden pearl. Continue the row and repeat step 9 for each decrease.

Step 11:
The strip of 3 pearls at the end of the bracelet will allow you to connect the clasp to the bracelet. Start weaving and then leave the thread; don't cut it. You will adjust the length of the band once the bracelet and the clasp are woven. If you don't want to make the pearl clasp, finish the bracelet with a point. Then pass the needle through a closed ring and return to the weaving. Iron a second time in the ring and the weaving to solidify everything, wedge your thread in the weaving and cut it before adding the chain and the carabiner with an open ring.

Notes: Remember to tighten and replace your pearls as you go.


Do not hesitate to show your creations on our Facebook page, in the Super club group of Perles & Co customers or on Instagram by quoting us with @perlesandco or with #perlesandco.


You have a question about this tutorial? Ask it to our team and the people who have already tested it. The Perles & Co community is here to help you!
Credits
Perles & Co, Internet & E-Commerce company [13/05/2020] Any reproduction, representation, adaptation, in any form whatsoever, even partial, is prohibited, except for reproduction for private use not intended for collective use, representation in the family circle (art. L 122-5 CPI) and online publishing on condition that the source is mentioned and a link is included to the corresponding page of our site www.perlesandco.com.

