Average Grades
Free shipping on orders over 50€ up to 500g
French Online shop for beads and accessories for the creation of DIY jewellery and other creative hobbiesLog-in
0
Shopping cart
Shopping cart

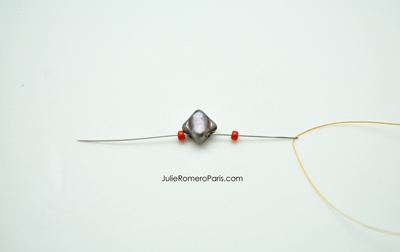
Step 1:
To begin, string the sequence of 1 Superduo + 1 Delica onto the thread, and repeat this 4 times.

Step 2:
Form a circle and return to the opposite side of the starting hole.

Step 3:
After passing the needle through the circle you just formed twice, reposition your needle so that it emerges from the top hole of a Superduo bead. Then thread 3 Delicas.

Step 4:
Thread the needle through the hole of the next Superduo bead.

Step 5:
Repeat this around the entire circumference.

Step 6:
Bring the needle back out through the first Delica bead in the group of three Miyuki beads.

Step 7:
Thread a Tango bead as follows:

Step 8:
Pass the needle through the second hole of the Tango bead, then pass it through Delica #3, the Superduo, and the next Delica.

Step 9:
Using your needle, thread a Tango bead as shown in the photo below.

Step 10:
Thread the needle through the second hole of the Tango bead, through the Miyuki Delica bead, through the Superduo, and then through the following Delica beads.

Step 11:
Thread another Tango bead as follows: pass the thread through the longer hole first. Pass the needle back through the second hole of the Tango bead, then pass the needle through the Delica, the Superduo, and the Delica again.

Step 12:
For the fourth Tango bead, thread it through the shortest hole first, then pass the needle through the second hole of the bead, and repeat the previous steps.

Step 13:
After adding the last Tango bead, pass the needle between the following beads and tie a securing knot and a finishing knot before cutting the threads. Here is the finished module. If you followed the steps correctly and maintained the correct positioning of the Tango beads, your threads should be parallel.
Step 14:
Make 7 modules.

Step 15:
We’ll now join the modules you’ve just created. Take another thread and a bead to hold it in place. Tie a half-knot; it needs to be easy to remove once the project is finished.

Step 16:
Thread the needle through the Tango bead, the Delica, the Superduo, the Delica, and then bring it back out through the Tango bead.

Step 17:
Separate the modules with 11/0 seed beads.

Step 18:
String 9 11/0 seed beads and form a loop.

Step 19:
Then alternate one 11/0 seed bead, one silky bead, and another 11/0 seed bead between each module.


Step 20:
Make another arch of 9 seed beads when you reach the end.

Step 21:
Pass the needle through the next few beads, tying off the thread before cutting it.

Step 22:
Don’t forget to do the same with the thread attached to the bead. Remove the bead and pass the thread through the next beads before cutting the thread.


Step 23:
Take a new thread and thread it through the loop, emerging from the side of the Silky beads.

Step 24:
Thread 2 11/0 seed beads and 1 8/0 seed bead.

Step 25:
Thread on a pompom.

Step 26:
After the pompom, thread 1 8/0 seed bead and 2 11/0 seed beads, then sew in a circle, returning to the starting bead.

Step 27:
Next, thread 2 11/0 seed beads + 1 8/0 seed bead + the pompom + 1 8/0 seed bead + 2 11/0 seed beads, and pass the needle through the silky bead.

Step 28:
Repeat this last step until you reach the other end. Then secure your work with finishing knots and cut the thread.

Step 29:
Once the front panel is finished, you can tie leather cords to both ends and make a securing knot—and there you go, your necklace is ready to wear.


You have a question about this tutorial? Ask it to our team and the people who have already tested it. The Perles & Co community is here to help you!
Credits
Perles & Co, Internet & E-Commerce company [26/06/2016] Any reproduction, representation, adaptation, in any form whatsoever, even partial, is prohibited, except for reproduction for private use not intended for collective use, representation in the family circle (art. L 122-5 CPI) and online publishing on condition that the source is mentioned and a link is included to the corresponding page of our site www.perlesandco.com.
