Average Grades
Free shipping on orders over 50€ up to 500g
French Online shop for beads and accessories for the creation of DIY jewellery and other creative hobbiesLog-in
0
Shopping cart
Shopping cart
Install Perles & Co on your home screen: tap the Share button in Safari, then "Add to Home Screen".
Install Perles & Co on your home screen for quick access and real-time updates.
Enable notifications to track your orders and never miss our highlights.

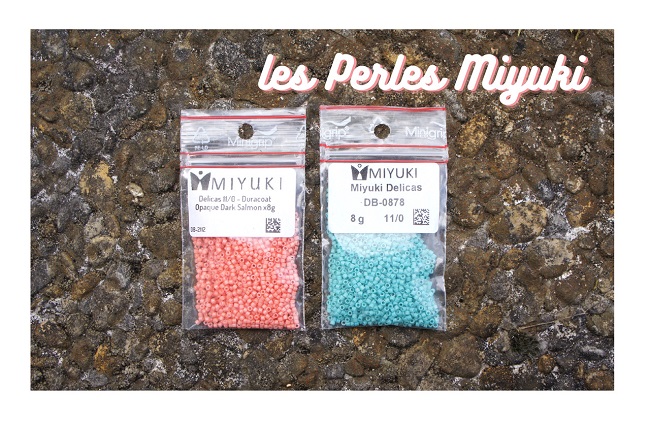
In this tutorial, you'll learn how to make a pair of earrings with a triangular brick stitch weave combined with feathers. This jewel was made with Miyuki Delicas coral and mint beads, the trendy colors of summer.
Many thanks to Charlotte for this step-by-step guide to brick stitch weaving.
Want to change colors? No problem, just choose your Miyuki Delicas beads!
Want to make other bead weavings? Find over 90 bead weaving tutorials in our tutorials section. If you're a beginner, take a look at our bead weaving tutorials, after which you won't have to worry about brick stitch weaving with augmentation and reduction.
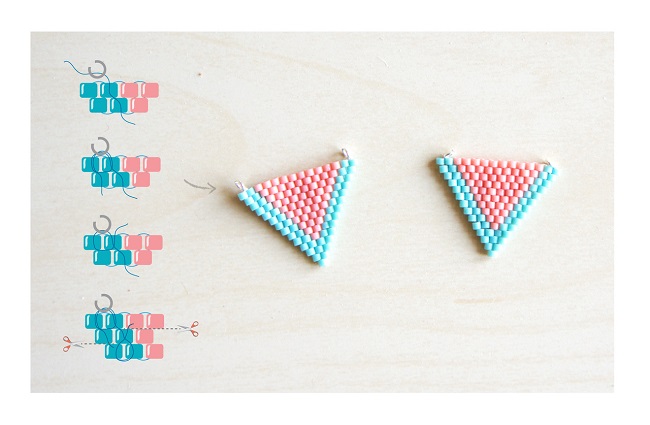
STEP 1: Weaving
The "Brick Stitch" method is used for both weaves.
Tips from the designer:


How do I start a Brick Stitch?
Start by threading the first two beads. Then thread through the first bead to create a loop, thread through the third bead and thread through the previous bead. Repeat for each bead in the first line.
How to make an invisible reduction?
Thread two beads, then pass your needle under the thread connecting the 2nd and 3rd beads in the row below. Then pass your thread back through the two beads in the opposite direction. Your thread is now in the first bead, so pass your needle through the second bead from bottom to top.
For the third bead, pass your needle under the thread connecting the 3rd and 4th beads, then pass it back through the bead in the opposite direction. Repeat until the end of the line.
How to make a simple increase?
Thread two beads, then pass your needle under the thread connecting the 1st and 2nd beads of the line below. Then pass your thread back through the last bead from bottom to top.
For the third bead, pass your needle under the thread connecting the 2nd and 3rd beads, then pass it back through the bead in the opposite direction. Repeat until the end of the line.
Tips from the designer :
STEP 2: assembly
Once you've made the weaves for each earring, you first need to attach the open rings. To secure the open rings, use thread to fix the ring in the middle of the two beads at each end (see diagram). Pass the thread through the beads twice to create a knot and secure the ring. Repeat this action at each end of the two weaves.
Tips from the designer:
STEP 3: Dressing
Now cut 6 cream and 4 turquoise feathers, each 3 cm high. Next, cut the bottom of the feather perpendicularly, then remove excess feathers/thread by hand.
Glue the reverse side of the weave to solidify it and, at the same time, glue the feathers to it harmoniously. Don't hesitate to use a generous amount of glue to ensure that the loops remain solid.

STEP 4: Finishing
For a cleaner, prettier finish, glue a triangle spacer over the feathers of each loop. Finally, slide the two 5 cm-long silver chains into the open rings, then combine the two chains into an open ring that you slide into a screw clip. Repeat these instructions for the second earring. Take care to ensure that the screw clip is in the same direction as the weave.

Your earrings are now finished!


You have a question about this tutorial? Ask it to our team and the people who have already tested it. The Perles & Co community is here to help you!
Credits
Perles & Co, Internet & E-Commerce company [30/06/2017] Any reproduction, representation, adaptation, in any form whatsoever, even partial, is prohibited, except for reproduction for private use not intended for collective use, representation in the family circle (art. L 122-5 CPI) and online publishing on condition that the source is mentioned and a link is included to the corresponding page of our site www.perlesandco.com.
