Free shipping on orders over 50€ up to 500g
French Online shop for beads and accessories for the creation of DIY jewellery and other creative hobbies

Log-in

Oval ring with cabochon and natural stones

Made by :Margaux Perles & Co
Published on the :14/03/2024
Time :20 minutes
Level :Easy
Prices :17,40€
Oval ring with cabochon and natural stones

How to make a ring with natural stones?

Fall for the natural stone trend with this oval ring tutorial! Simple to make and inexpensive, you'll be able to do it even if you're a beginner in jewelry design.

For this tutorial, I've chosen to use amazonite beads for both the cabochon and the beads around the ring. However, you can choose to use other beads if you wish. Why not imagine a little mix of colors for the more creative among you? The cabochon compatible with the ring is available in several stone categories: Carnelian, Howlite, Amethyst, Lapis Lazuli or Moonstone. As for the 2mm pearls all around the ring, we have a wide choice on our website, so you're sure to find what you're looking for!

The little extra of this ring? It's adjustable and fits sizes 52 to 58. Ideal if you'd like to offer a piece of handmade jewelry to a loved one and don't know their finger size.

If you like this type of ring, you might like this natural stone cabochon ring tutorial? You can even wear them together!

If you like this DIY jewelry idea and would like to republish it, don't hesitate to share your creation on our social networks by mentioning us on your publication.

Tutorial steps

Step 1
Oval ring with cabochon and natural stones : Step 1

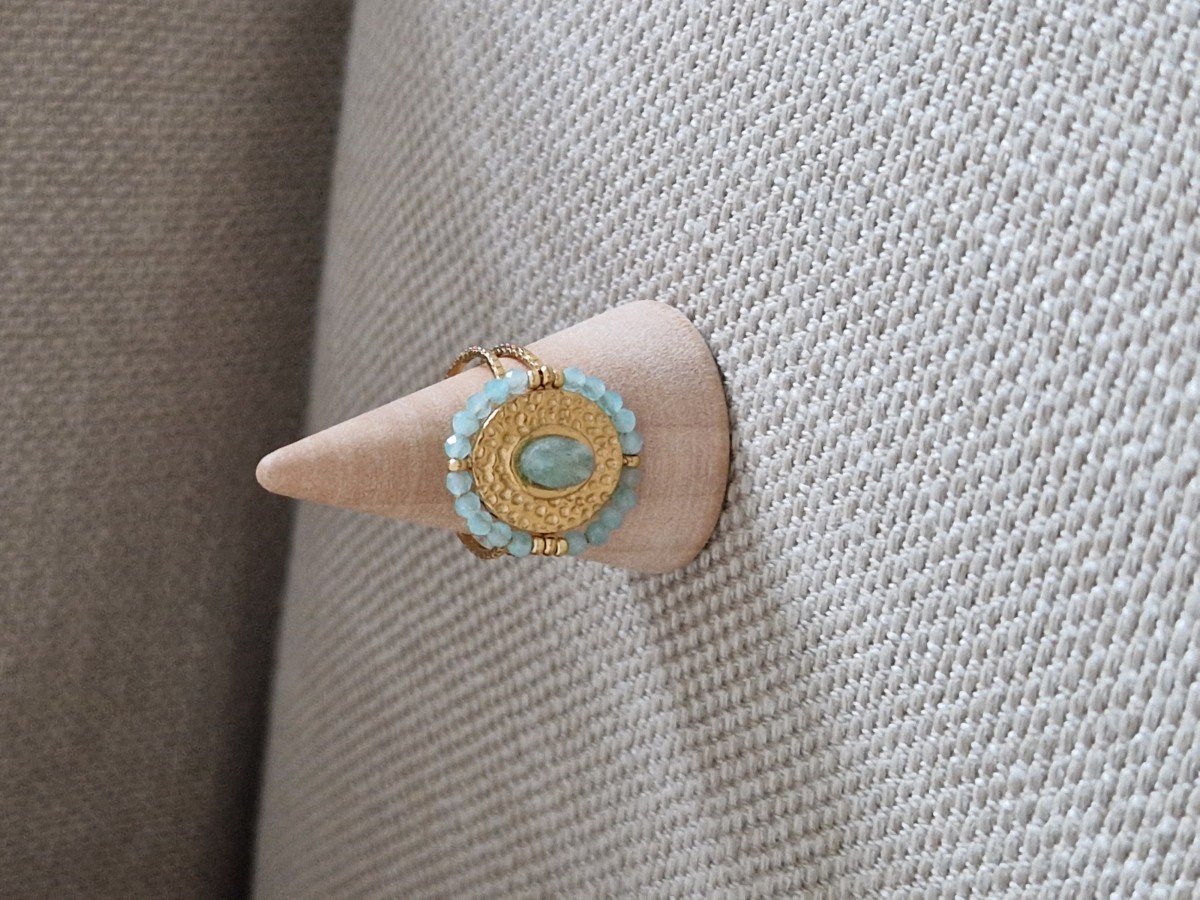
To begin, we'll glue our cabochon to the ring support using Hasulith glue. Place a dot of glue in the center of the ring and glue your cabochon. Allow to dry for 24 hours before continuing with your creation.

You can also choose to do this step last if you wish.

Step 2
Oval ring with cabochon and natural stones : Step 2

Next, take your nylon thread and cut a sufficient length. Start by tying a double knot on the first ring.

If you're just starting out, take a look at this earrings tutorial, which will show you how to tie the knots. The wire used is different, but the technique remains the same.

Next, start stringing your natural stone beads. Use a needle to make threading easier.

Step 3
Oval ring with cabochon and natural stones : Step 3

Go all the way around, threading the needle through each ring as you go.

Result
Schema  Oval ring with cabochon and natural stones
Margaux Perles & Co
 Margaux Perles & Co - Les tutos de Margaux
Hello, moi c'est Margaux ! Chez Perles & Co, je suis chargée de partenariats et relations presse. J'adore m'essayer à de nouveaux loisirs créatifs et je suis un peu une touche à tout : bijoux, polymère, crochet, jesmonite, bougies et depuis peu couture !
Associated keywords
Techniques
Couleurs / Effets
Niveau de réalisation
Pour qui ?
Share with my friends
Which material to use ?
Supplies
Jewel Glue Hasulith 30ml
OUTIL-007
Qty : 1
5177 in stock
2,40€
Bead Faceted round beads  2mm Amazonite x38cm
8,80€
6x4mm Flat oval cabochon - palet - gemstone - Amazonite x1
0,80€
Subtotal : 17,40€
Tools
Miyuki Beading needles x6
OAC-162
Qty : 1
6867 in stock
1,50€
Subtotal : 4,30€
Please note that the quantities of the suggested equivalents are not necessarily exact. You can adjust them in your basket.
Equivalent product
Round faceted beads 2 mm - Howlite x38cm
11,50€
Bead Faceted round beads  2mm Amethyste x38cm
10,30€
Round faceted beads 2 mm gemstone - Moonstone x39cm
10,50€
6x4mm Flat oval cabochon - palet - gemstone - Amethyst x1
0,90€
6x4mm Flat oval cabochon - palet - gemstone - Howlite x1
0,80€
6x4mm Flat oval cabochon - palet - gemstone - Lapis lazuli x1
0,90€
6x4mm Flat oval cabochon - palet - gemstone - Moonstone x1
0,90€
6x4mm Flat oval cabochon - palet - dyed gemstone - Carnelian x1
0,80€
Your questions (1)

You have a question about this tutorial? Ask it to our team and the people who have already tested it. The Perles & Co community is here to help you!

By Magdalena (07/04/2024 21:07:22)
Cette bague est magnifique ! Mais comment faire pour que les perles soient bien stables ? J’ai beau serrer le fil, elles bougent encore…
Merci de votre réponse !
Translate the question
Please log in to use this feature
Our Margaux I. expert answers you (08/04/2024 10:37:00)
Bonjour Magdalena ! Pour que les perles soient plus stables, plusieurs options s'offrent à vous : vous pouvez faire un point de colle Hasulith sur le bord de la bague pour bien fixer les perles, ou utiliser de la résine uv led si vous en avez ou bien encore utiliser du fil cuivre. Belle journée !
Translate the answer
Your reviews (1)
Notices subject to control
5/5
Average Grades
Please log in to use this feature
By Veronique (posted on : 31/03/2024 )
Merci pour ce tuto, très bien expliqué et superbe bague. J'ai inséré des rocailles dorées de chaque côté de la bague.
Veronique
Translate the notice
Our Margaux I. expert answers you (03/04/2024 11:55:33)
Merci beaucoup pour votre retour sur ce tutoriel ! La verison avec les rocailles dorées est très jolie également !
Translate the answer

Credits

Perles & Co, Internet & E-Commerce company [14/03/2024] Any reproduction, representation, adaptation, in any form whatsoever, even partial, is prohibited, except for reproduction for private use not intended for collective use, representation in the family circle (art. L 122-5 CPI) and online publishing on condition that the source is mentioned and a link is included to the corresponding page of our site www.perlesandco.com.