How to weave in even peyote using the Peyote Quick Start?
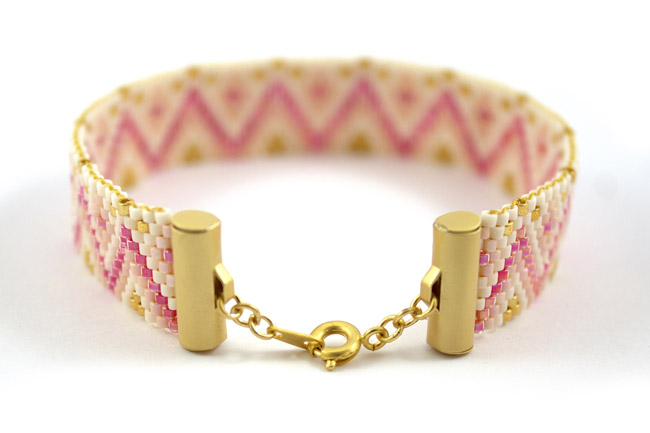
The even Peyote weave is one of the easiest and quickest needle weaves to learn. In addition, thanks to the Quick Start Peyote you will learn even faster to weave without a loom. Start with this pink and cream beaded bracelet pattern or even this trio of even peyote bracelets before jumping into odd peyote weaving patterns.


Step 1 :
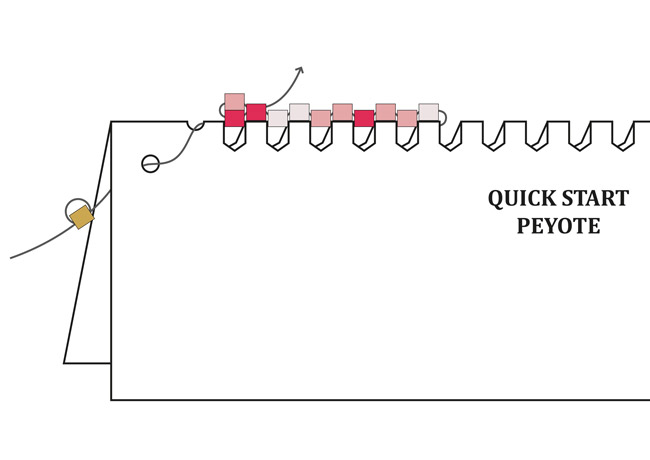
Cut 1 m of thread and fix a holding bead 15 cm from the end of the thread. To do this, thread the bead and iron the thread through the bead in the same direction 2 times.

2nd step :
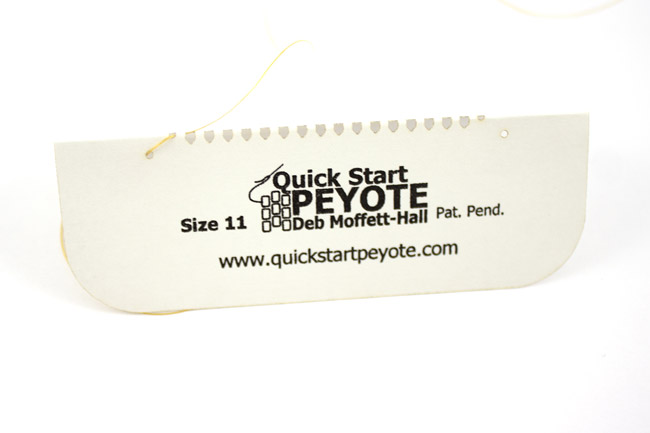
Fold the quick start peyote in half. Pass the needle through the bottom hole through the inside of the quick start peyote. Then go through the hole above and then into the hole to the right of it.

Step 3:
Add a bead between each hole following the diagram. The first five beads correspond to the first row in the diagram.


Step 4:
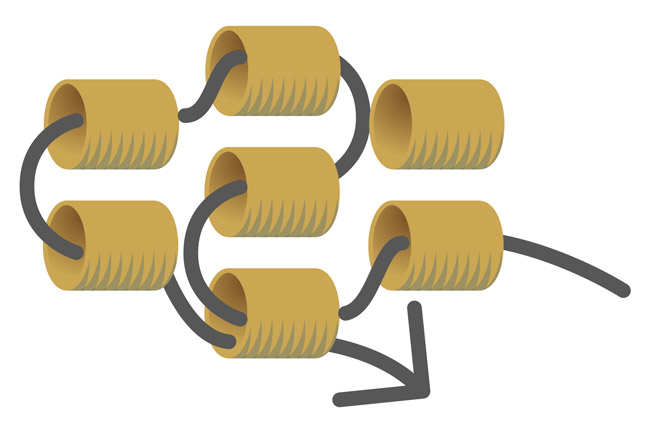
At the sixth hole, thread the first bead in the next row and pass the needle through the last bead in the first row.


Step 5:
Add the beads from the second row between each of the previous beads. Then put on the first bead in the third row.

Step 6:
Continue weaving by repeating the previous steps. Once you have woven a little more than 1 cm, remove the weaving from the quick start peyote. To do this, remove the retaining bead then remove the wire from each hole as you go. Then continue weaving normally, filling in the gaps left by the beads.

Step 7:
On each side of the bracelet, add the beads that will be used to connect the weaving end to the bracelet. To do this, move through the weaving with the needle in order to bring out the thread of one of the beads of the very last woven row. Thread a new bead of the same color and pass the needle through the bead of the last row on the opposite side where the thread comes out. Iron again in the two pearls to consolidate the buckle, then go to the next pearl in the last row and so on until you have added a pearl to each pearl in the two rows on each side of the bracelet.

Step 8:
To make the thread disappear. pass the needle through the beads of the weaving at random, taking care that the thread is not visible, pull on the last threaded bead to check that the thread is well stuck in the weaving then cut it flush with the weaving.
Step 9:
Then slide the end caps and close them. Add the rings and the clasp to complete the bracelet.

Do not hesitate to show your creations on our Facebook page, in the Super club group of Perles & Co customers or on Instagram by quoting us with @perlesandco or with #perlesandco.


