How to make a simple DIY bracelet from glass beads?
How to make a bracelet imitation snake Ginko glass beads?
How to make a simple DIY bracelet in glass beads?
This fall the trend is still imitating animal skin . And if you wore a nice imitation snakeskin bracelet? Made by you obviously! This is what proposes Nela Kabelova in this tutorial to be able to make a DIY snake skin bracelet . With our large selection of Ginko glassbeads and round beads you can create your bracelet according to the colors you want.
For reasons of stock some products put in the cart in the end are not those used in the tutorial.
Step 1: Start your bracelet


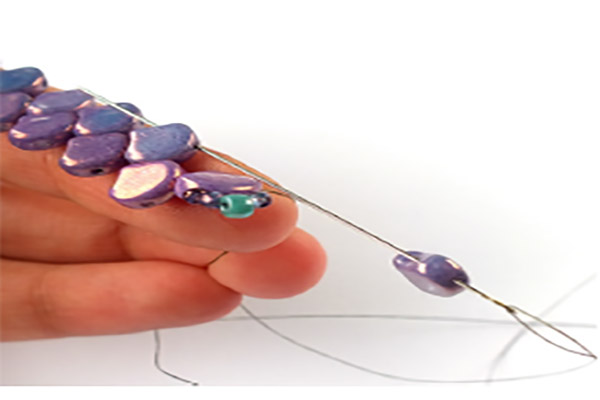
Place a stopper bead on your bracelet to prevent the beads from being removed from your thread.
Then start putting on the Ginko glass beads from the inside as shown in the picture. To make a bracelet of 16 cm you will need 38 Ginko glass beads
Step 2: Adjust your bracelet


You can adjust your bracelet by adding or removing beads, but the total beads should always be the same.
Add as on the picture two seed beads 11/0, 8/0 and again two 11/0 and pass your thread into the free hole of the last glass bead Ginko.
Step 3: Continue your bracelet

Add a Ginko glass bead (from the outside as shown in the picture) and go through the free hole of the next glass bead.
Repeat this step until you stop at the end of the row.
Step 4: Add the seed beads


At the end of the row add a last Ginko bead from the outside and add a seed pearl 11/0, 8/0 and 11/0.
You can now remove the stopper bead and and tie both ends of the wires together. Do not overtighten to keep your bracelet flexible.
Step 5: Add the round beads


Pass the thread through the free hole of the last Ginko glass bead. Add a 4mm round bead between the two Ginko glass beads and pass the wire through the free hole of the next glass bead.
Repeat until the end of the row
Step 6: Pass the wire on the other side


Pass through the other hole of the glass bead (the one where the thread comes out) and into the next bead hole as shown in the picture.
Thread the thread into the other hole of the glass bead to raise the thread to the top of the bracelet. And finally put the thread in the hole of the next pearl.
Step 7: Do the other side


Pass the needle through the free hole of the same last Ginko glass bead as in the previous step.
Repeat step 5 until the end of the row.
Step 8: Raise the wire


At the end of the row pass the wire through the other hole of the glass bead (the one where the wire comes out) and then into the hole of the next Ginko glass bead, as shown in the picture.
Go through the other hole of this same bead and the next one to bring out the thread up the bracelet.
Step 9: Finish your bracelet

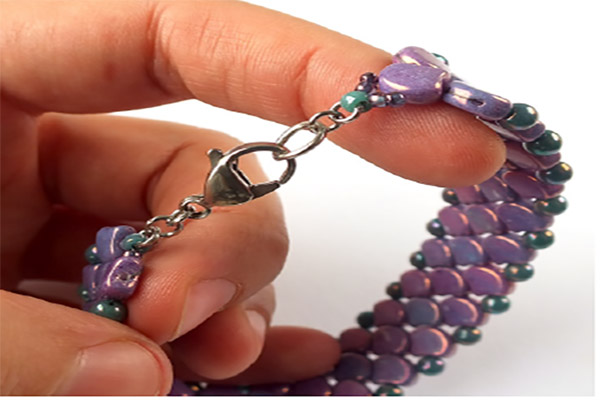
The two ends of the thread are now in the same place, tie the two ends of the threads together and cut the remaining thread.
Use rings to hang the clasp with the two beads on each side of the bracelet.
You made this bracelet? Or did you realize it with your own colors? Come and show us all your creations on our social networks: on our Facebook page and on our instagram page !


