Average Grades
Free shipping on orders over 50€ up to 500g
French Online shop for beads and accessories for the creation of DIY jewellery and other creative hobbiesLog-in
0
Shopping cart
Shopping cart
Install Perles & Co on your home screen: tap the Share button in Safari, then "Add to Home Screen".
Install Perles & Co on your home screen for quick access and real-time updates.
Enable notifications to track your orders and never miss our highlights.

How to embroider with purl and jaseron?
How to embroider a brooch in gold embroidery?
How about immortalizing a summer end in a DIY pin with the technique of gold thread embroidery ? Thanks to this step-by-step, introduce yourself to this ancestral art by embroidering flax and jeweler with some seed beads. You want to be more interested in gold thread embroidery , find out what material used to make a DIY accessory in our toolbox section. To go further in DIY embroidery , discover all our tutorials in the heading embroidery.
Step 1 :
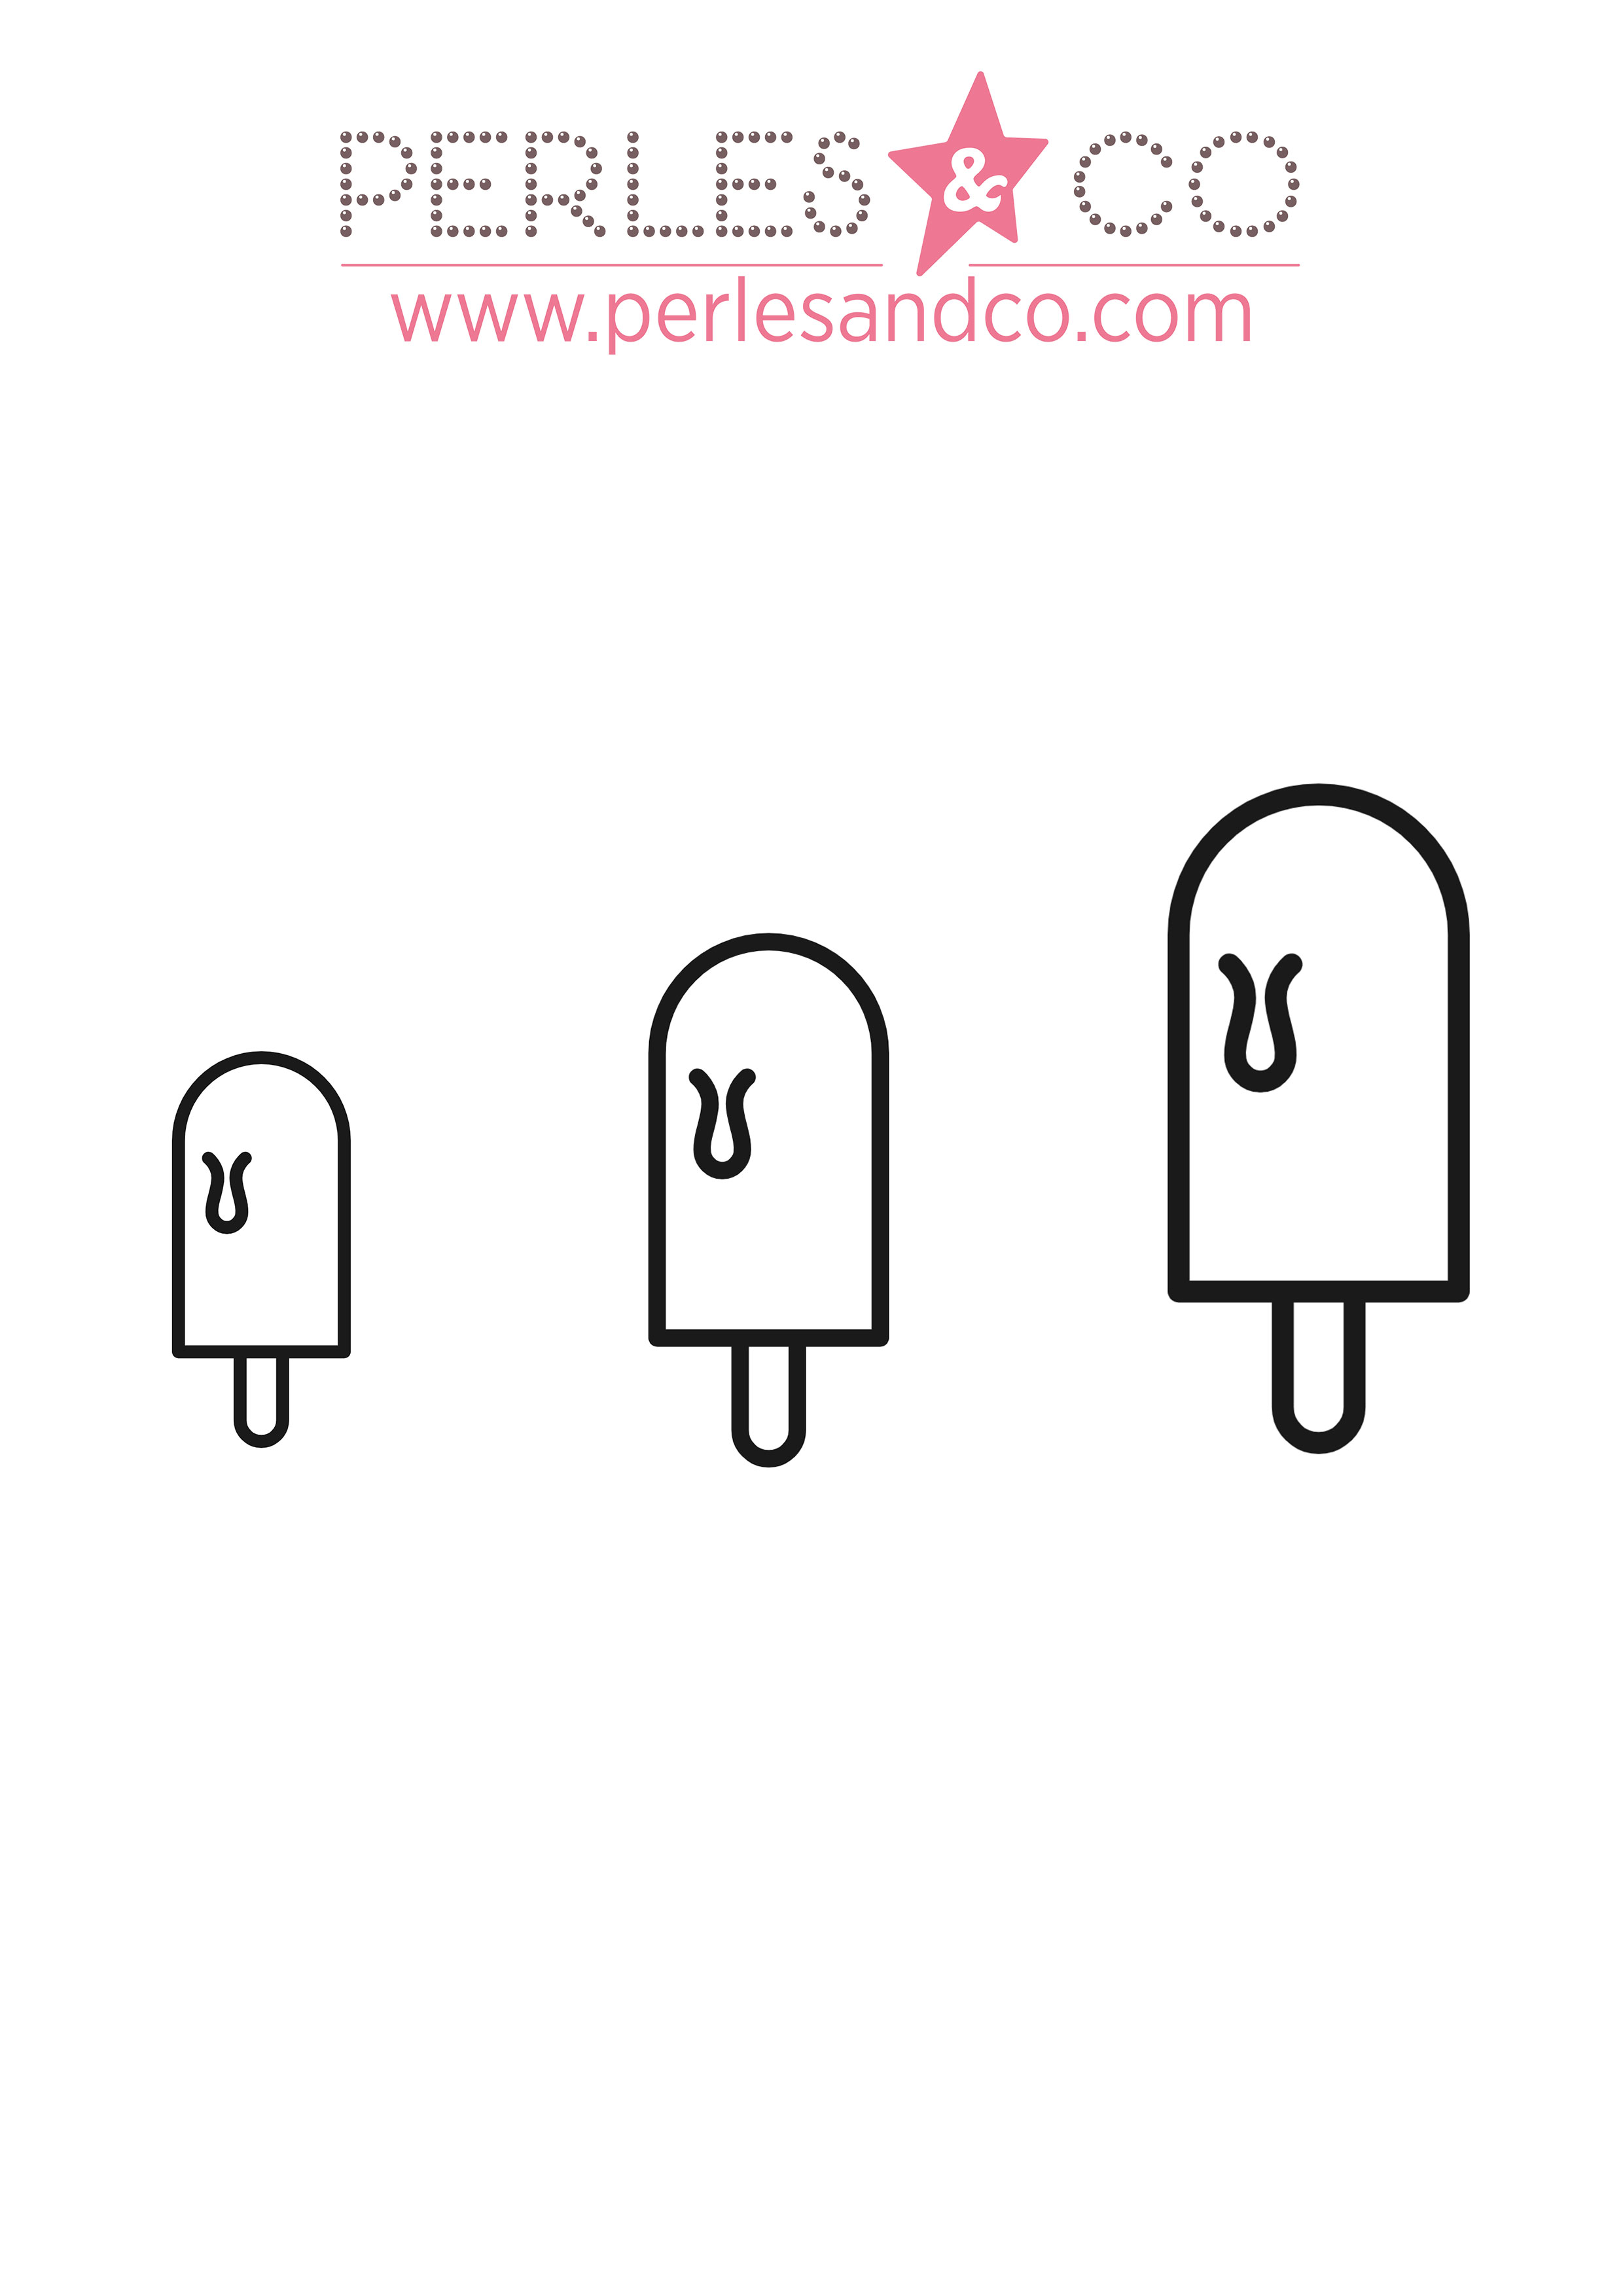
Print the drawing of the ice cream according to the pin size you want and cut it out.
2nd step :
Place your muslin fabric on your stretched embroidery frame.
Step 3:
In pencil or erasable pen draw the contours of your ice on the fabric.

Step 4:
Put down the jaseron. This is a particularly meticulous step, it is to embroider this wire on the contour of the work. So you have to be precise so that your final pin looks the most like your drawing. Before placing the jasseron, increase the turn interval by about 10% by gently pulling it from one end to the other. These intervals will serve us to pass our thread to fix it. It is possible to do this in several parts and to help you with material to round the corners.


Step 5:
Now go to the curly fleck; cut several pieces of all sizes. They will be used to fill the inside of your ice cream. Randomly and by superimposing pass the thread in the tube and embroider them one by one to the organza.

Step 6:
For a rounded relief, you can deposit beads of rock inside your ice cream.

Step 7:
Then embroider seed beads of another color for your ice cream stick.

Step 8:
Your embroidery is finished, with clear glue, glue the back of your brooch to fix your work. Once dry, cut out your ice making sure to leave about 0.05 mm margin.

Step 9:
Place and trace the design of your ice on felt. Cut it out on the back of your brooch by returning the margin left in the previous step for a cleaner finish.

Your pin is now complete!
We like to see what you do with the tutorials on Perles & Co. So, do not hesitate to send us photos of your creations on our Facebook page or to tag us on Instagram #perlesandco.


You have a question about this tutorial? Ask it to our team and the people who have already tested it. The Perles & Co community is here to help you!
Credits
Perles & Co, Internet & E-Commerce company [31/12/2022] Any reproduction, representation, adaptation, in any form whatsoever, even partial, is prohibited, except for reproduction for private use not intended for collective use, representation in the family circle (art. L 122-5 CPI) and online publishing on condition that the source is mentioned and a link is included to the corresponding page of our site www.perlesandco.com.
