Average Grades
Free shipping on orders over 50€ up to 500g
French Online shop for beads and accessories for the creation of DIY jewellery and other creative hobbiesLog-in
0
Shopping cart
Shopping cart

The ginko leaf has a very distinctive shape. Both graphic and poetic, ginko is a beautiful leaf with green and yellow hues in autumn. Estelle from the blog Petit Bout de Chou was inspired to make a necklace with a ginko leaf woven using the brick stitch technique.
If you like ginko and Miyuki Delicas beads, this tutorial is for you!
In this tutorial, you'll learn how to make different technical brick stitches: simple increases and decreases, as well as multiple increases.
For beginners, check out our "How to make a brick stitch weave with augmentation and reduction?" datasheet .
STEP 1 How to make the first row in ladder stitch?
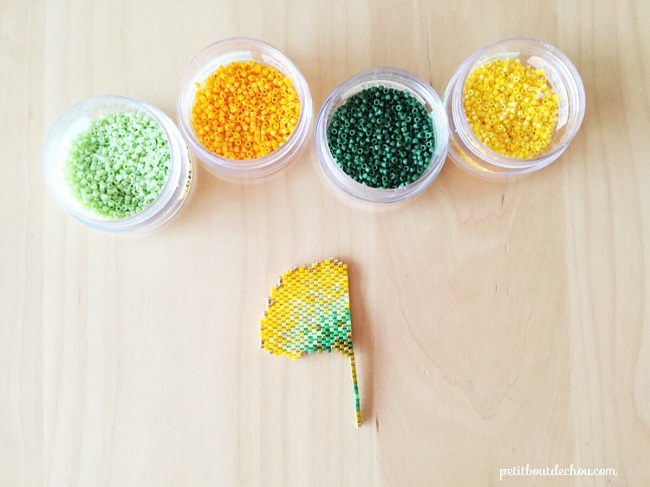
First, cut 2 m of thread. Then thread each end of the thread through a needle.
You'll find the weaving chart below.

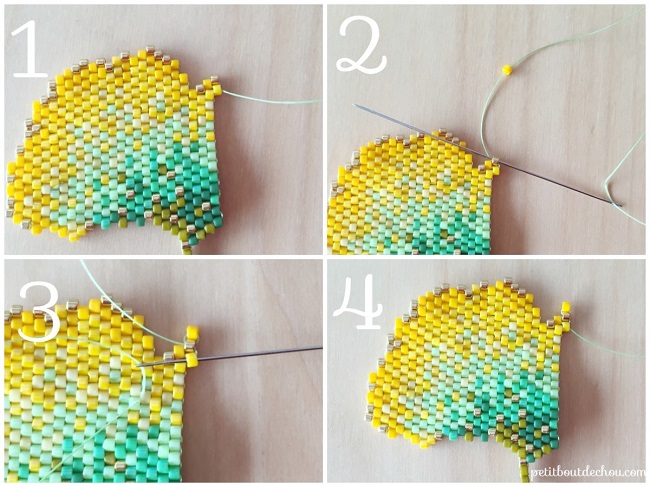
For the first row, following the grid, thread the first bead using one needle and pass through using the second needle (1), then pull the thread through (2).
Repeat these steps for the second bead in the grid (3). You should have 9 beads at the end of the row (4).

STEP 2 How do I make the second row?
The second row starts with a simple increase (1 more bead).
To do this, thread the first two beads of the row following the grid (1) and slide the needle between the first and second bead of the previous row.
Then thread through the second bead from bottom to top (2). Then pull the thread through (3).
The increase is complete.

STEP 3 How do I make a simple decrease at the beginning of the row?
If you follow the grid, you'll need to make several decreases at the beginning of the row. Here are the steps to follow.
Start by threading the first two beads of the row according to the grid. Then slip the needle between the second and third beads of the previous row (1).
Pull the thread all the way through the second bead of the new row from bottom to top. Pull the thread through (2).
Pass through the first bead from top to bottom, then pull the thread (3).
Pass again through the second bead from bottom to top and pull the thread (4).

The first two beads should now be well positioned. You've just created a decrease at the beginning of the row.
Continue to follow the grid using the normal stitch until the end of the row (5).
The normal stitch is formed by threading a new bead and inserting the needle between the two beads just below it from the previous row. Pass through the bead and pull the thread through.
STEP 4 how to make a simple increase at the end of the row?
You'll also need to make simple increases at the end of the row.
To do this, thread a bead through the beads below it in the previous two rows (1).
Then go back up through the adjacent bead and pass through the two previous beads(2).
You've formed an X and are back in the additional bead.
Follow the grid to the end of the first half.

STEP 5 How do I make the second half?
The second half begins with a double decrease. It's the same method as for a single decrease, except that you'll need to pull the thread out of the second bead rather than the first.

STEP 6 How do I make multiple increases at the beginning of the row?
You'll encounter a multiple increase at the beginning of the second half of the sheet.
Start by making a single increase (1). Then go through the first bead.
Thread a bead and pass through the first bead again (2). Then pass through the second bead (3). Your multiple augmentation is complete (4).
Follow the grid to the end of the second half and remember to hide the thread by weaving through the work when finished.

STEP 7 How do I mount the pendant on a chain?
Use the pliers to open a ring and insert it into one of the beads at the top of the leaf.
Then insert the last link of the chain, cut in half before closing the ring. Next, open a ring to connect the chain on the other side, add the end chain and close the ring.
On the other side, repeat the operation to connect the weave and the other half of the chain with a ring. Finally, use another ring, open it to connect to the chain, add the clasp and close.
You can also go to our data sheet: How to open a ring to make a piece of jewelry?
Your necklace is finished! So, what do you think? Doesn't this gradient look great?
We'd love to see your version of this necklace ... so don't hesitate to send us photos on Facebook or by e-mail, it might inspire others!


You have a question about this tutorial? Ask it to our team and the people who have already tested it. The Perles & Co community is here to help you!
Credits
Perles & Co, Internet & E-Commerce company [20/01/2017] Any reproduction, representation, adaptation, in any form whatsoever, even partial, is prohibited, except for reproduction for private use not intended for collective use, representation in the family circle (art. L 122-5 CPI) and online publishing on condition that the source is mentioned and a link is included to the corresponding page of our site www.perlesandco.com.
