Average Grades
Free shipping on orders over 50€ up to 500g
French Online shop for beads and accessories for the creation of DIY jewellery and other creative hobbiesLog-in
0
Shopping cart
Shopping cart
Install Perles & Co on your home screen: tap the Share button in Safari, then "Add to Home Screen".
Install Perles & Co on your home screen for quick access and real-time updates.
Enable notifications to track your orders and never miss our highlights.

What resin to use for jewelry or accessories?
The beautiful days arrive, we want colors and tropics! That's good, Estelle, a participant in last year's resin competition, offers you her tutorial to make this pretty Toucan brooch.
To hang on a pretty jacket, a light shirt or even a canvas bag, it's up to you to customize the clothes as you wish.
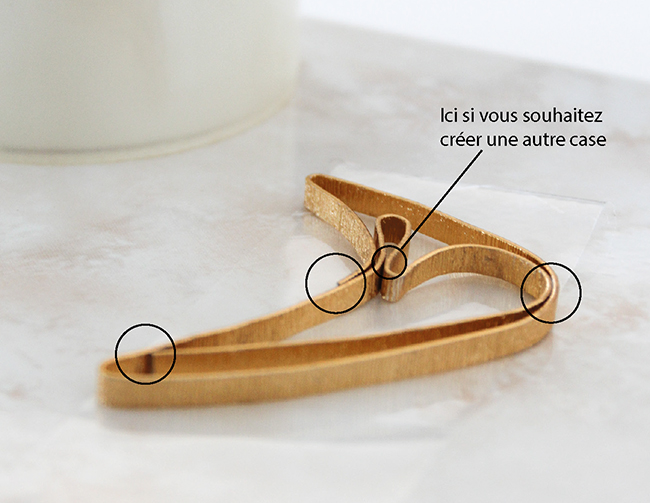
Step 1 : To create your toucan pin, use the flat aluminum wire and bend it (with your fingers or a flat pliers for easier) until you obtain the desired shape.

Step 2 : When you have finished your shape, you will have to close it with strong glue, especially on the points targeted on the photo below (this will allow you to create "boxes" which will allow you to put different colors):
It is then necessary to flatten your toucan as much as possible so that it is flat, that there is no vacuum which could let escape the resin. Then place your toucan on a piece of tape or a plastic or silicone sheet.
Step 3 : Once your toucan is on the tape, put white glue around the toucan as if to "join" the metal and the tape so that the resin stays inside. This step is very important because if you do not put glue the resin will escape from below.
Let the glue dry (The white glue will be removed very easily later, remember to put a glue of this type there, not strong glue which adheres to the metal).

Step 4 : The resin! To prepare your resin, refer to the instructions for the resin used, here the cleopatra resin. Prepare a small amount, this stage of the realization is to make the bottom of the spit.
For information I divided by 4 the example of the booklet of the cleopatra resin which mentions "ex: 10g B + 22,5g A", which gives us: 2,5g B + 5,6g A
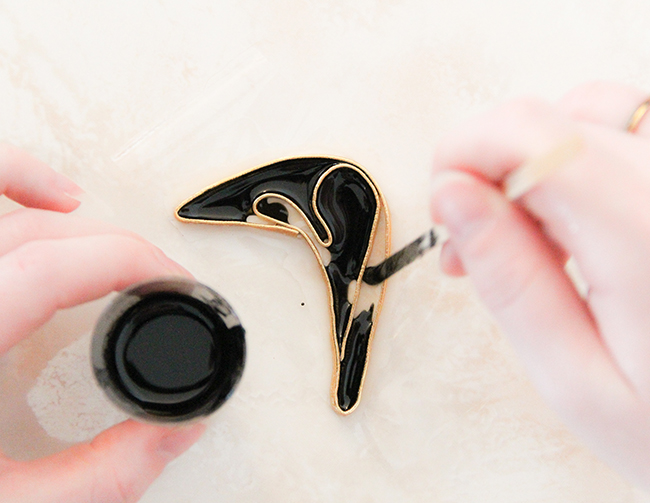
Choose the color of your choice (here black), and pour the resin on about half the height of the toucan.

Step 5 : Let this first layer dry for 24 hours. Then after 24 hours pour the chosen colors in resin, do not hesitate to fill the corners with a wooden stick or a toothpick.
Let dry again between 24 and 48 hours until completely dry.

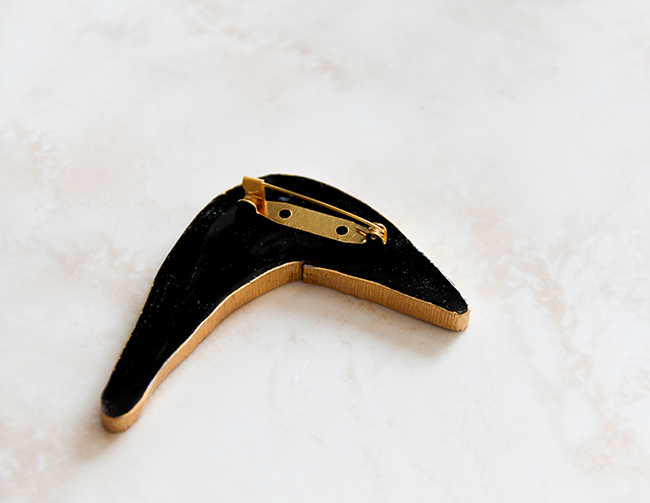
Step 6 : To finish this brooch, choose the accessories to finish it: including a pin fastener and an element for the eye. Fix its elements with strong glue and voila!

Estelle's tip: if your pin is not straight on the underside, lightly sand and apply a varnish to regain the shine of the resin!


Share the result on social networks - on our Facebook page - by tagging us on Instagram
You have a question about this tutorial? Ask it to our team and the people who have already tested it. The Perles & Co community is here to help you!
Credits
Perles & Co, Internet & E-Commerce company [23/04/2020] Any reproduction, representation, adaptation, in any form whatsoever, even partial, is prohibited, except for reproduction for private use not intended for collective use, representation in the family circle (art. L 122-5 CPI) and online publishing on condition that the source is mentioned and a link is included to the corresponding page of our site www.perlesandco.com.
